Zeroing and Cutting
Once you have the file, and have secured your material and warmed up the machine, open the shopbot app and make sure you’re in shopbot easy mode.
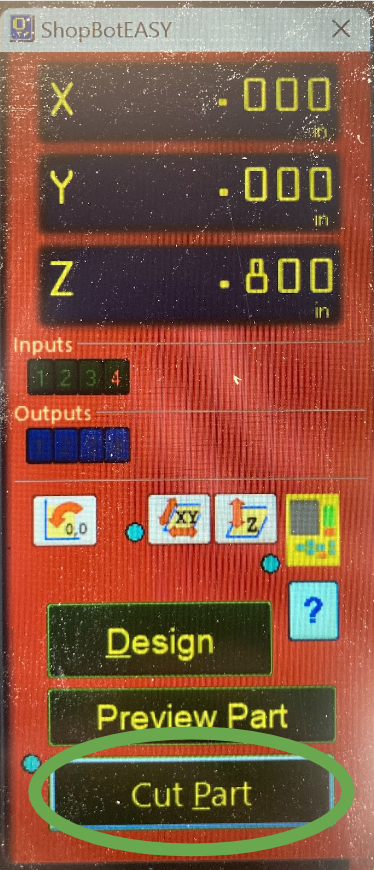
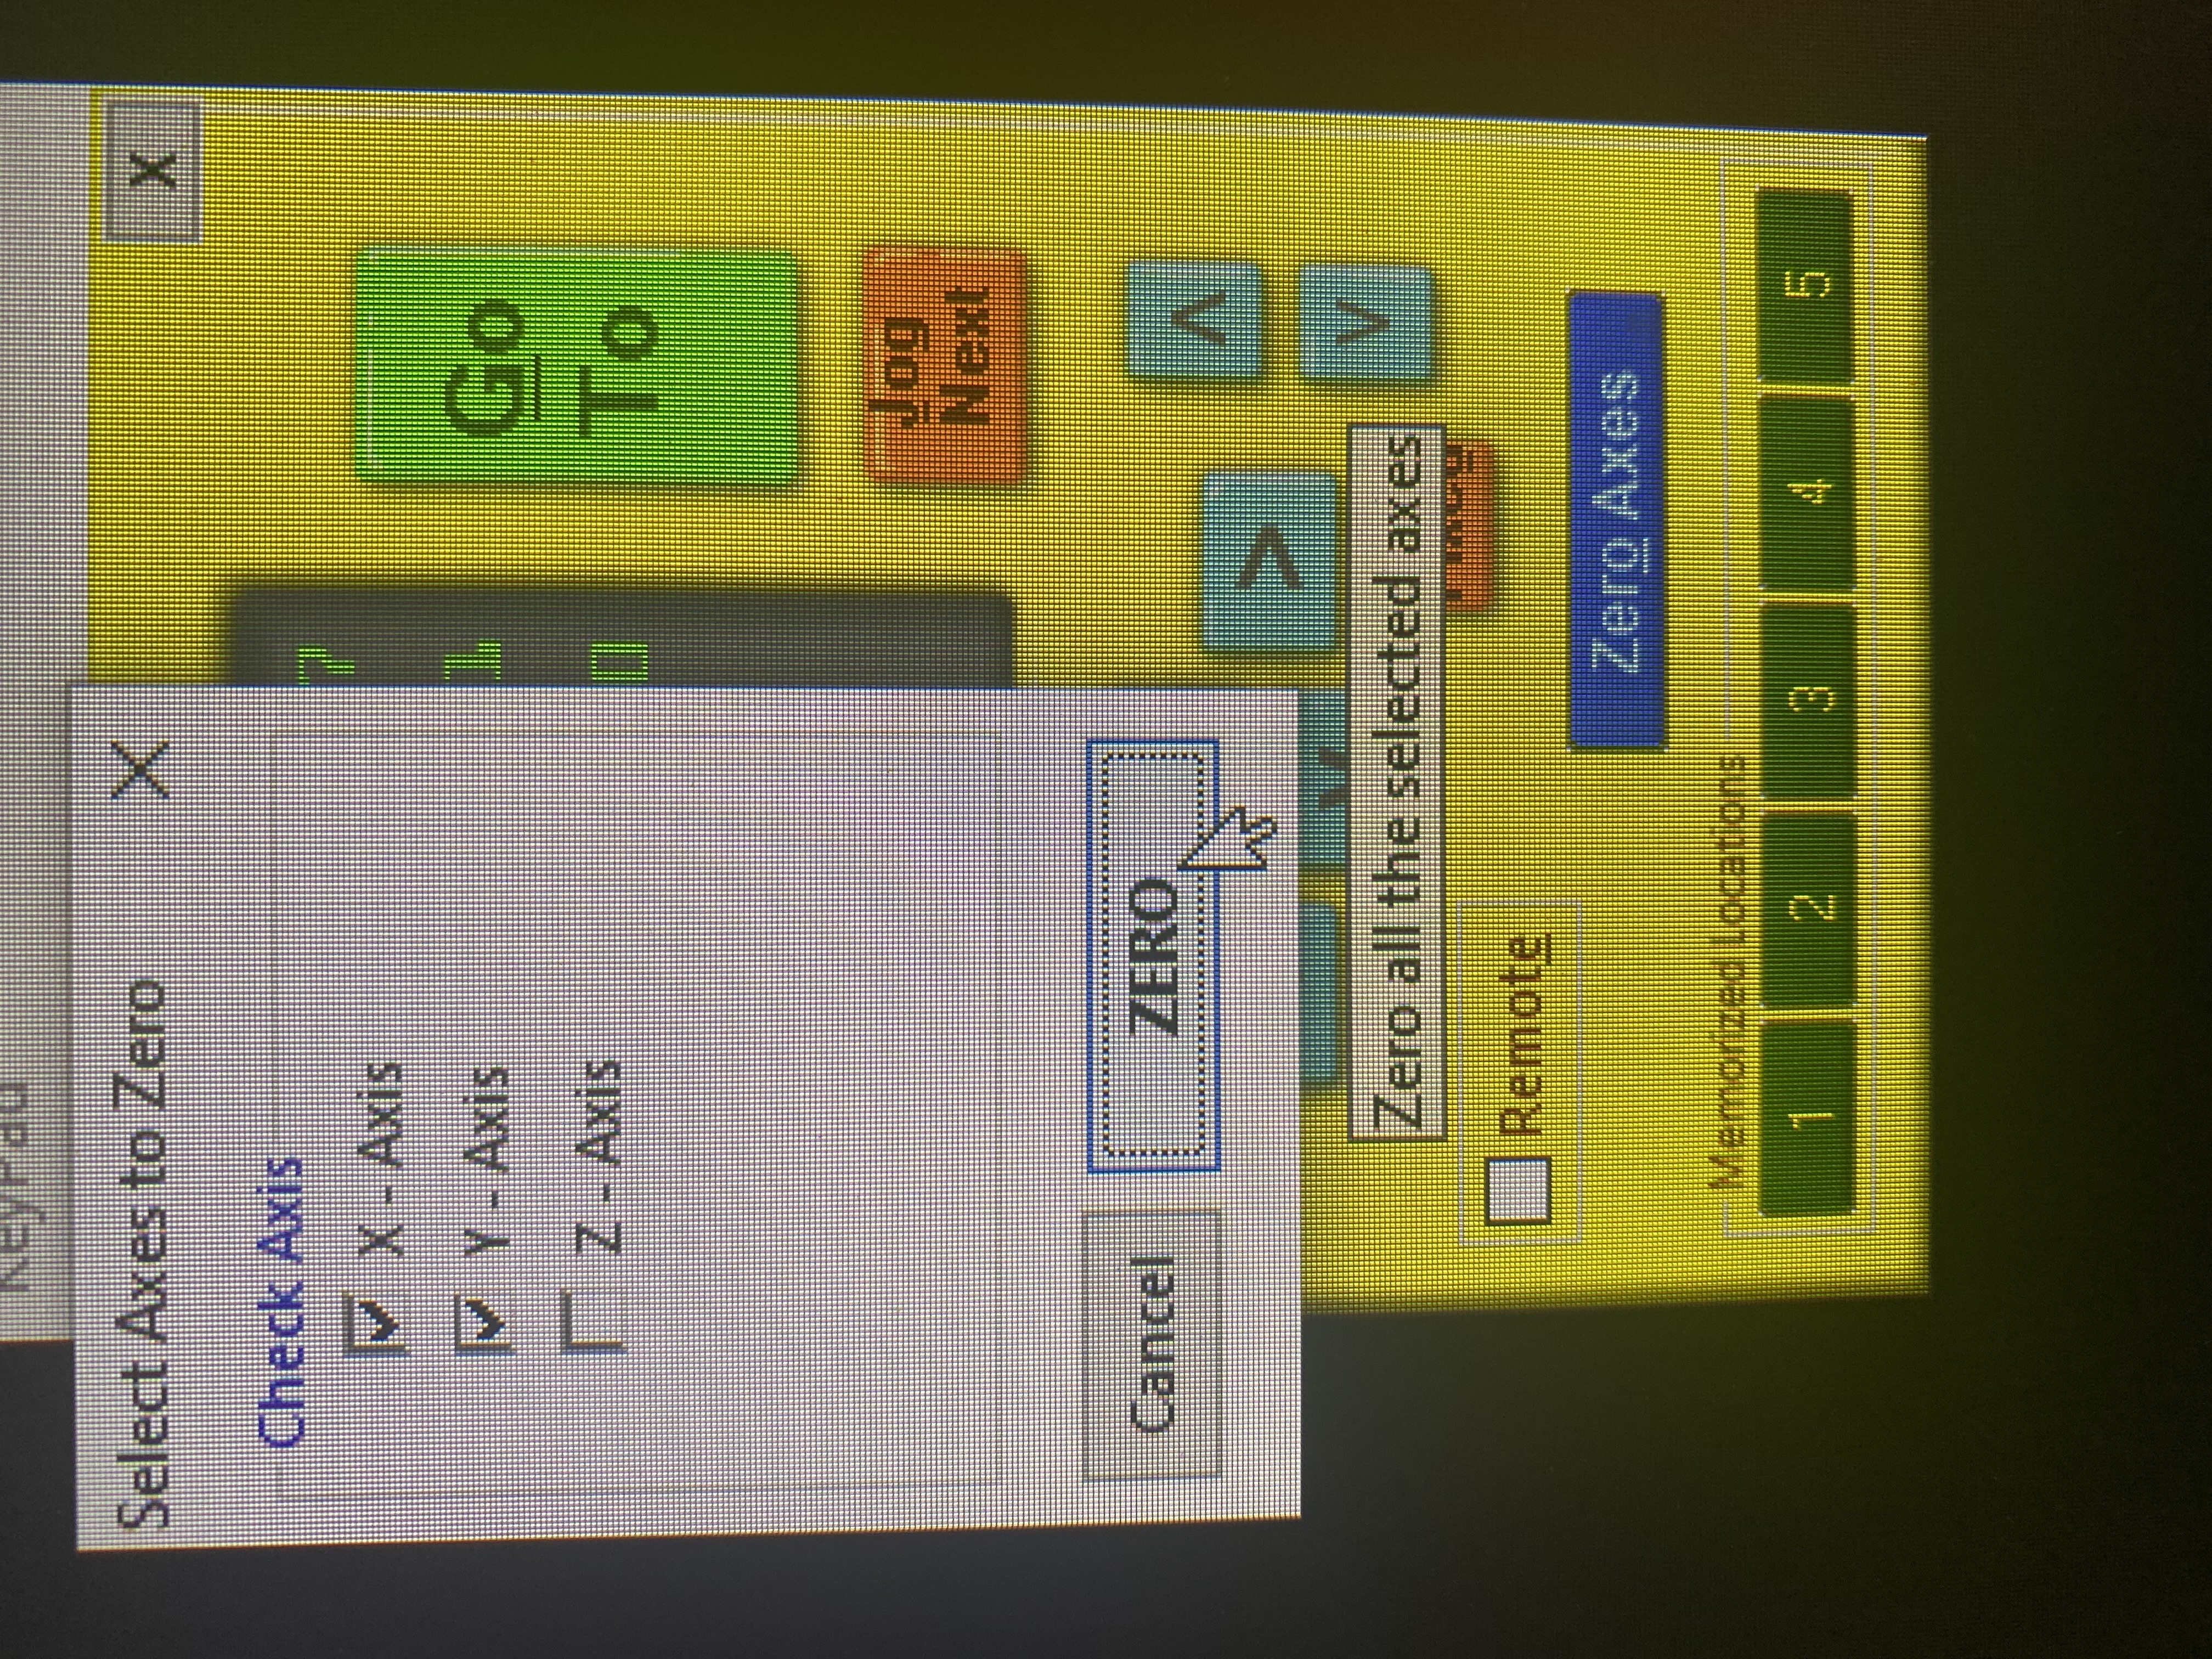
Then open the manual control panel by clicking the yellow box.
You will zero the X and Y at the same time. Before you zero the X and Y, make sure the piece of wood (or other material) is in the machine, not crooked, and is held down in some way. Then use the right set of arrows to lift the head of the machine up so that the bit will not get caught or drag across any of the parts.
Then use the left arrows to move the bit until it is exactly lined up with the bottom left corner of the area you want to cut.
It will place 0,0 in your aspire file at this location. Click Zero Axis, select X and Y, and then hit Zero.
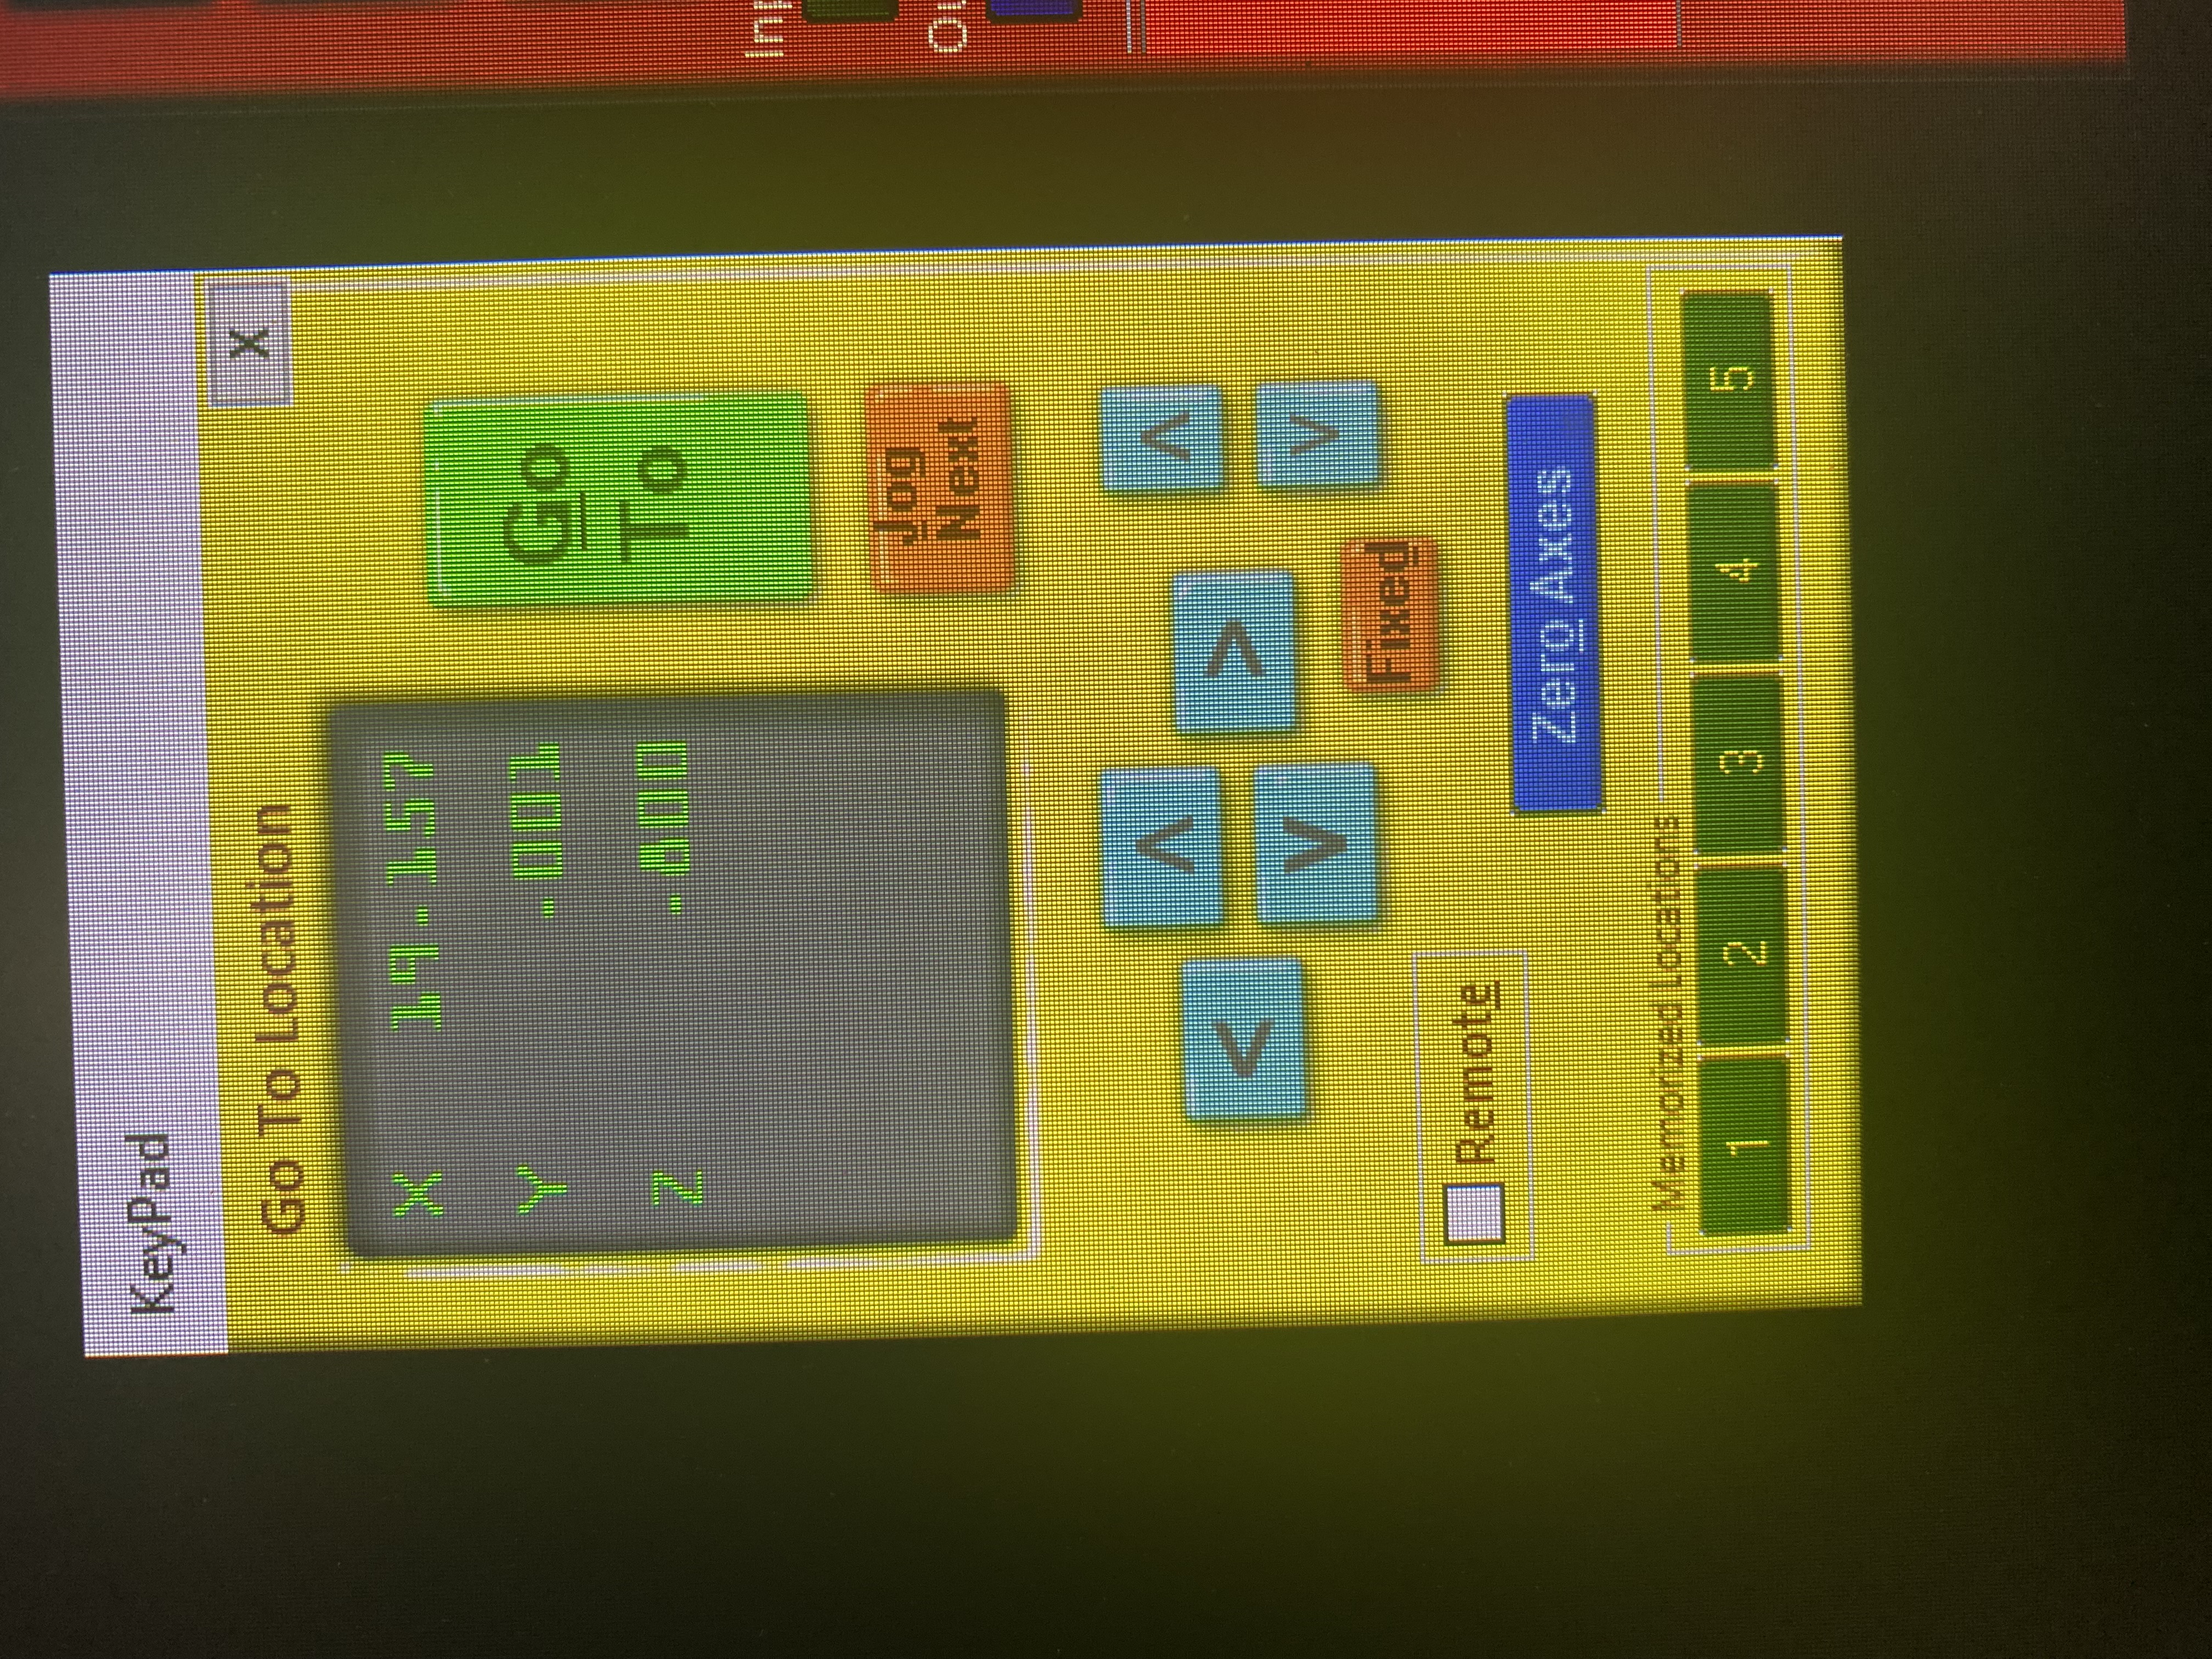
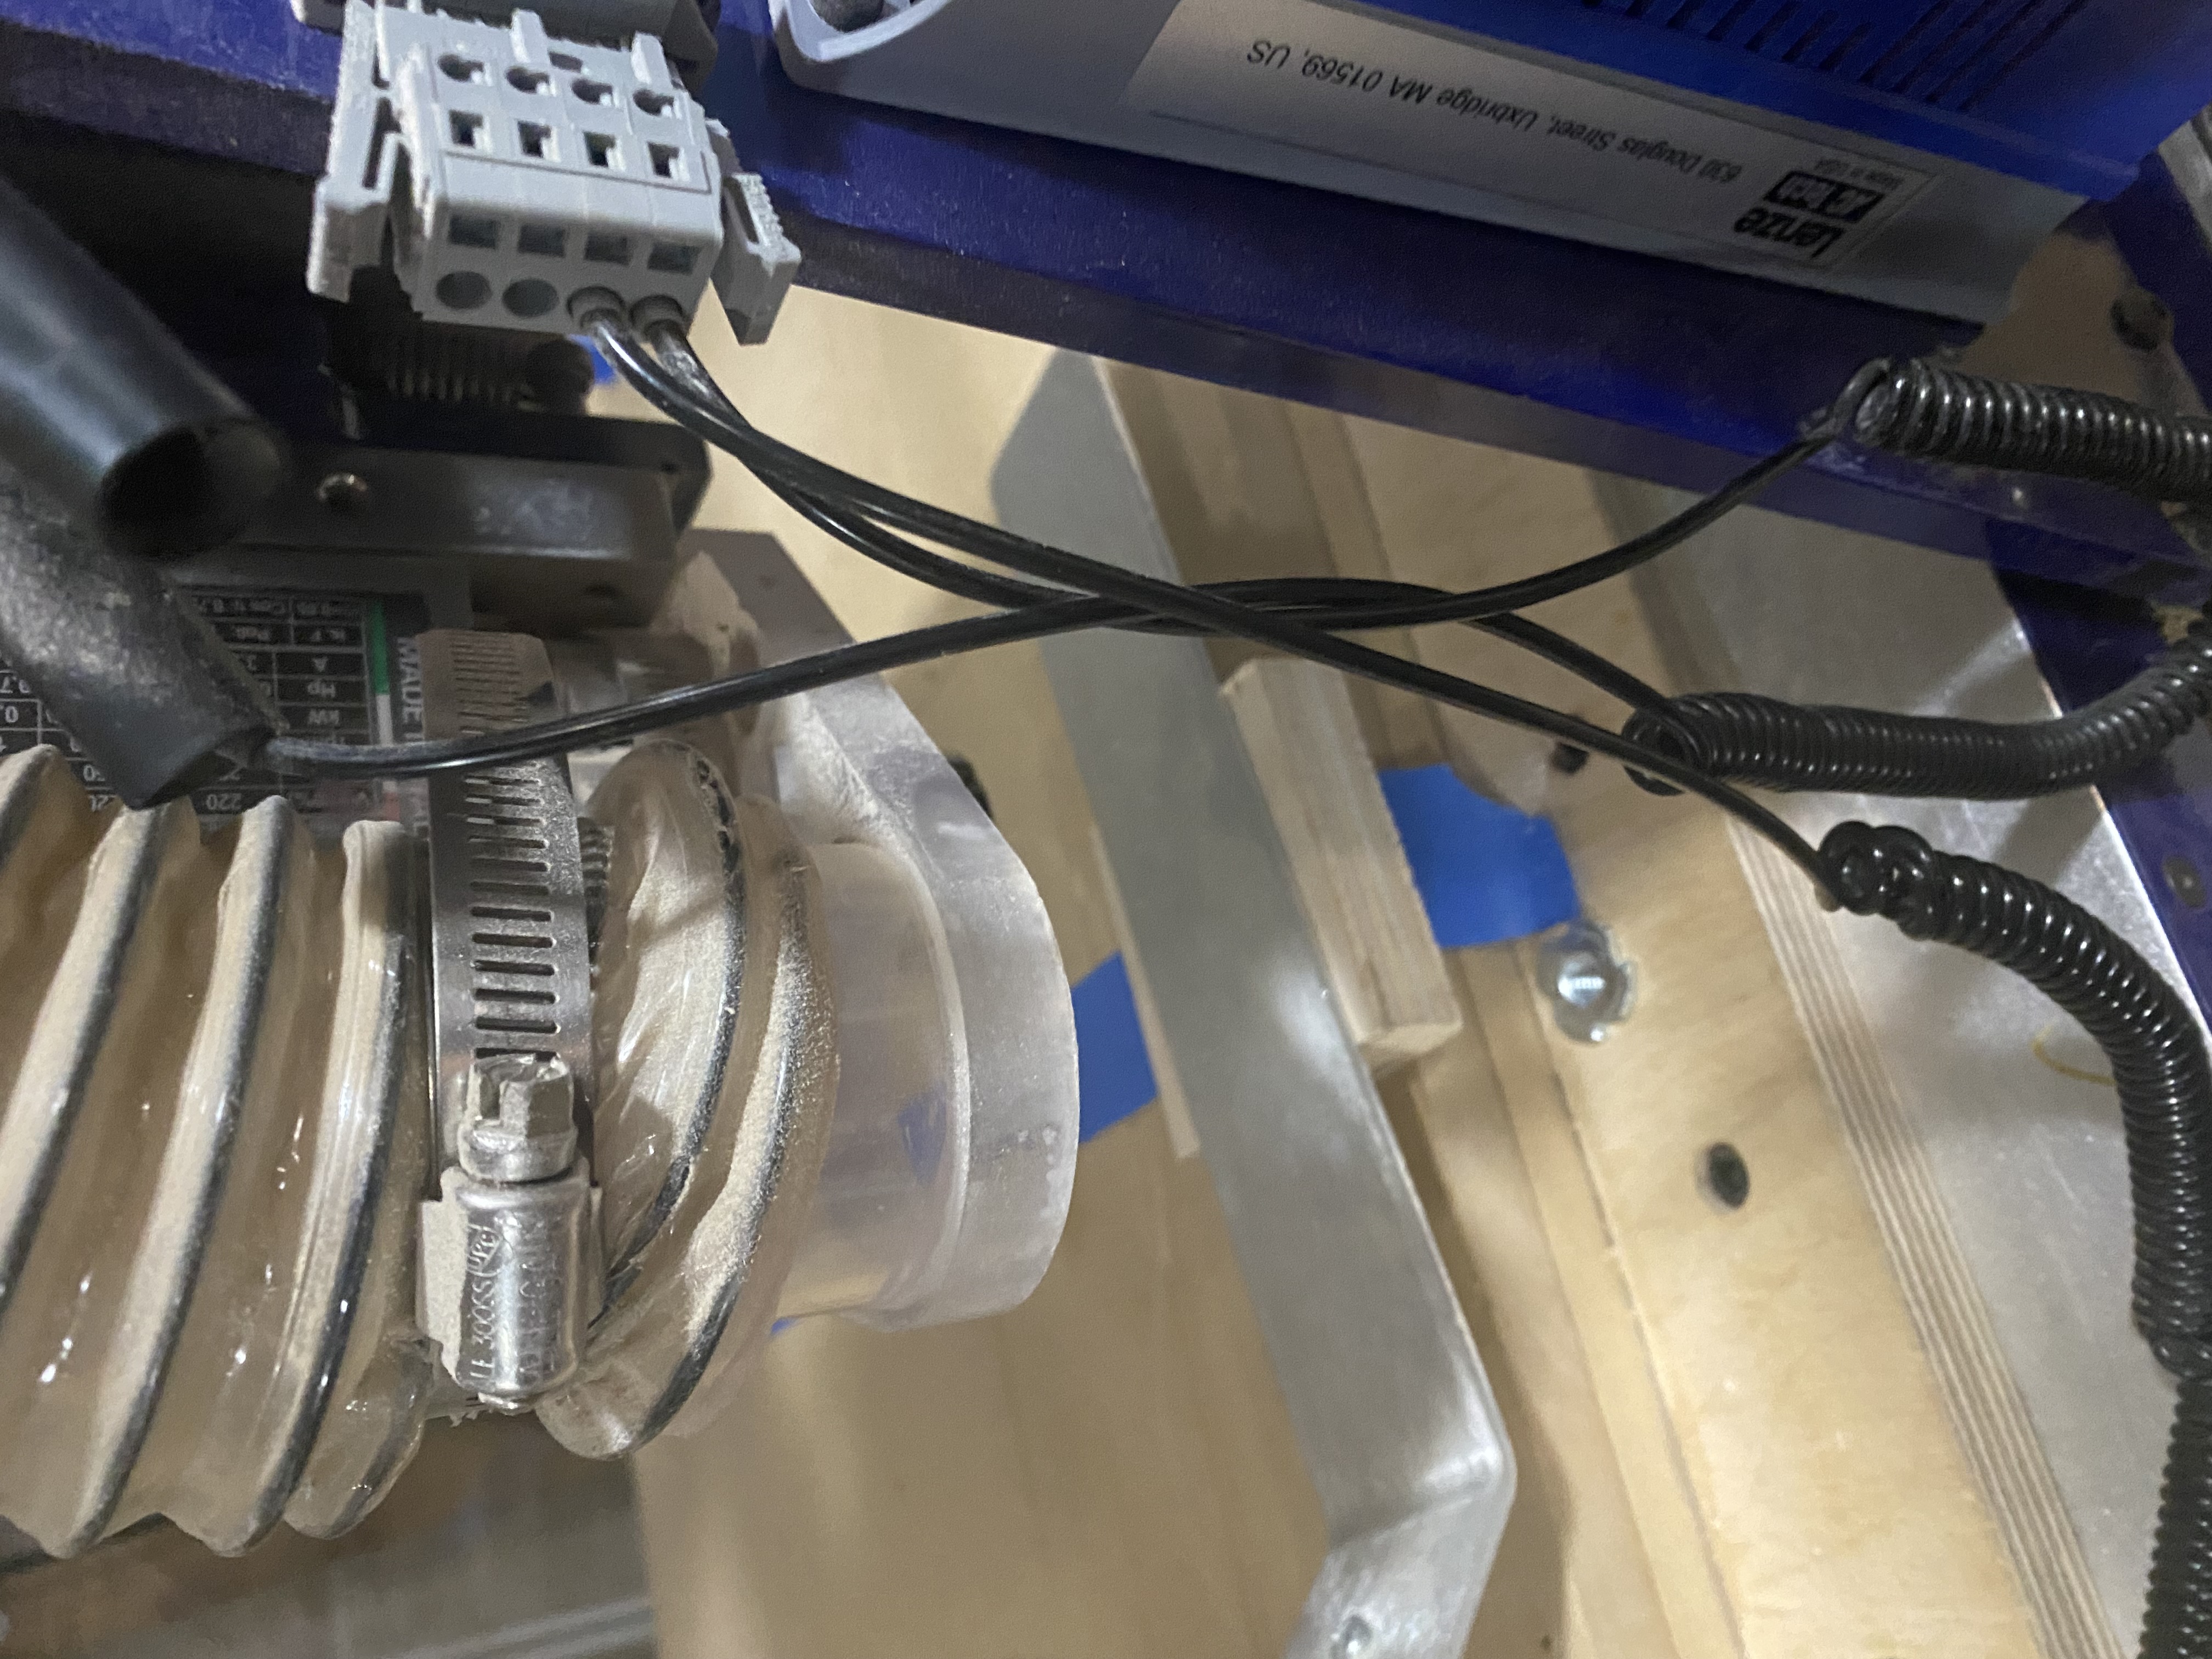
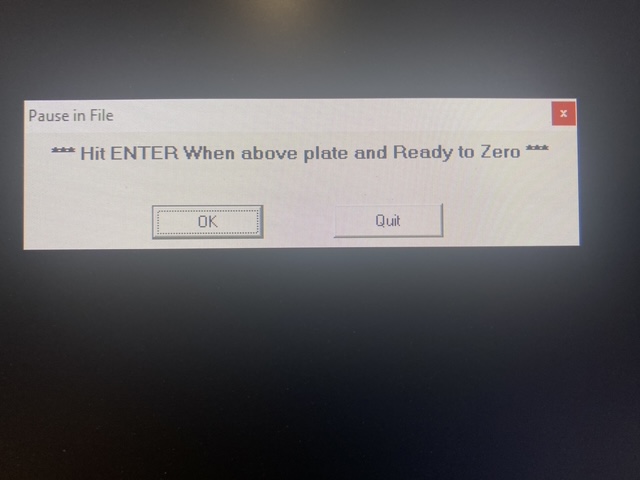
Once the X and Y is zeroed, you can zero the Z. Open up the keypad and move the bit so that it is over the material. Place the metal Z-zero plate on the material beneath the bit.
Close the keypad and click the Z-zero button on the computer controller, then press enter to confirm.

The bit will go down until it hits the Z-zero plate, and then go back up, down again, and finally back up again. Once the bit stops moving, you can remove the Z-zero plate, and the Z is now zeroed. You should re-zero the Z before each cut.
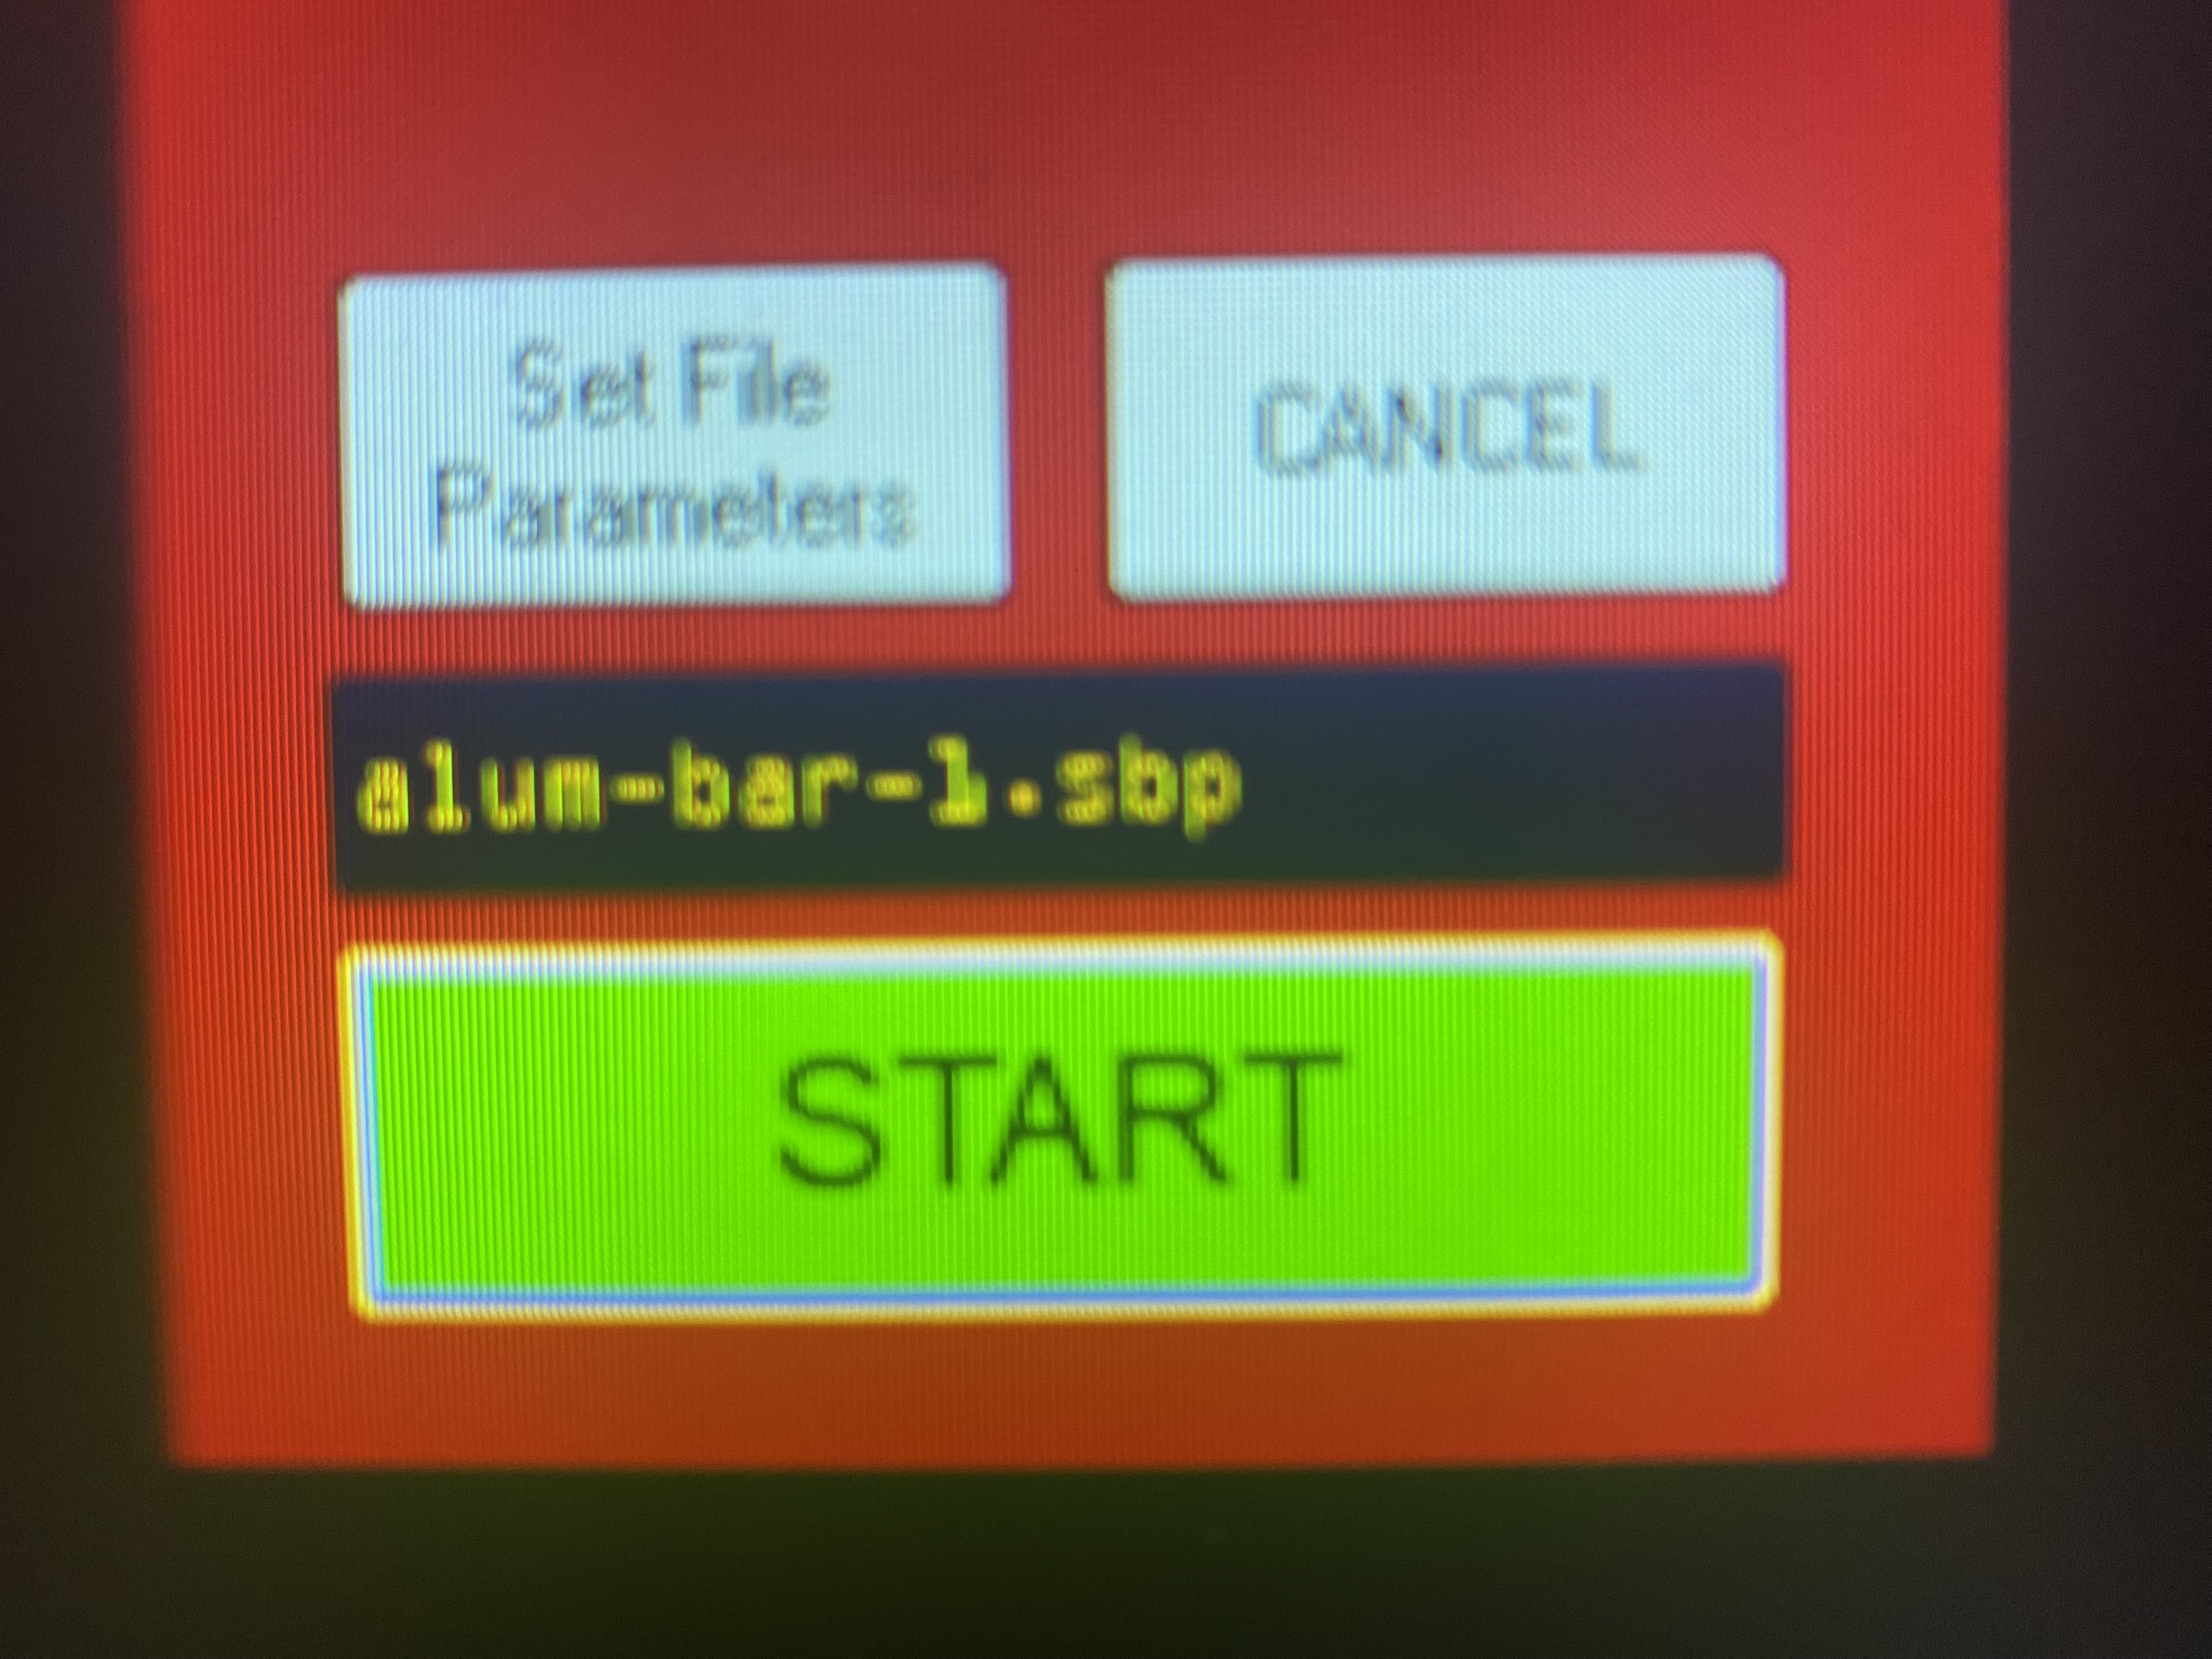
The machine now is properly zeroed. Press “Cut Part”. This will ask you to open a file. Select the .sbp file you want to cut.
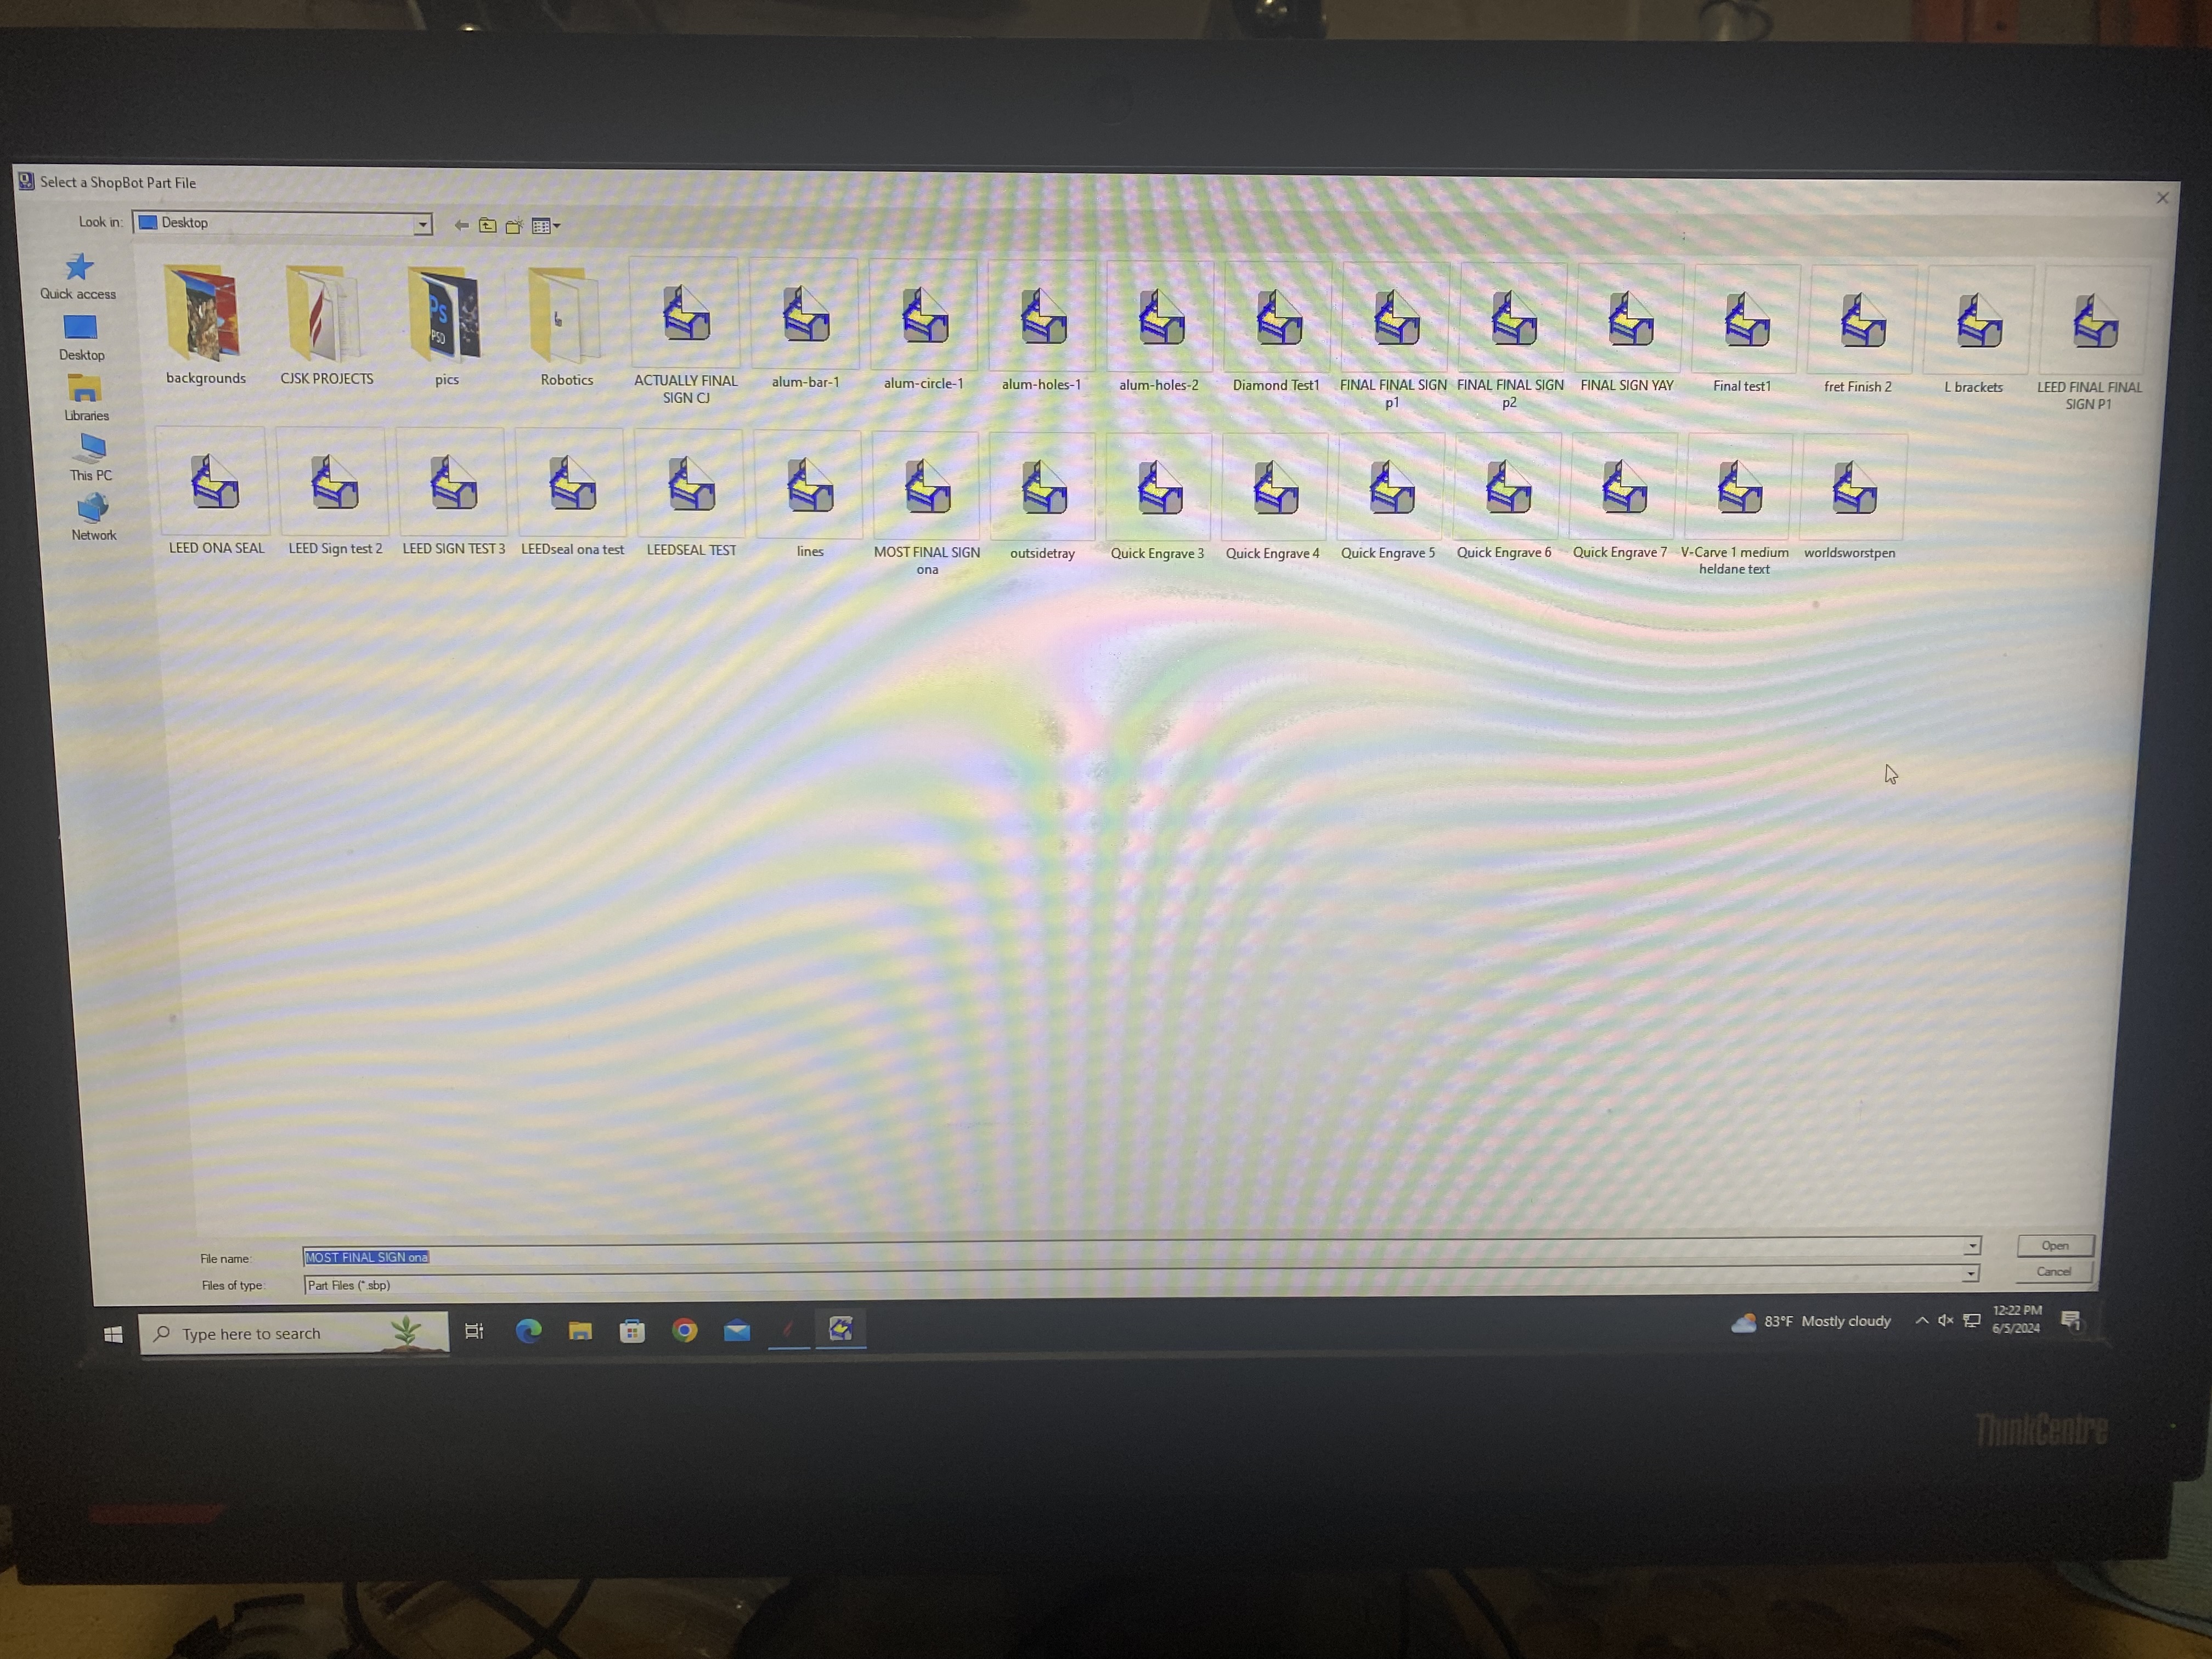
Once the file loads in, you are ready to start the cut by hitting the Start button.