Subsections of Glowforge
Uploading Files
To bring your file into the Laser Cutters first go to https://glowforge.com. There you will see a website with many options.
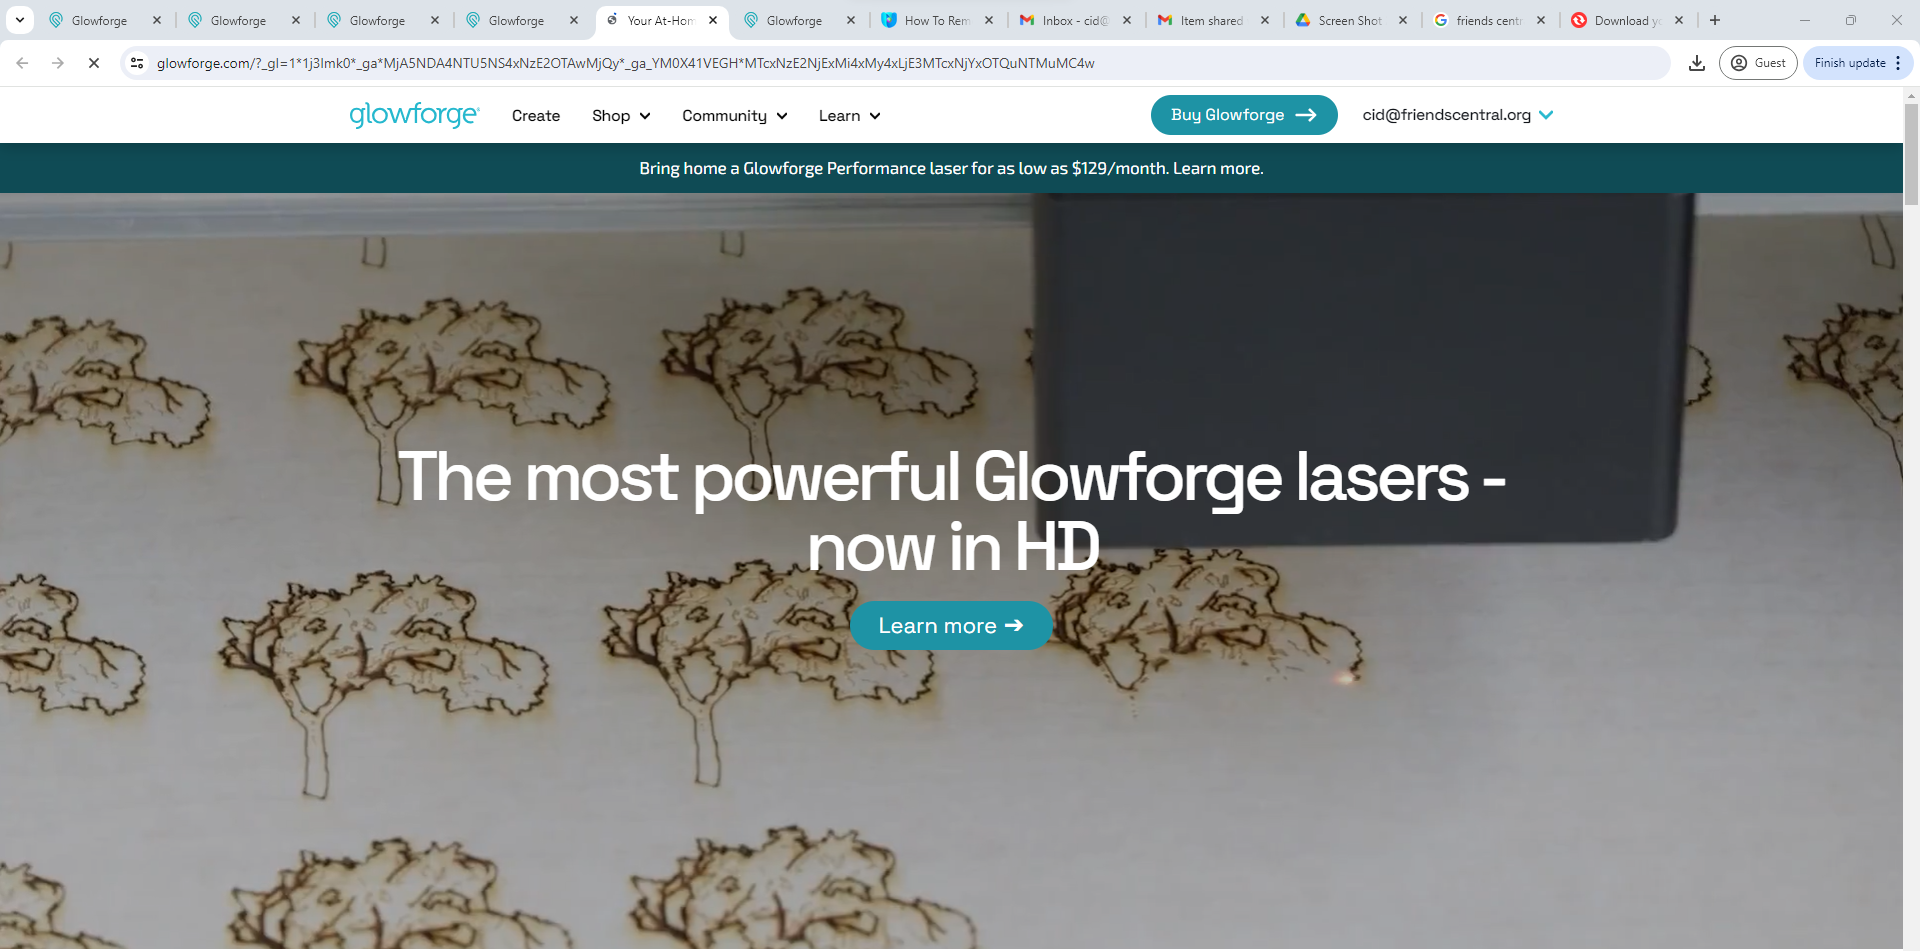

If the computer is not signed into glowforge, have an adult sign you in.
If the computer is signed in, hit the Create button, which will take you to a new menu.
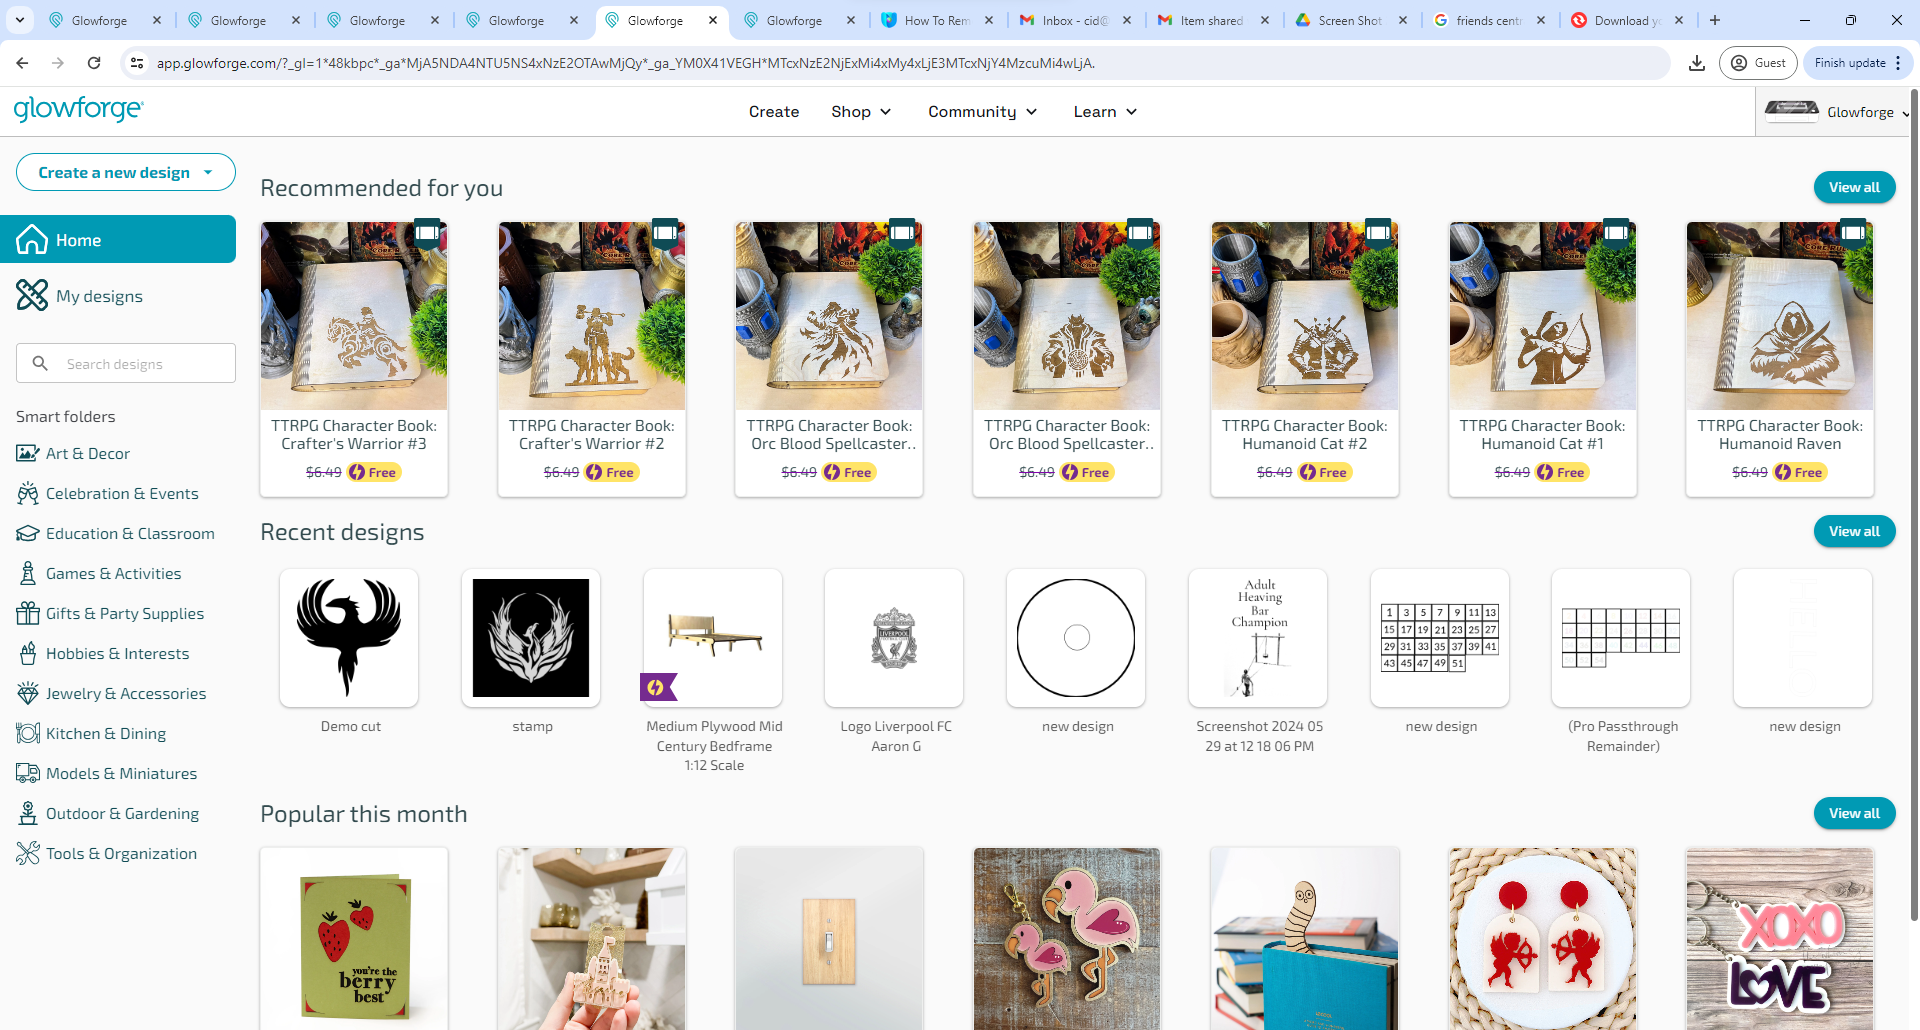

there you will see a list of projects, which you can select to open, or in the top left, there is a Create a New Design button for your own designs. Hit the Create button and it will open a dropdown menu.
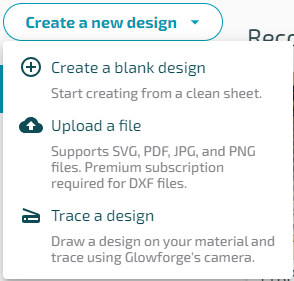

Create a Blank Design will open an empty workspace, where you can start from scratch and use the tools to create your design.
Upload a File will let you upload one fo your own files, which will open up a menu to select your file. Once you select it it will open your file in the workspace to edit as you please.
Trace a design will let you trace a design, which will be covered in a separate page, go to the Tracing Page.
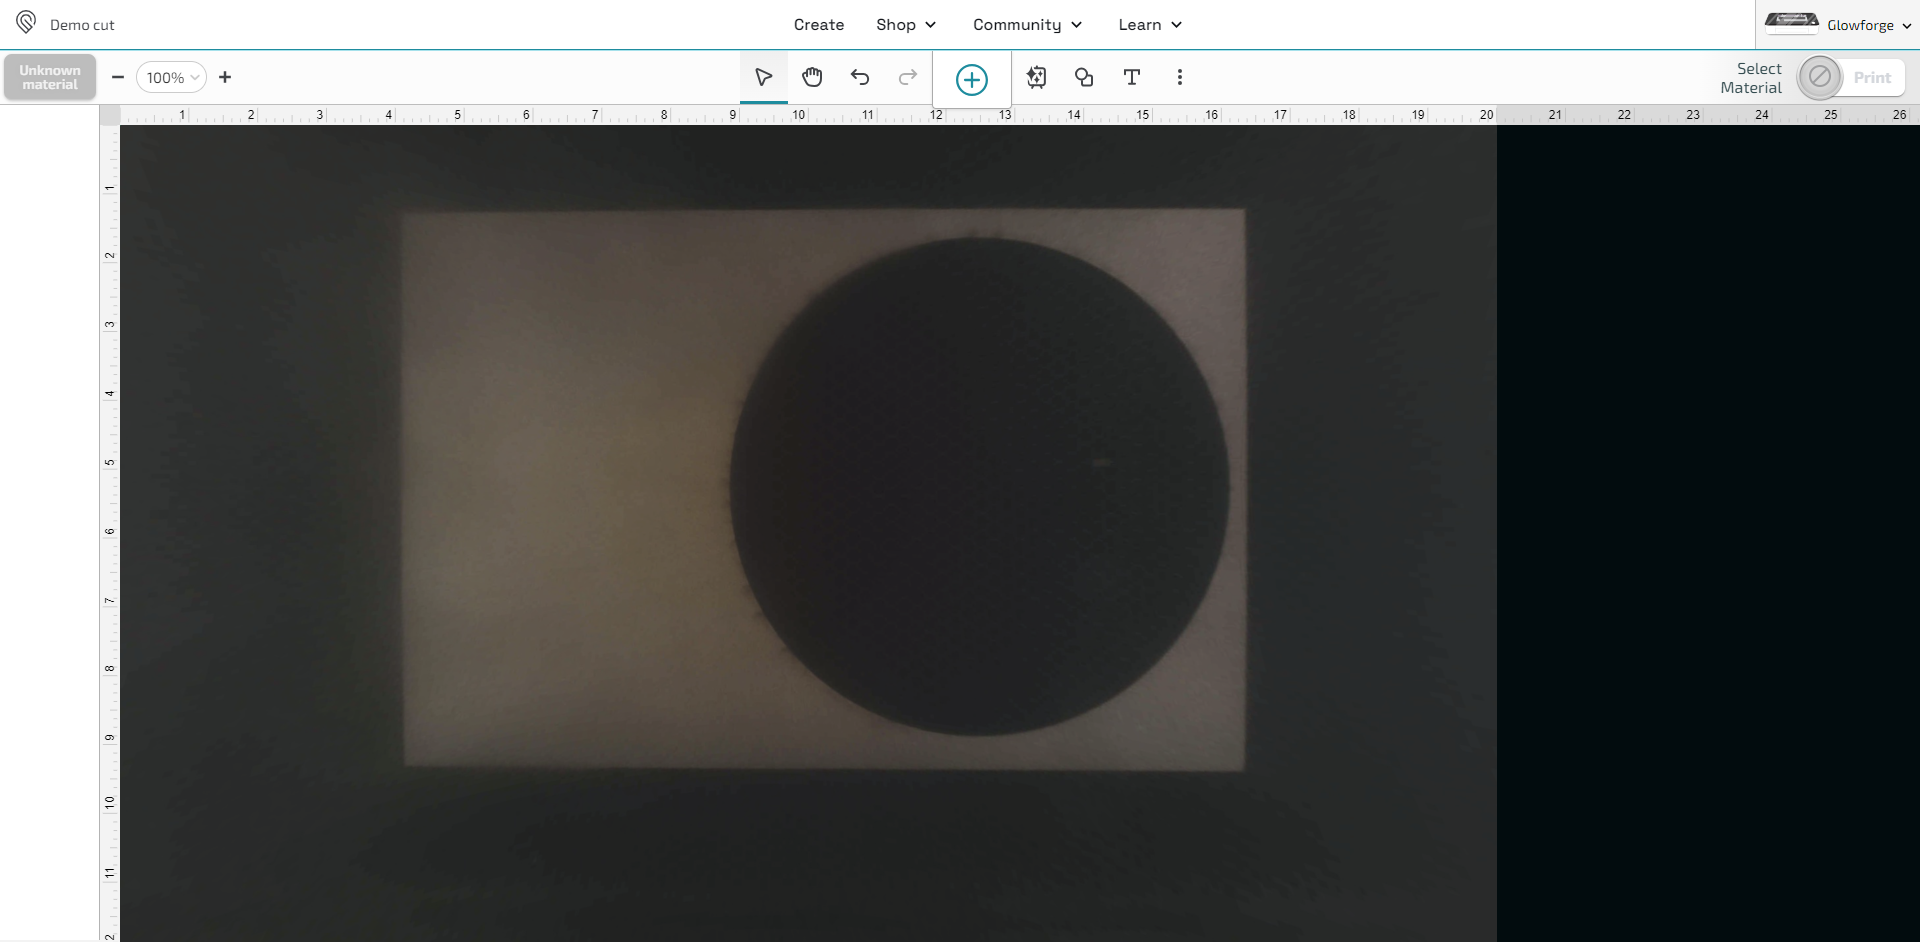

No matter what you choose, you will eventually reach the workspace. There you will se a lot of options. We’ll start with the top menu.
Top Bar
Hitting the (
 ) icon will allow you to select objects in the frame by clicking them or dragging your mouse over them.
Hitting the (
 ) icon will allow you to pan the scene by dragging with your mouse.
Undo and Redo
Hitting the (
 ) icon will undo your last action, and hitting the (
 ) icon will redo your last undone action.
Import artwork
Hitting the (
 ) icon will open the import artwork menu.
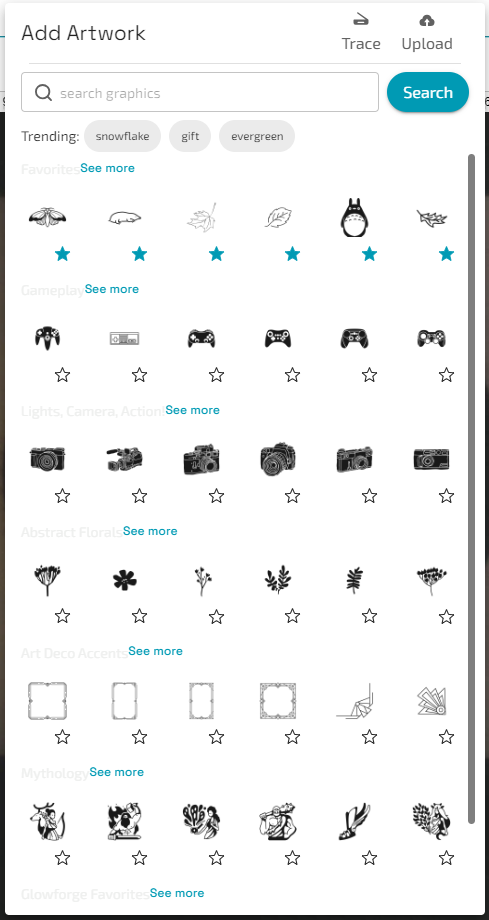

Here you can select to import artwork from the computer, trace artwork, or use the search bar to search designs. When you select a design it will open in the workspace. We will cover tracing in the Tracing page.
Magic Canvas
Hitting the (
 ) icon will open the Magic Canvas menu.


This menu will allow you to add AI generated designs to your cut. Select which type of design you would like to generate, and type in the prompt you would like to generate. A loading menu will appear and eventually your design will appear. You can then choose to use the image as is, or edit the image with the tools provided.
Add Shape
Hitting the (
 ) icon will open a menu with a list of shapes you can add to your design.
Hitting the first 3 shapes will create that shape, hitting the pentagon or star icon will open another menu.


There you can edit the number of points in your shape, change the sharpness of a star, and round the corners.
Text
Hitting the (
 ) icon will create text and open a menu to customize that text.


Firstly put what you want the text to say in the first box.
Then you can edit the font by clicking the dropdown labeled Typeface.
You can edit the thickness of the letters by clicking the dropdown under Weight.
You can select the switch labeled Italic to make the text Italic.
You can edit the size of the text by clicking the dropdown labeled Size.
You can change the alignment in the box by clicking the dropdown labeled Alignment.
You can edit the spacing between the letters by clicking the dropdown labeled Spacing.
You can make your text into different shapes by clicking the dropdown labeled Style.
If you have a style selected, clicking the Options button will allow you to customize the style you selected.
More Options
Hitting the (
 ) icon will open a new menu with more options.
Refresh Bed Image will re-scan the bed and show what is there.
Set focus will allow you to click somewhere on the bed to force the glowforge to focus on.
Design Details will open up a panel of information about your design, as well as any instructions included with the design.
Export Design will allow you to export your design to the computer.
Past Prints will show all past print jobs on this file.
Keyboard Shortcuts shows the list of keyboard shortcuts.
Preferences opens up a menu of accessibility options.
Pro Passthrough is used to make longer designs, which will be reviewed more in the pro passthrough page.
Do not select Glowforge Air Filter Attached as we do not have that.
Units will switch from inches to centimeters for measuring.
Movement and Arrangement
Moving
To move an object around the screen, simply select it and drag.


Scaling
To scale an object select it and drag the white dots. If the aspect ratio is locked in the arrangement menu, the object will scale evenly. If not it will scale however you drag it.


Rotation
To rotate an object, select it and drag the (
 ) icon until it is rotated how you want it.
Selecting the (
 ) icon in the bottom left will open up a menu.


Here you can select the exact position of the object and scale of the object, as well as unlocking and locking the aspect ratio by clicking the (
 ) icon.
Selecting the (
 ) icon in the bottom left will open up another menu.


This menu allows you to align multiple objects to each other as is displayed in the buttons shown.
Side Bar
After selecting an object, a side bar will appear.


Outline
Hitting the (
 ) icon will open a menu, and allow you to create an outline of the currently selected object.


Once you create the outline, you can adjust how far outside or inside the shape the line is.


Mirroring
Hitting the (
 ) icon will mirror the object vertically, and hitting the (
 ) icon will mirror the image horizontally.
Patterned line
Hitting the (
 ) icon will open another menu, which will allow you to create a patterned line from a regular line object.


Hitting the dropdown labeled Mode will allow you to choose from a list of options.


Repeating shapes will allow you to place shapes along the line.
Seamless Pattern will create a pattern along the line.
Stitching Holes will create holes along the line.
Perforated Line will cut a dashed line.
Hold-in Tabs will give the line small bits of material to keep it in place while cutting that are easy to remove afterwards.
No matter what option you choose, there will be a list of customizations to edit your pattern below, with more available after hitting the Options dropdown.
Puzzle Maker
Hitting the (
 ) icon will open another menu, which will allow you to place a puzzle around your object.


You can specify how many rows and columns to add, whether you want a frame, and whether you want to keep the selected object or delete it after creating the puzzle around it.
Hit the Create Puzzle button to create the puzzle.
Stamp maker
Hitting the (
 ) icon will open another menu, which will allow you to create a stamp that stamps the selected design.


Padding will dictate how far the stamp will extend past the design’s edge.
Keep Original Artwork will keep the design as well as creating the stamp.
Add Edge will add a box around the stamp to make it easy to cut out of your material.
Hit the Create Stamp button to create the Stamp.


Done?
Once you are happy with your design, move to the Material Selection page.
Material Selection
Once your design is ready, select what material you wish to use from the bins near the laser cutters.


Once you have loaded the material into the cutter, go to the top left corner of your workspace and click the button which will either be labeled Unknown Material or some other material name. This will open up a menu.


Use the search bar to select the type of material you are using. In general it is best to call anything less than 1/8 inch medium, and anything greater then or equal to 1/8 inch thick.
Once you have selected your material, move to the Cut Settings page.
Adjust Settings
Once you have your material selected, we can start choosing how we want each shape to be cut.


On the left of the screen will show all individual objects in the workspace. Click on the object you wish to change the settings of.


Cut Options
A menu will appear, with various options. First let’s look at the top menu. Each of the options on the top menu will cut the object in a different way.
Engraving
Engraving will have the laser cutter burn an area into your material but not cut all the way through.


If you have a shape with a simple boundary this will just fill in the shape.


But if you have an image instead, the engraving will attempt to create a pattern to make the image.


Clicking the arrow next to the default setting will open up a menu of more options.


Speed controls how fast the laser moves, and Power controls how much power the laser outputs.
If you have an image, there will be a panel labeled Bitmap Options.


The dropdown labeled Grayscale will let you choose how darkness is interpreted by the computer.
Convert To Dots will add more small dots in darker areas and less in lighter areas.
Convert To Patterns will add a darker pattern in darker areas and a lighter pattern in lighter areas.
Vary Power will use more power in darker areas and more in lighter areas, with the maximum power being the number specified in the previous panel and the minimum power being specified in a box just below the dropdown.
For either of the first two options a slider labeled Pattern Density will appear, where the left gray bar designates the lightest pattern the printer will create and the right bar designating the darkest pattern the printer will create.
For any of the three options, there is a slider that will change how the edge of the image is managed, between minimizing the margin and maximizing the quality of the image.
Finally there will be options labeled Engrave
Lines Per Inch designates how many lines the laser will make per inch.
# of Passes designates how many passes the laser will do during the engraving process.
Focus Height can be changed from a manual to automatic focus. It is recommended to set it to Auto.
Cutting
The cut setting will cut the outline of the selected object.


Clicking the arrow next to the default setting will open up a menu of more options.


Speed controls how fast the laser moves, and Power controls how much power the laser outputs.
If the laser does not cut all the way through, turn down the speed by 10-20 and try again.
# of Passes designates how many passes the laser will do during the cutting process.
Focus Height can be changed from a manual to automatic focus. It is recommended to set it to Auto.
Scoring
Scoring will engrave just the outline of the shape but not cut all the way through.


Clicking the arrow next to the default setting will open up a menu of more options.


Speed controls how fast the laser moves, and Power controls how much power the laser outputs.
# of Passes designates how many passes the laser will do during the engraving process.
Focus Height can be changed from a manual to automatic focus. It is recommended to set it to Auto
Ignoring
Ignore will make the cutter completely ignore the object and not cut it at all.
Done?
Once you have your settings set, move to the Process Ordering page.
Process Ordering
Once you have your cut settings set, close out any open menus.
Now it is important to order the cuts in an appropriate order.


The cutter will do the steps in the left bar from top to bottom.
Take any engraving and scoring steps, and drag them upwards, and take any cutting steps and drag them downwards. This way pieces will not move after being cut and be misaligned for engraving.
Once you are done this, move to Printing.
Printing
Cutter Selection
Before cutting make sure you have the right cutter selected by clicking the name of the Glowforge in the top right and selecting which machine you are using.


The “Glowforge” has the slot in the front for passthrough cutting while the “Glowforge II” does not.
Last Rearrangement
Once you are ready to print, look at the material image on the workspace and make sure that the object is in the right location.
The two things to look out for are:
- Make sure your object is not over any holes in your material.


- If possible, try to move your object to leave the biggest space possible for others to cut.


Printing
When you are ready to print, click the Print button in the top right.


From there the printer will begin the printing process, and eventually show a menu.


When this menu shows, check once again that your object is not over any holes as the bed image often shifts slightly when you do this.
Once you are confident it will print correctly, move to the laser cutter and hit the flashing white button. Your design should begin printing.
If you need to cancel at any time, just hit the cancel print button on the computer.
Tracing
To trace an image into the laser cutter, place the drawing or art you wish to trace in the machine and close the lid.
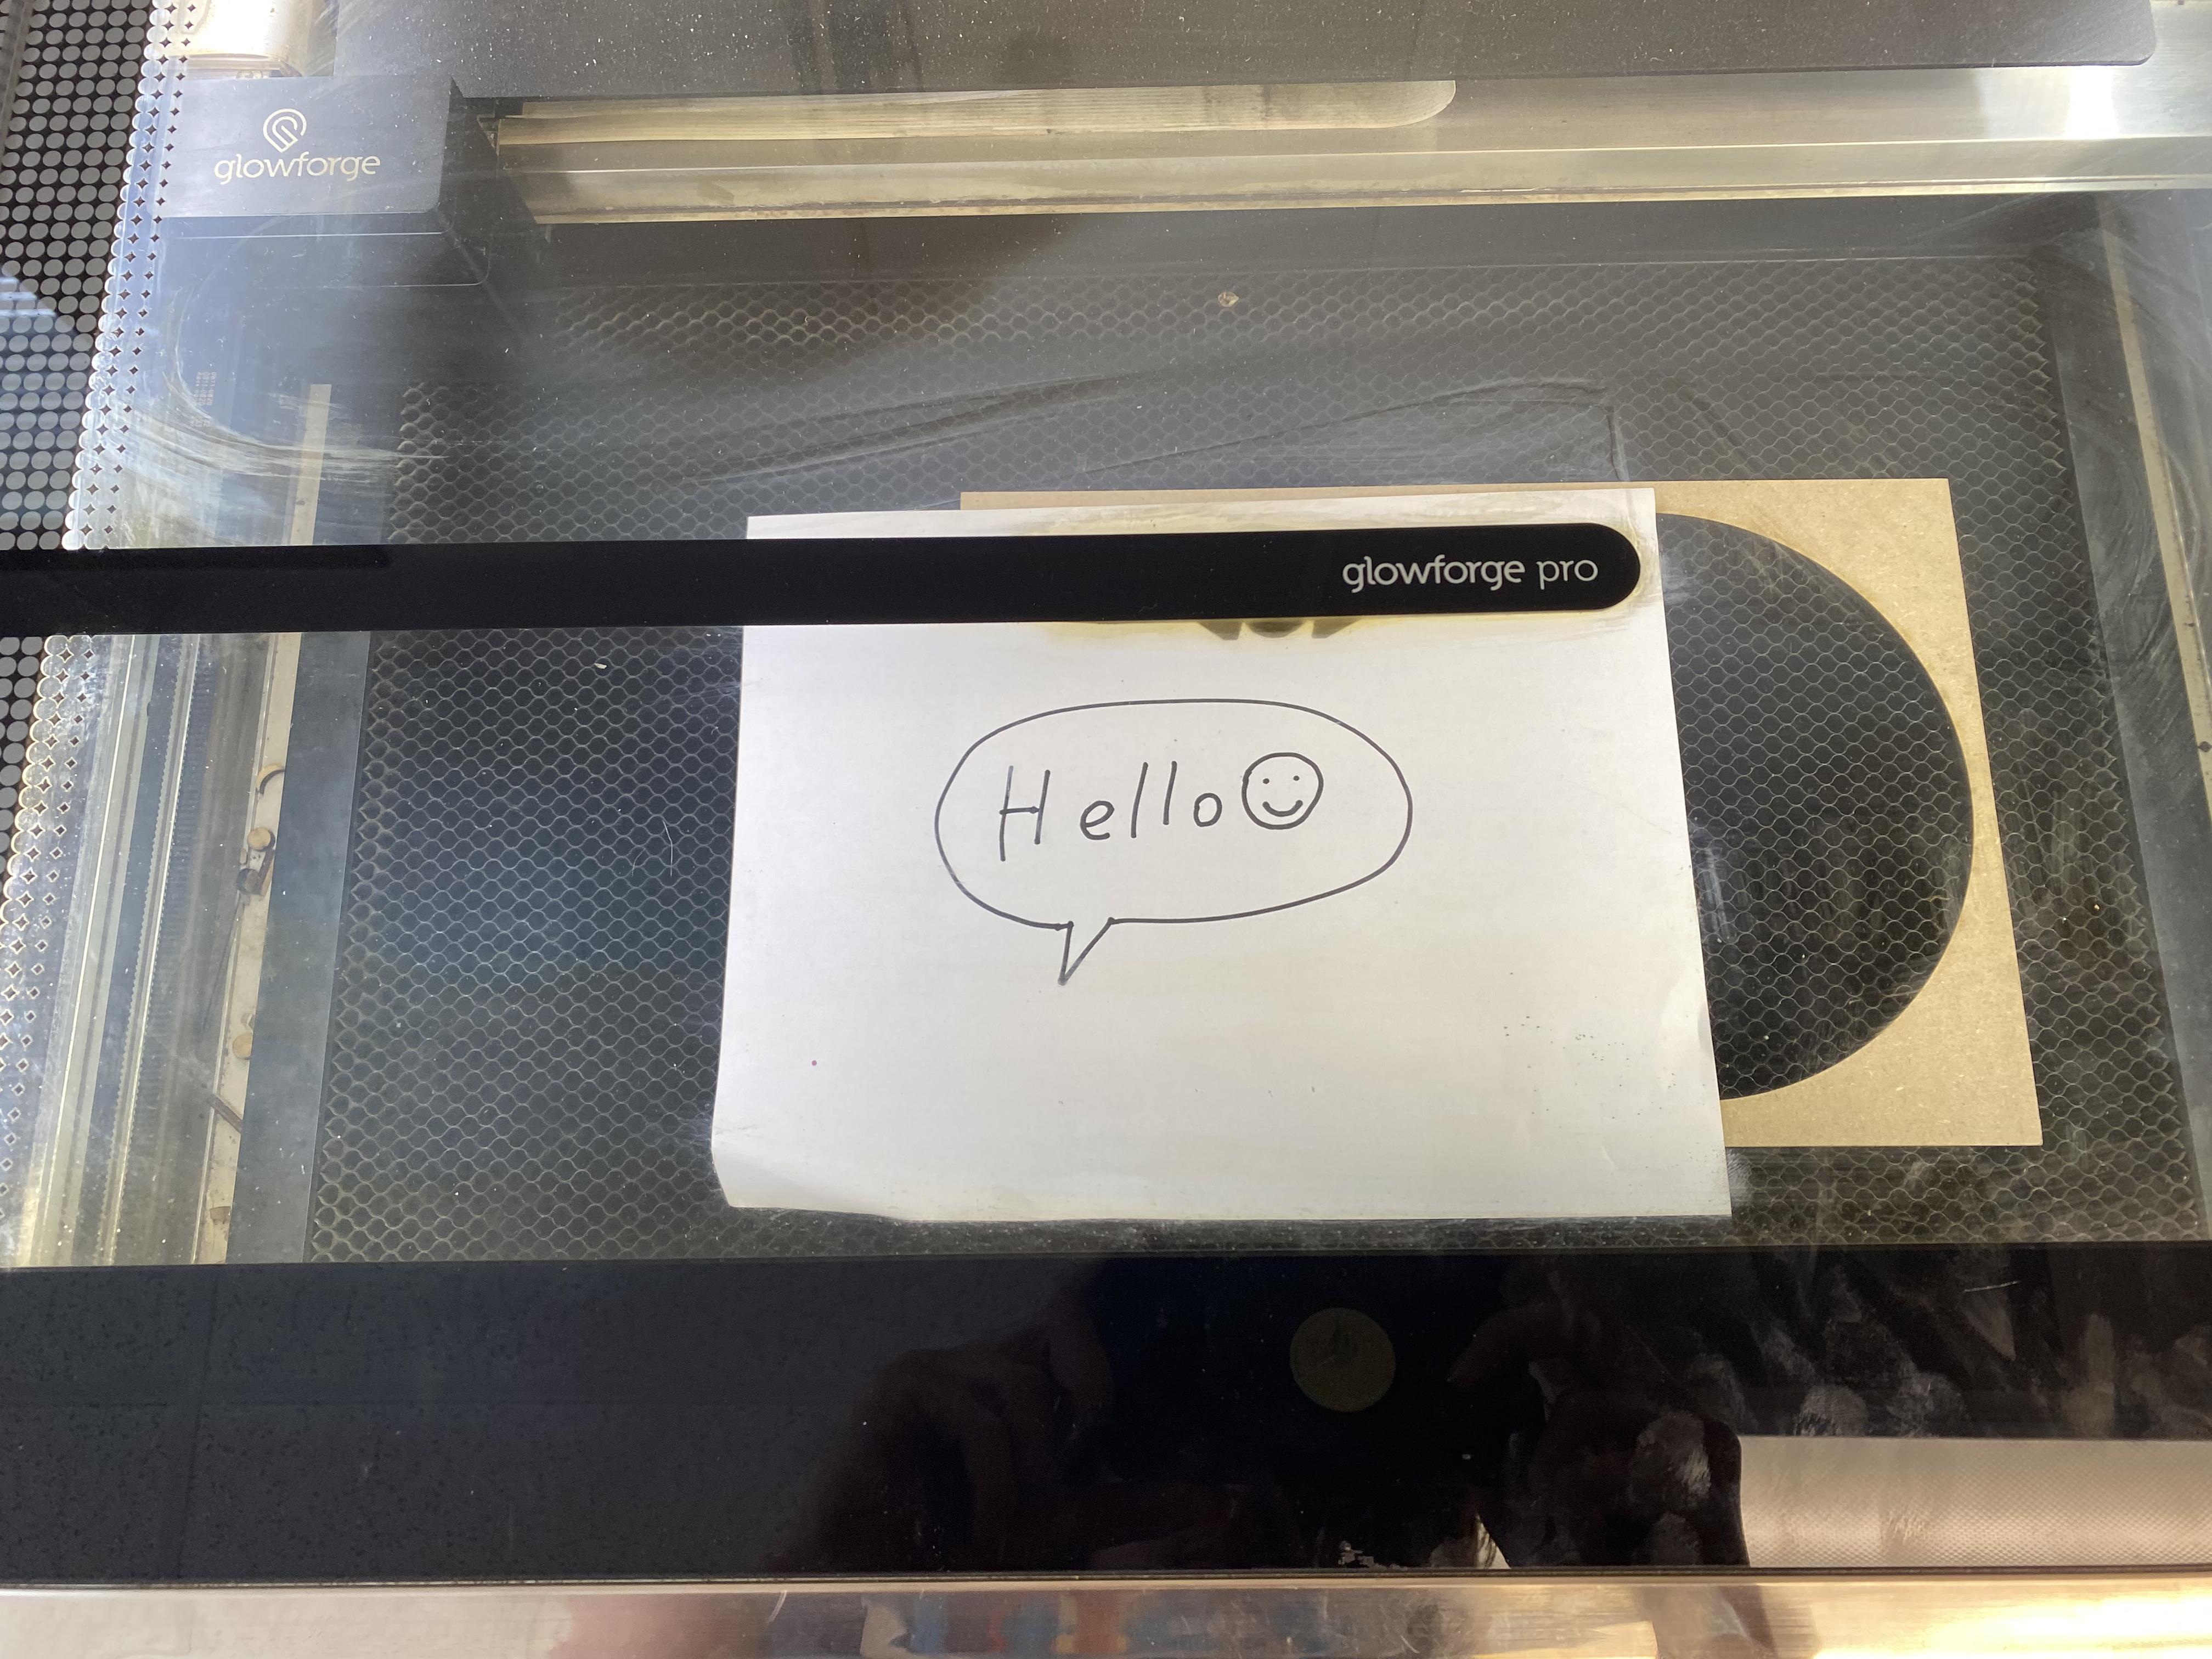

Then either go to the Glowforge home menu and hit Create New Design and Trace Artwork or open a workspace and hit the (
 ) icon and then the Trace button in the top right. This will open up an image of the bed and anything in it.


Now simply drag your mouse over the art you wish to trace.


This will show a black and white scan of the artwork. If you wish to cut an outline of any section of the art, click that area and it will outline it in purple.


Once you have selected all areas to cut, hit the Place Artwork button in the top right.


This will place an engraving of the art, as well as cut lines anywhere you selected, with the two grouped together. Right click and hit Ungroup to seperate the two.
Passthrough Usage
Cutter Setup
To activate passthrough, first set up the cutter to let objects pass through it.
To do this, first open the lid, open the front compartment, and pull out the black tray.
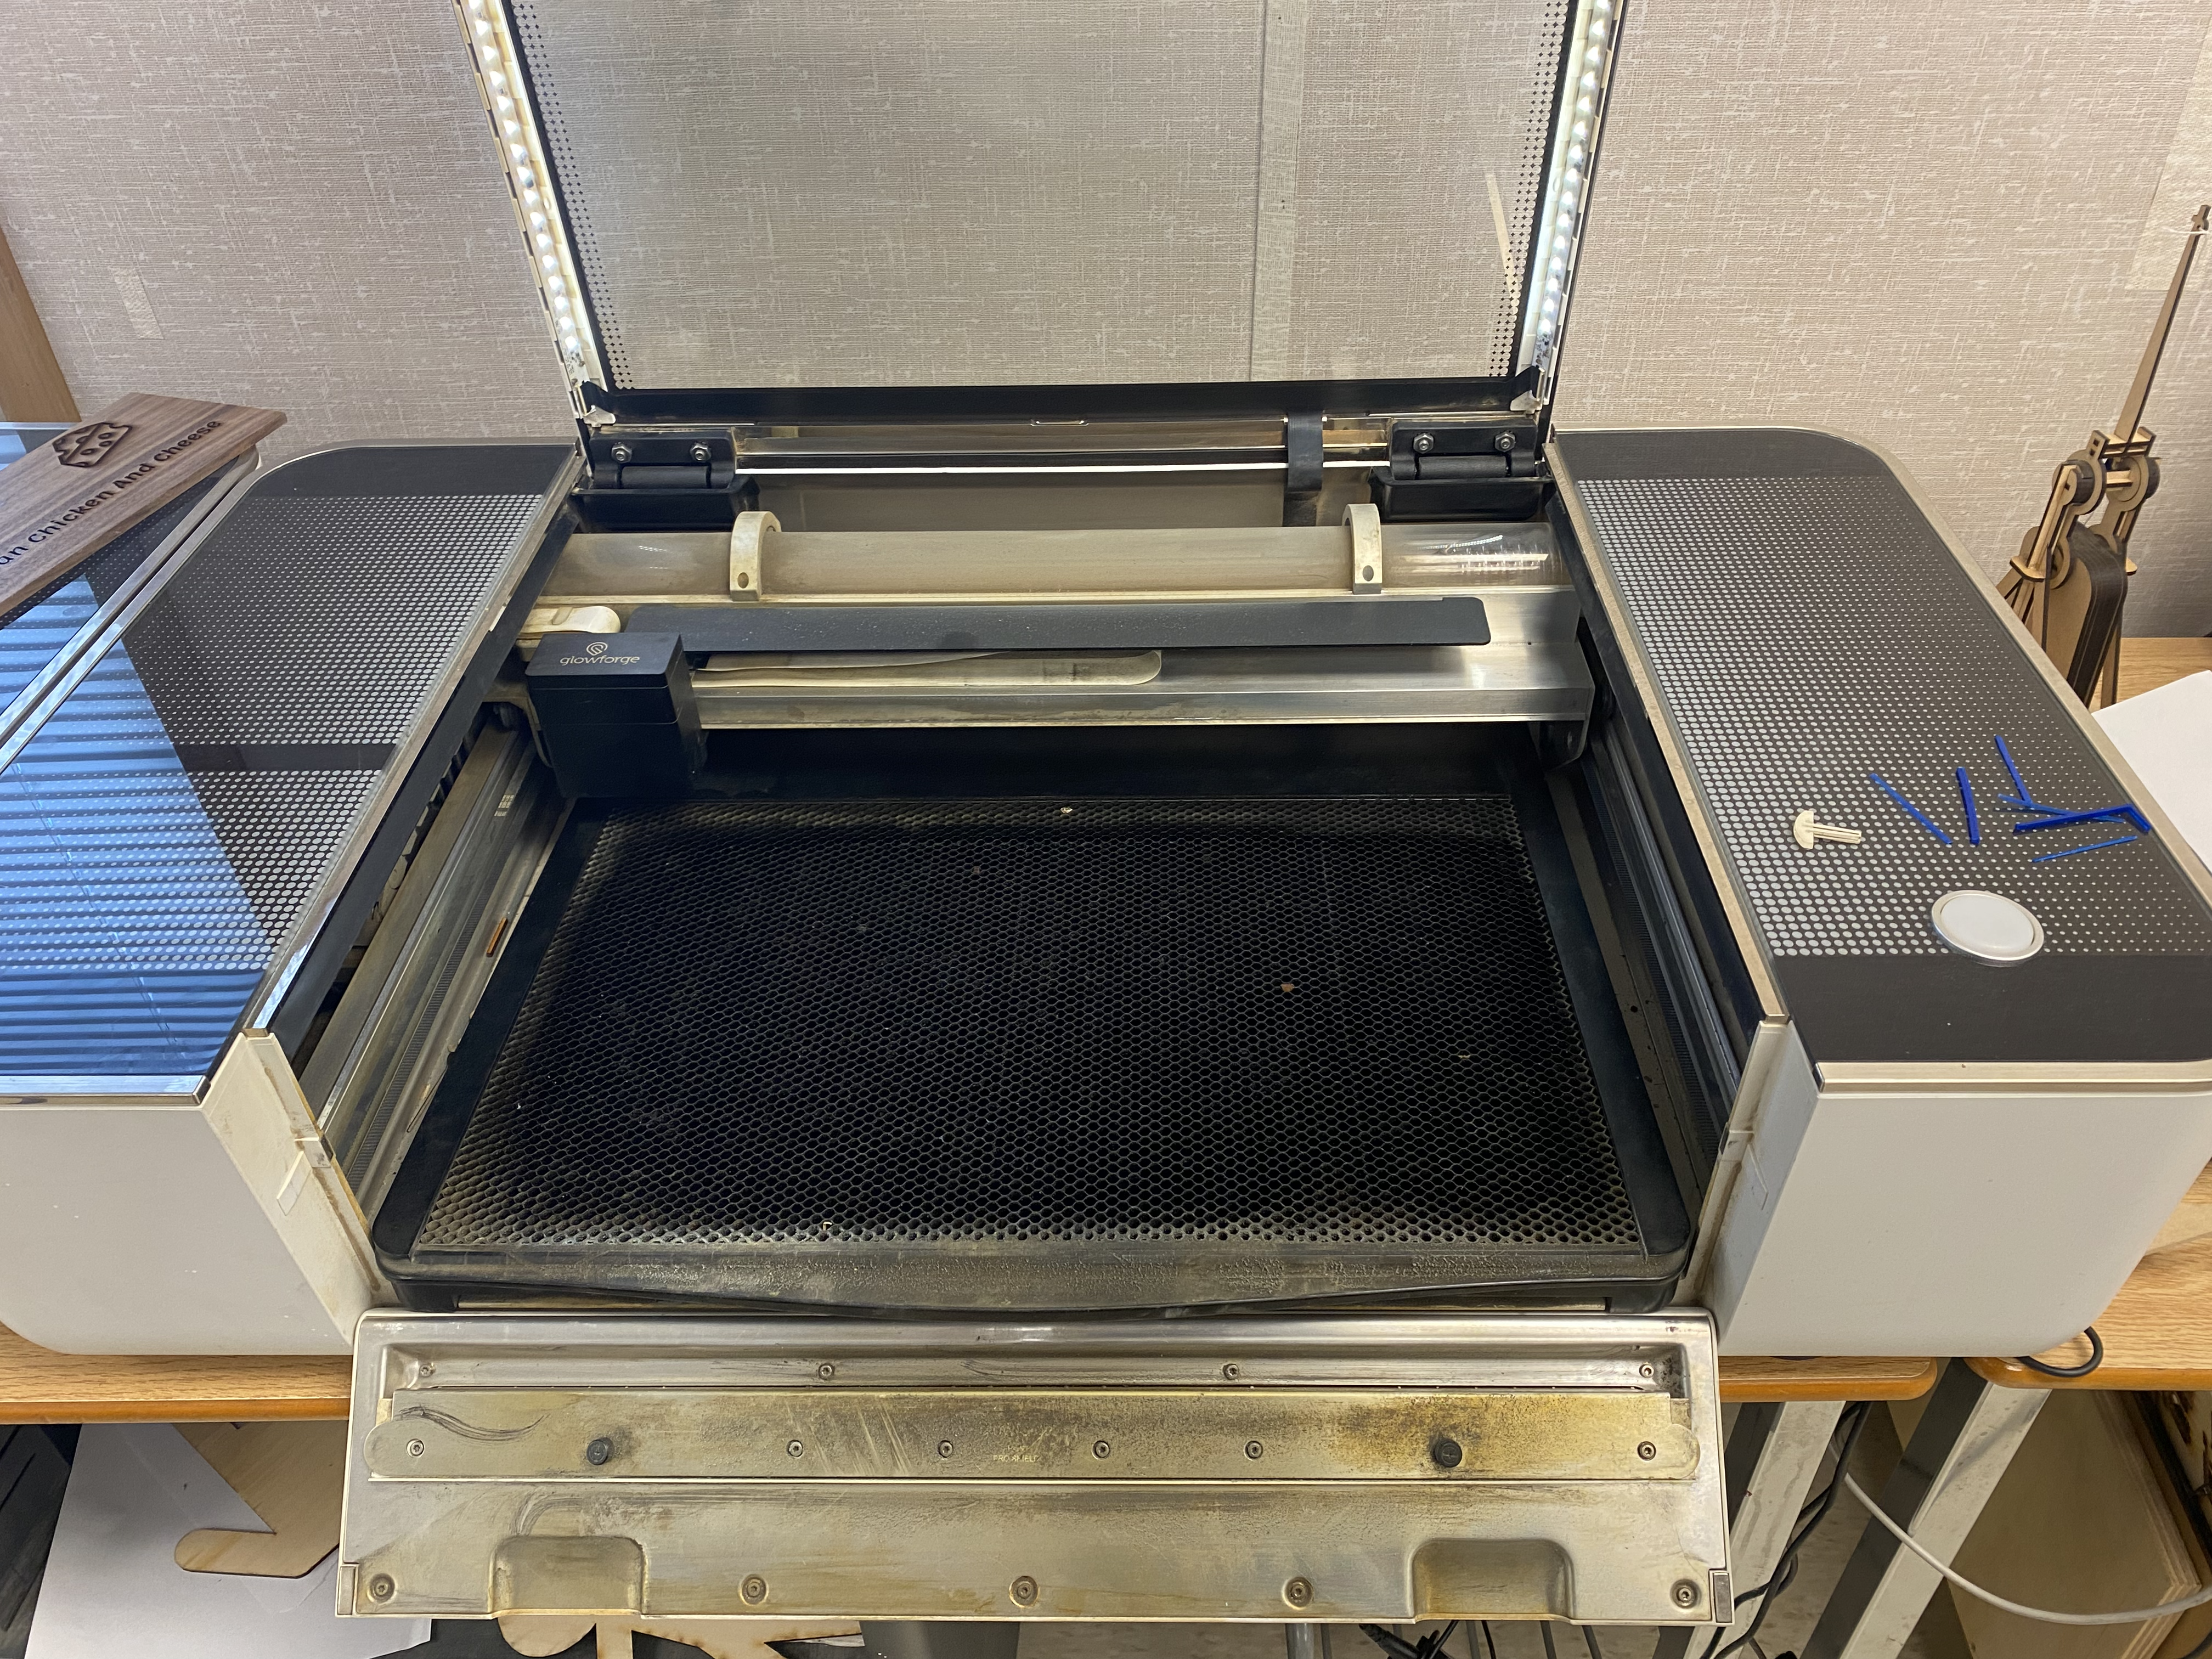

You will then see in the front and back 2 black screws.
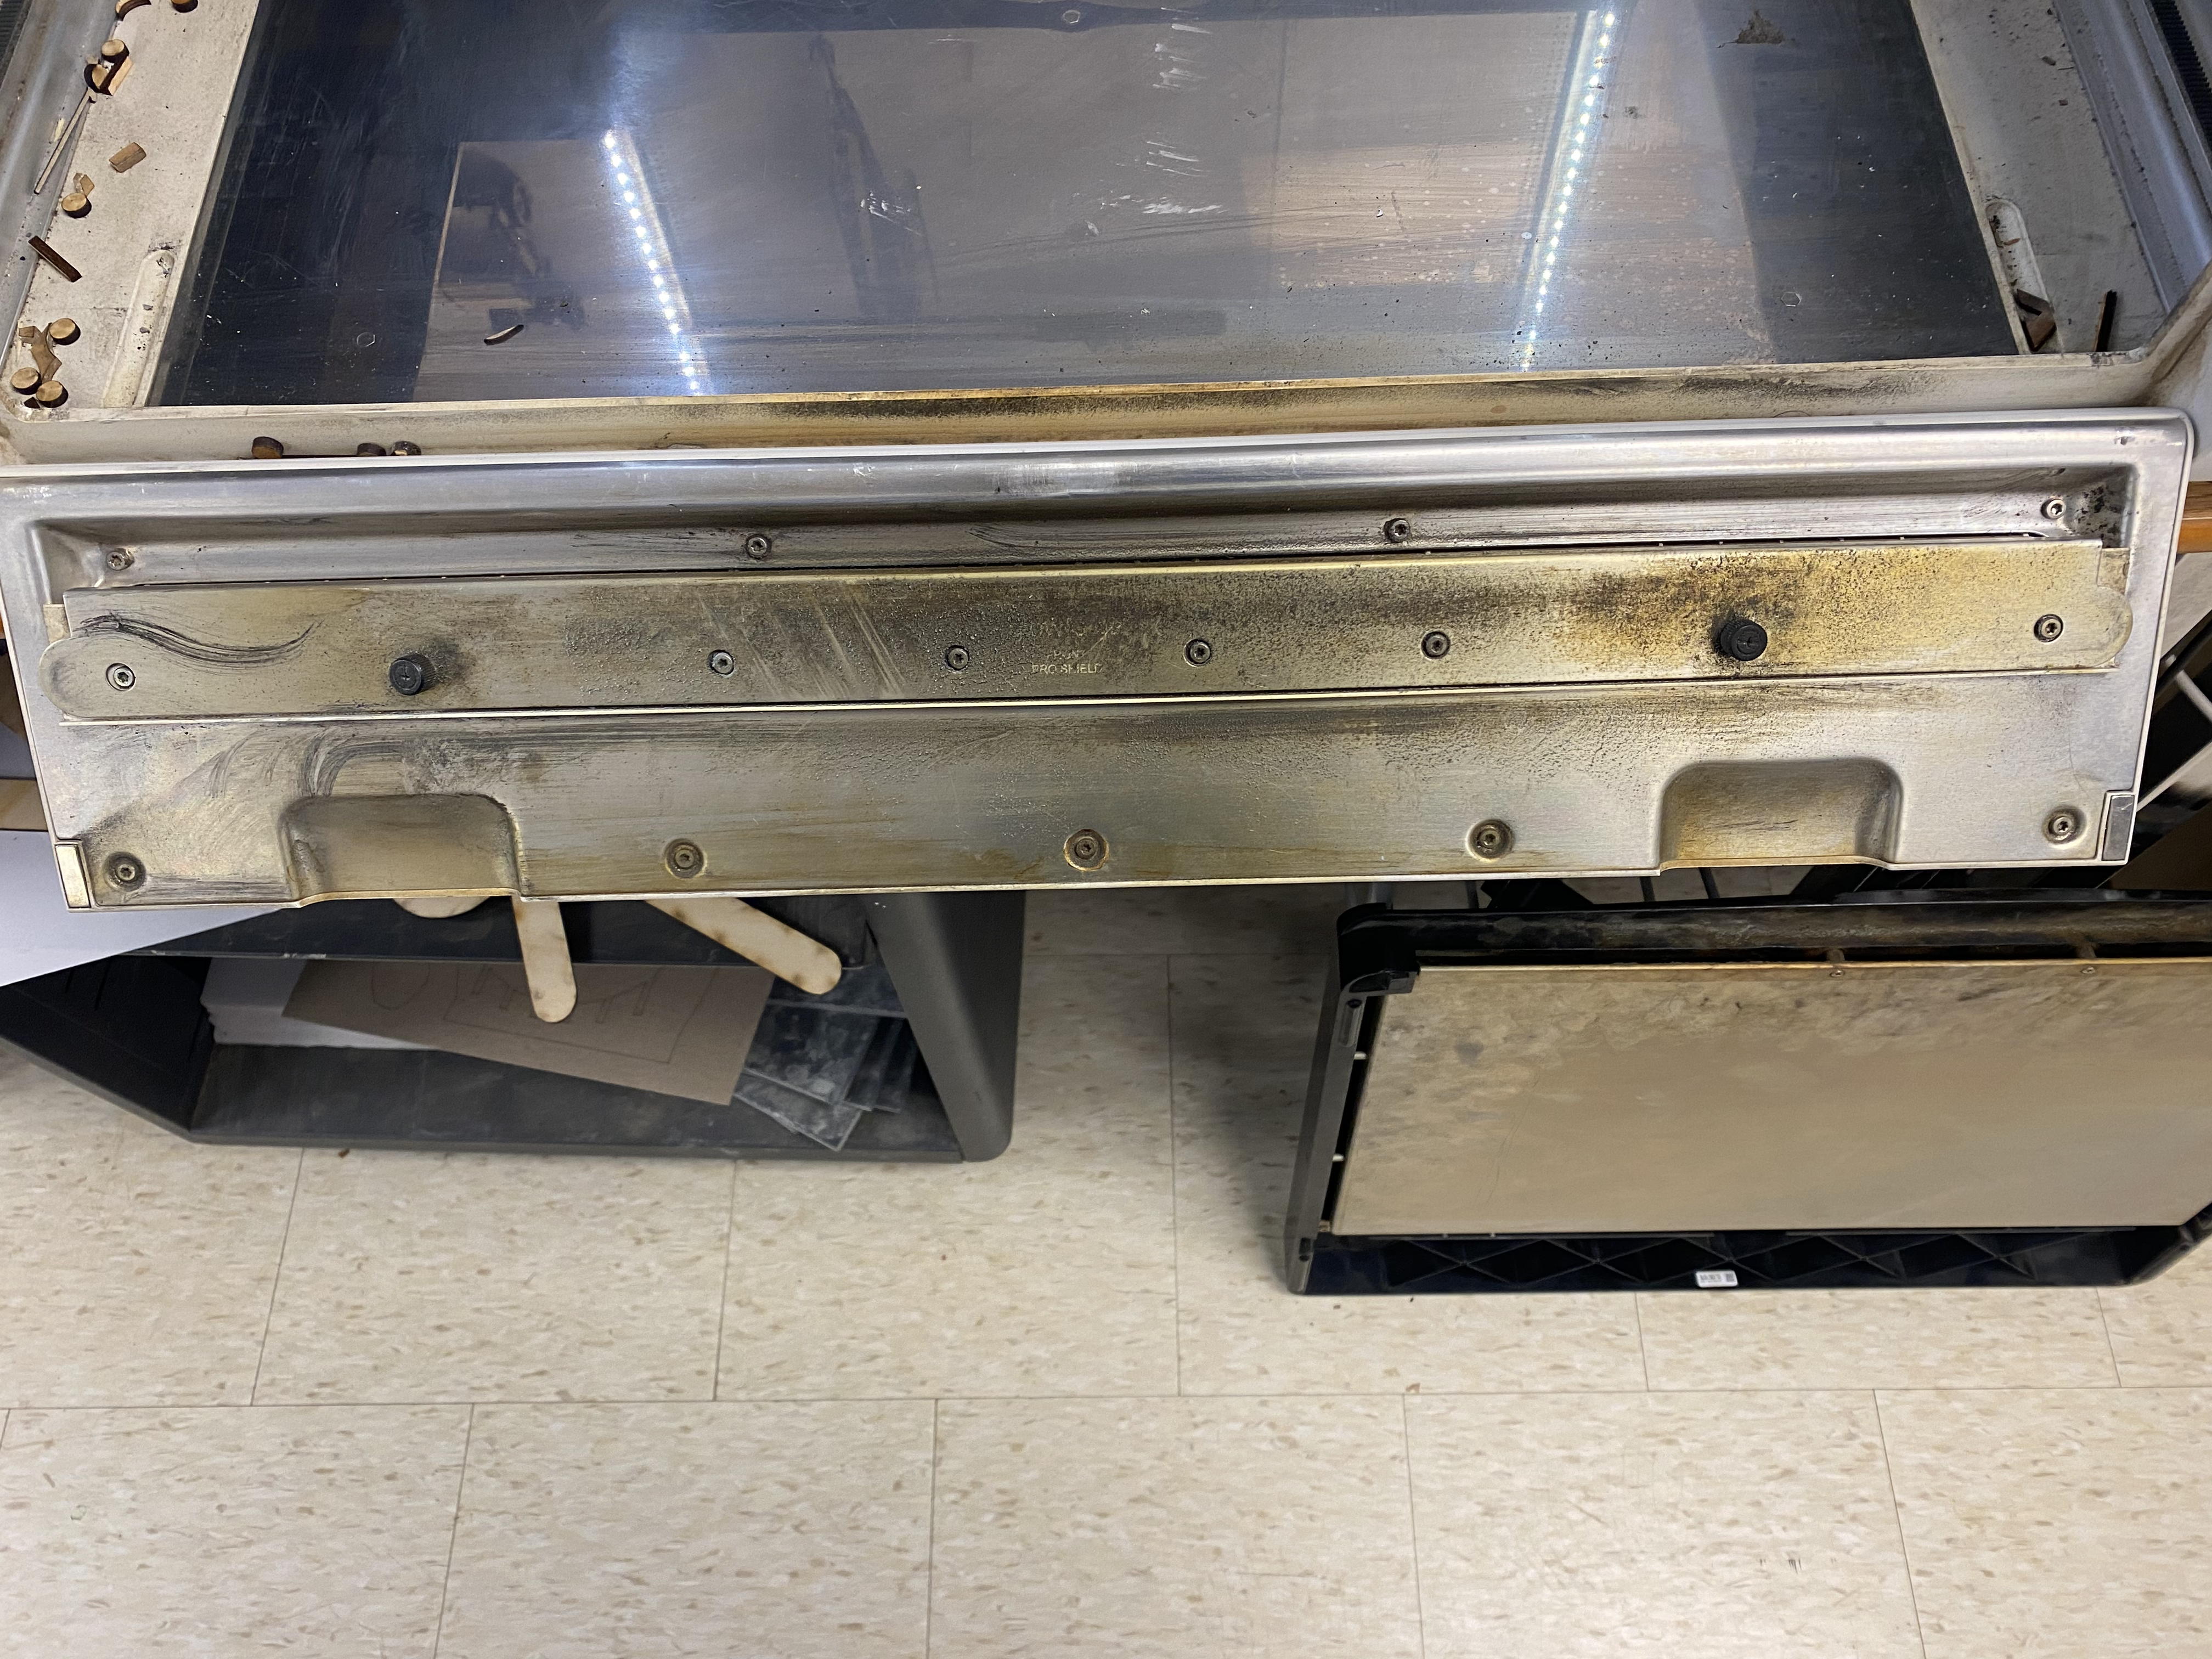

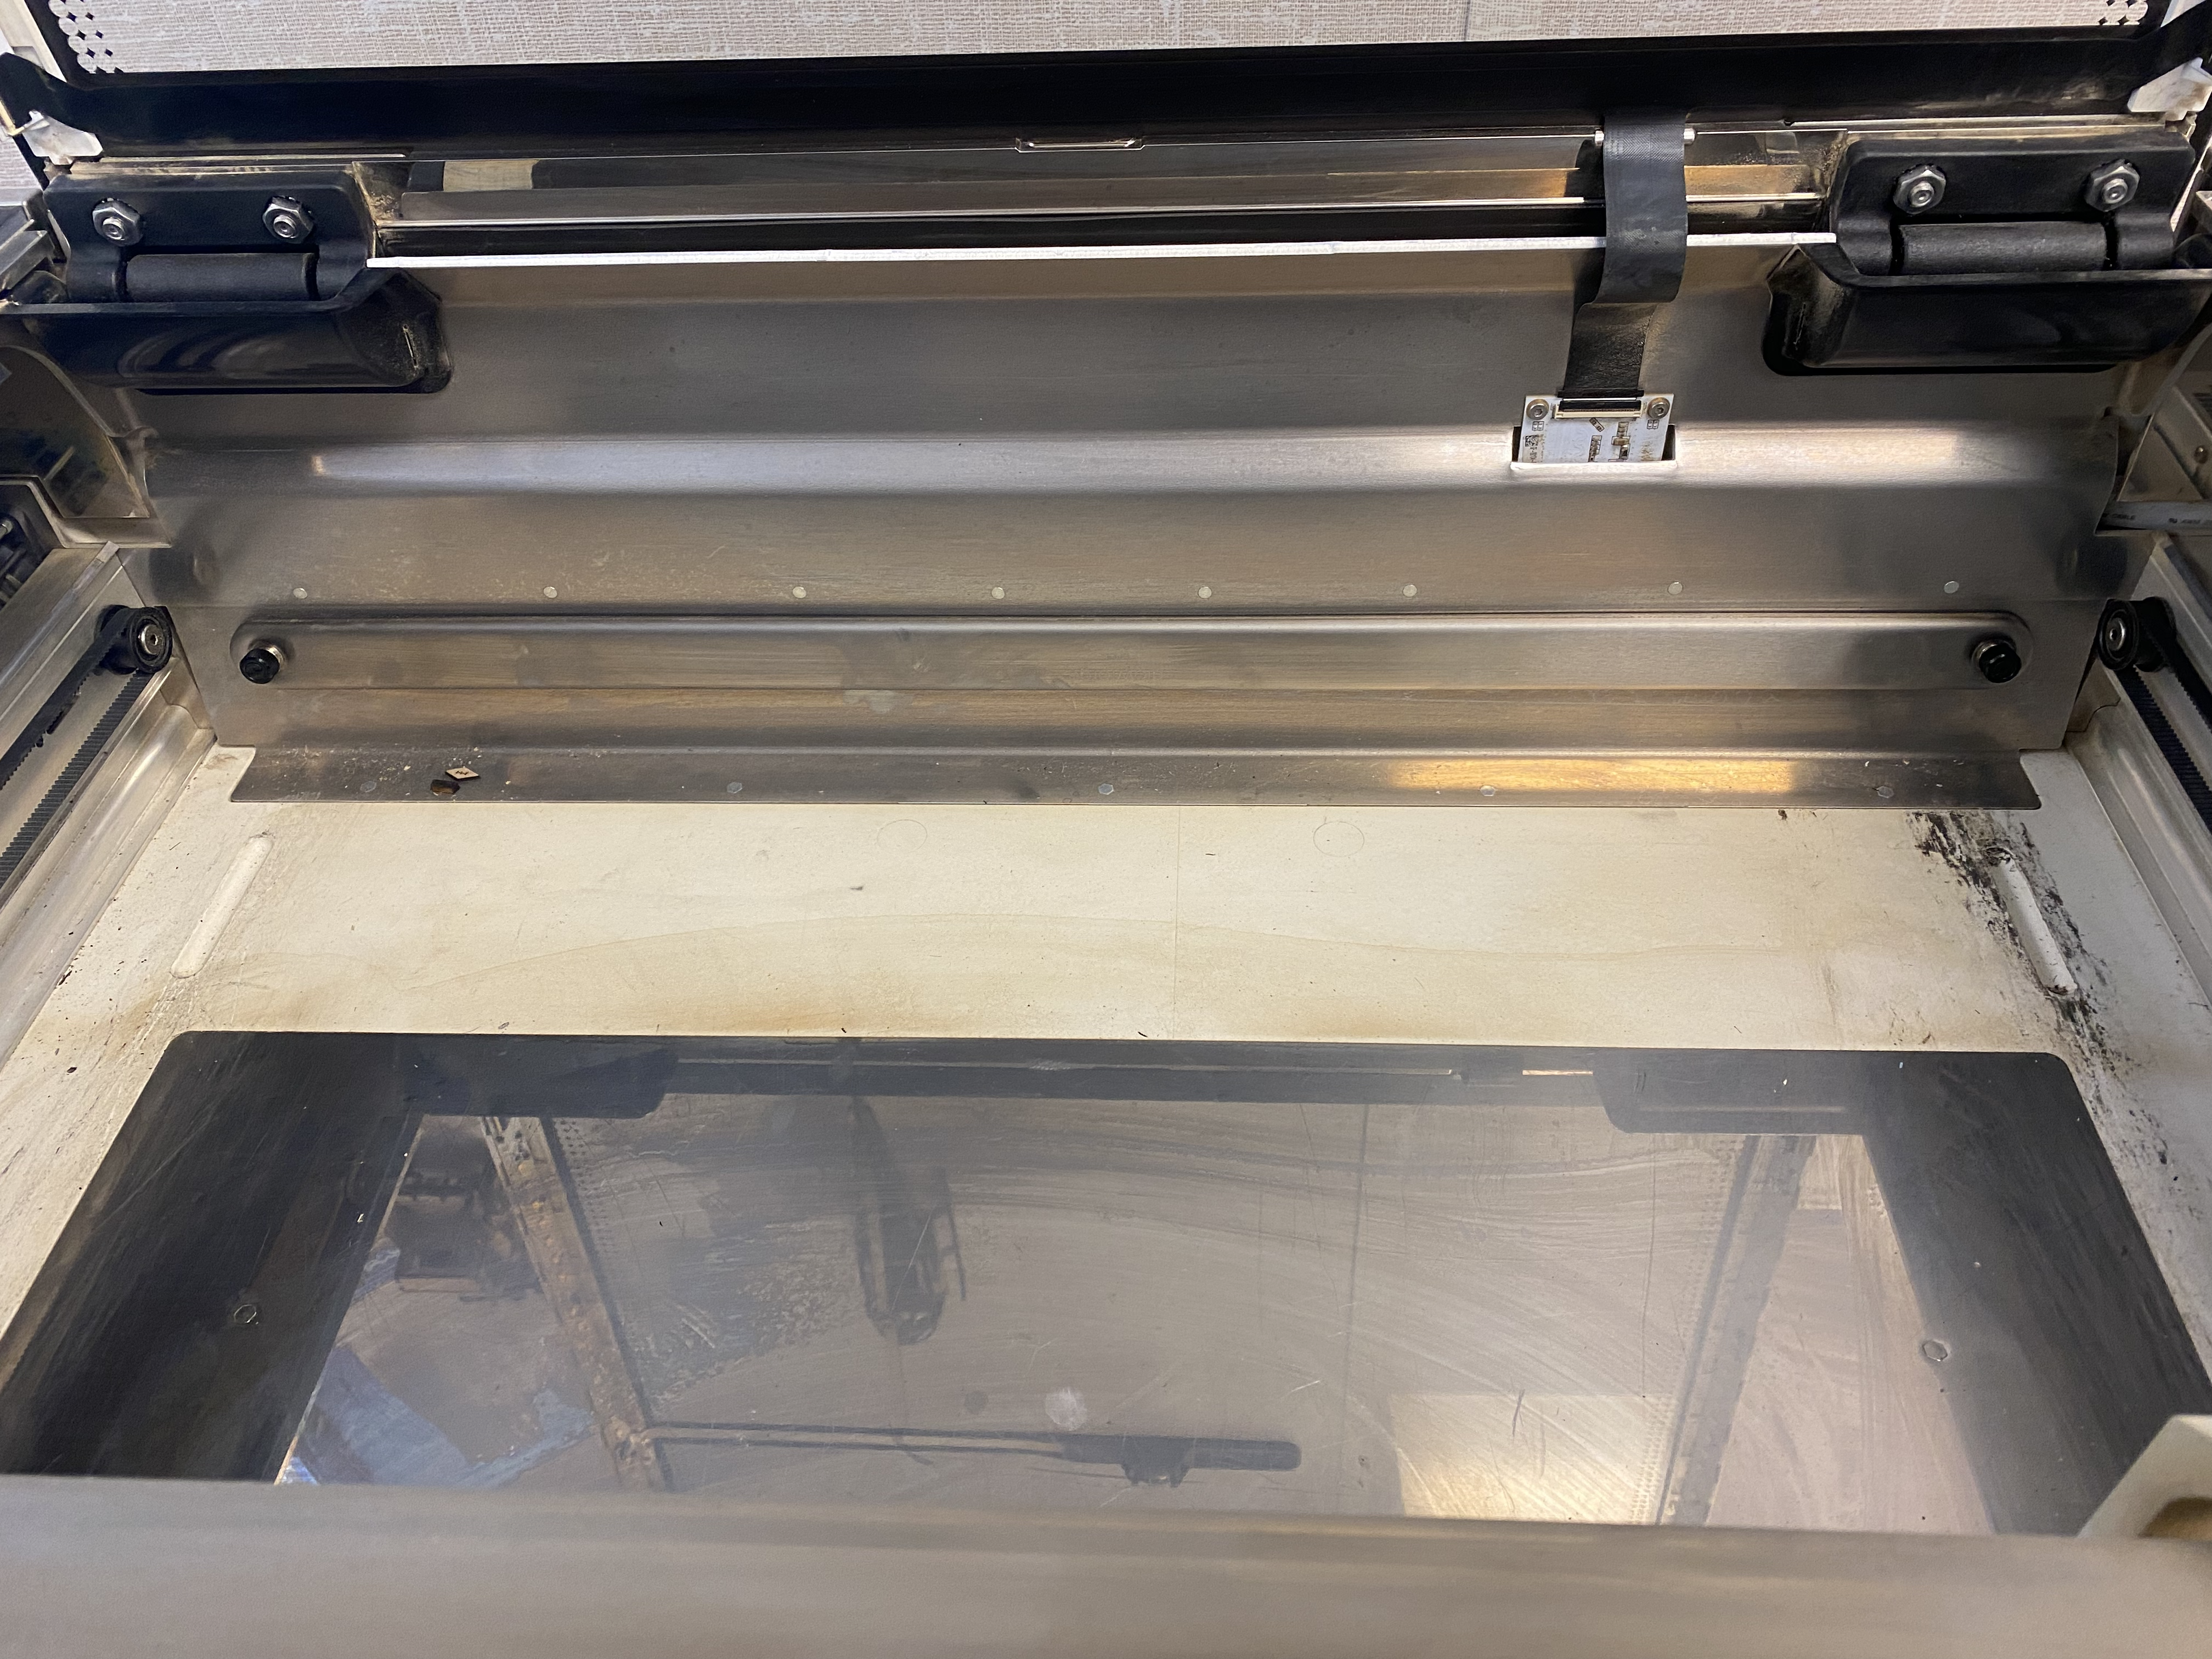

Twist these to remove them and the attached bar, and set them aside somewhere safe.
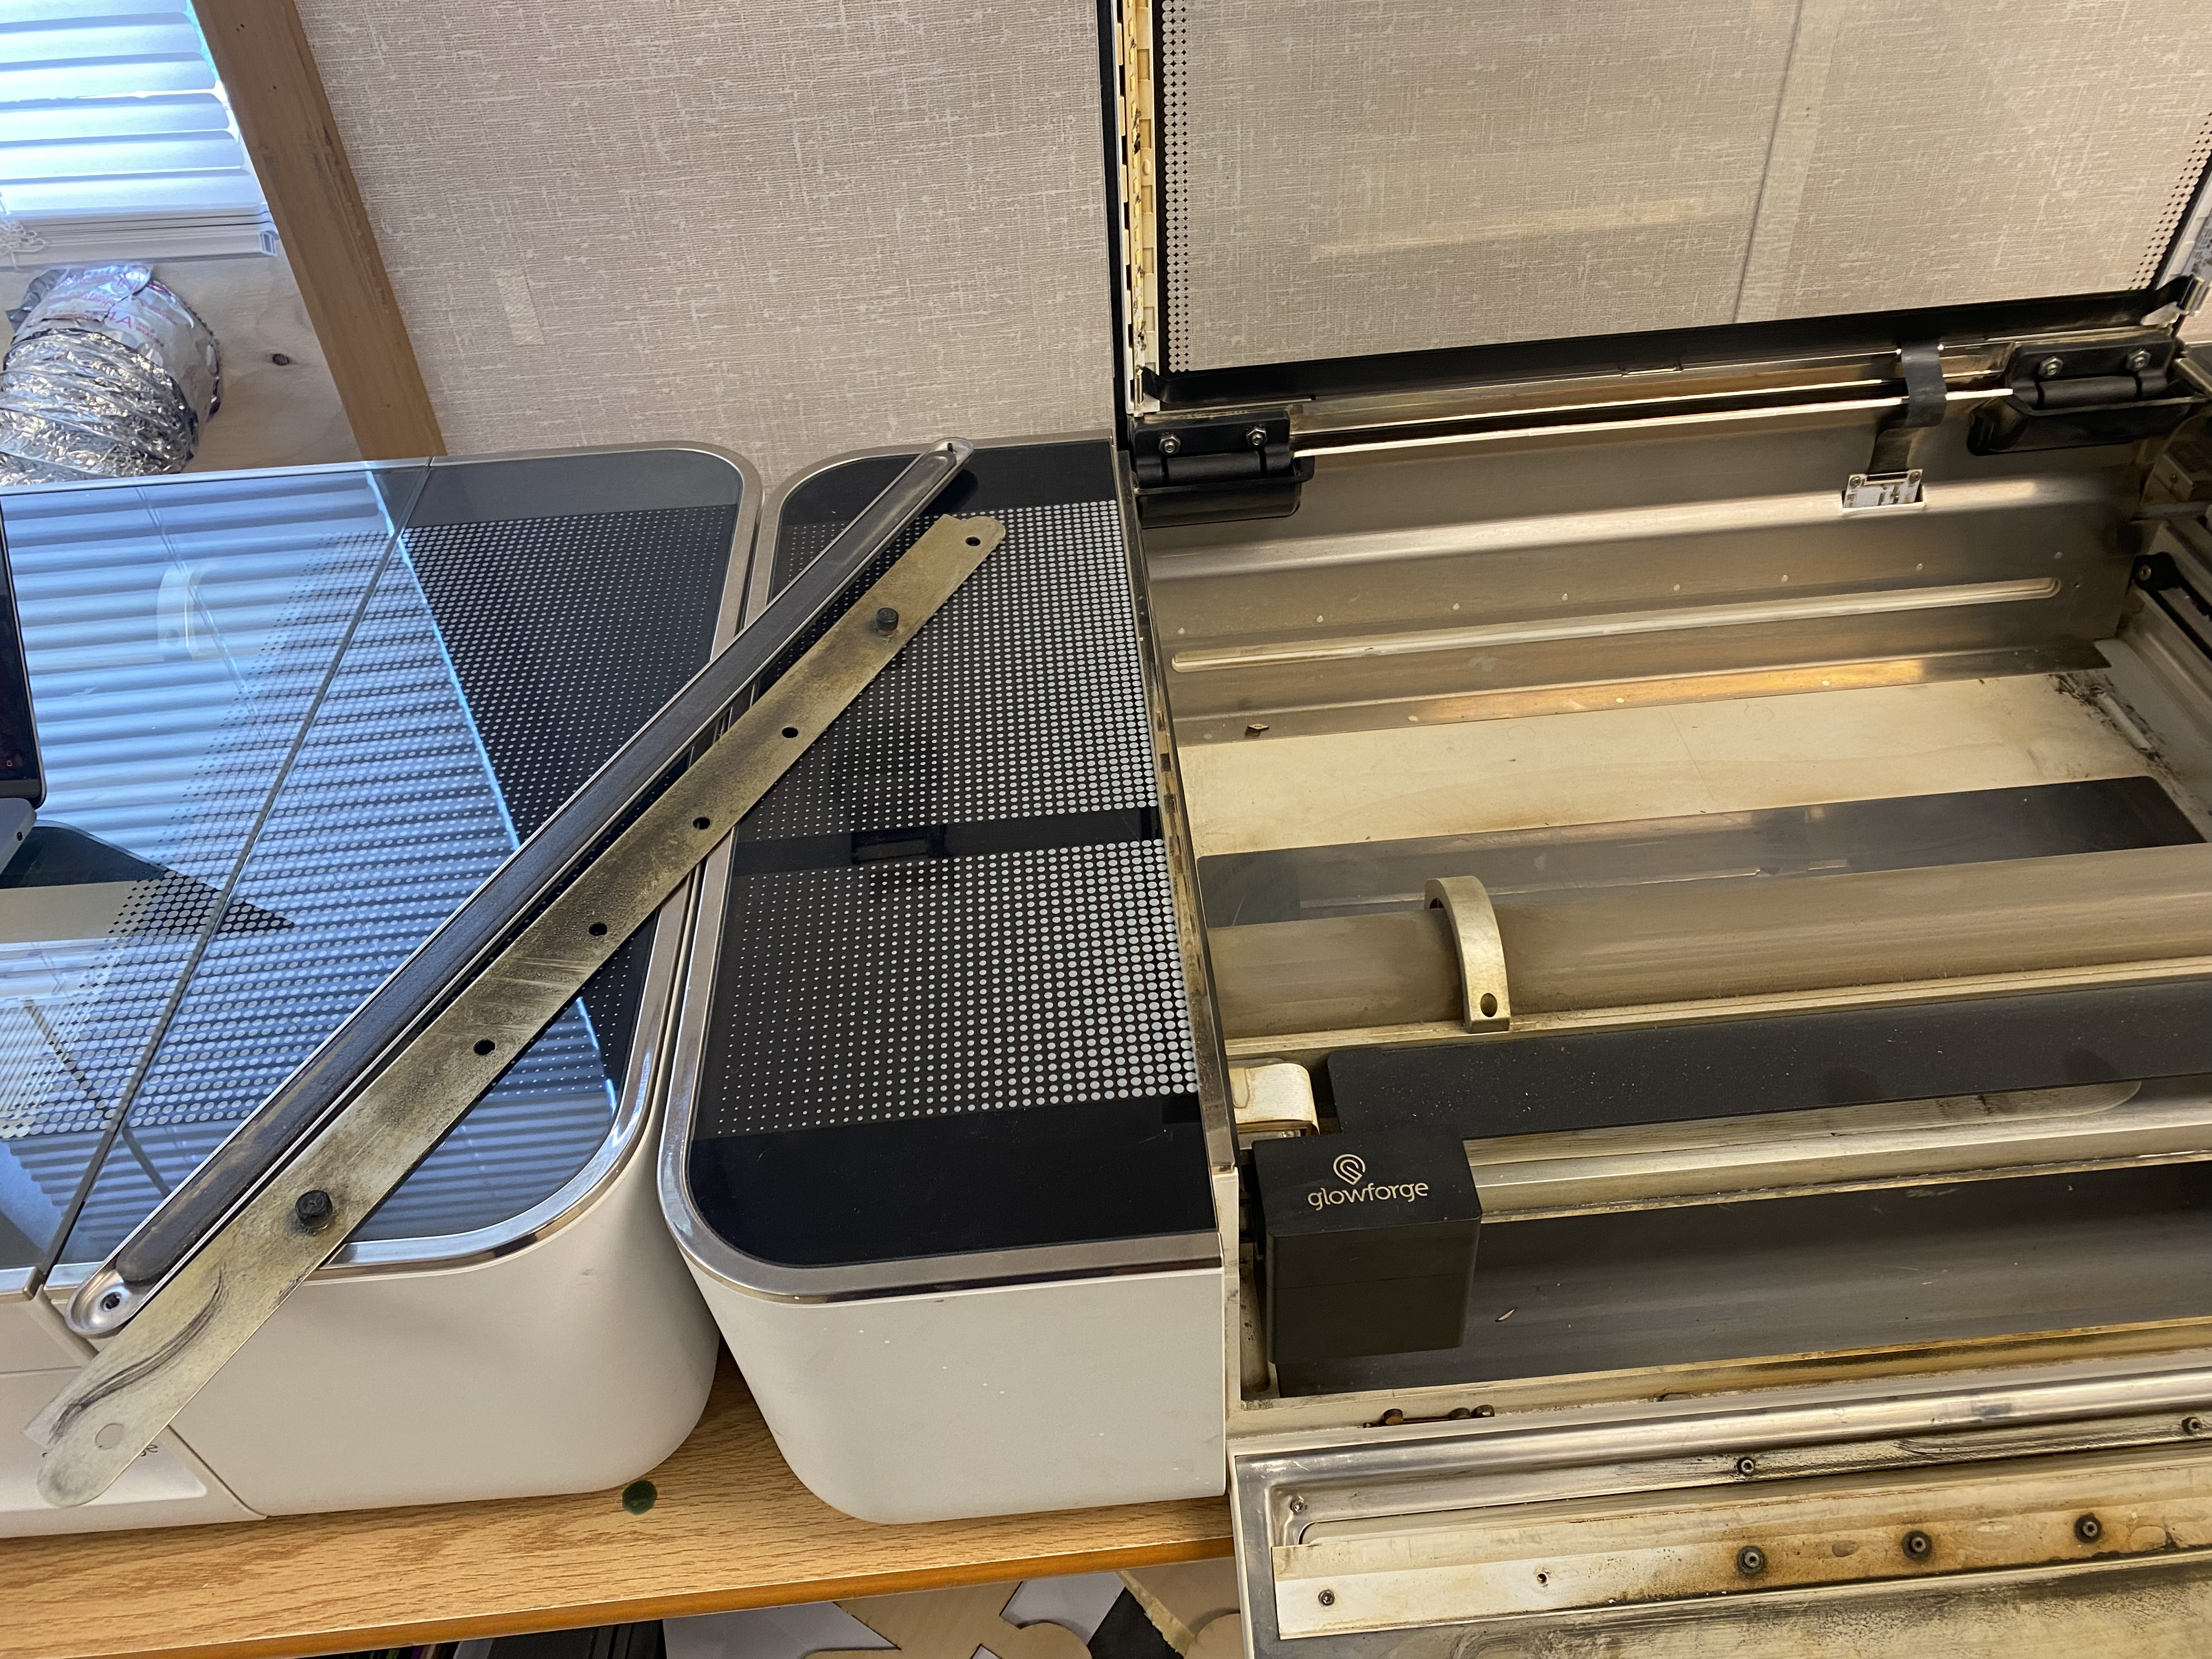

You can then place the tray back in, and close the front and the lid.
Now insert your material so that the closest edge to you is lined up with the front of the black tray, and the back sticks out through the back flap on the cutter.
Software Setup
Open a workspace on the computer and click the (
 ) icon on the top bar, then select the Pro Passthrough option. This will extend the workspace upwards as far as you want. Now simply create your extra long design, following the other steps as you normally would.


Printing
Hit the Print button as you would for any print and start the print.
Once it finishes it will show a new menu as it scans your cut so far.
Then once it has finished a new menu will appear. Simply pull your print forwards about 8 inches, then hit continue.
The print will re-scan and then continue with your design. Hit the button once it begins glowing.
If your design takes more than two prints, repeat the last 2 steps until you have finished your design.


