Subsections of CNCs
Shopbot
The CNC is the biggest and most heavy-duty piece of machinery in the CID. It can cut very large objects and is good for both 2D and 3D pieces, although it has some limitations when working in 3D. It can be used to cut wood, acrylic, stone, metal, and many more materials. It is also the most dangerous of the machines so please take extreme care when using it:
Subsections of Shopbot
2D Cutting
The CNC machine’s primary functionality is cutting 2D parts. It can create cuts of many types and outline, engrave, and carve designs into almost any material. To prepare 2d files use these guides:
Subsections of 2D Cutting
Uploading Files
How to use aspire (main)
To start designing a part, go into Aspire and click File > New. This will create a new Aspire file in the .crv3d format. It will also take you to the Job Setup menu.

Here, you can set the width, height, and thickness of the material you will be cutting (in the Job Size section). Don’t change anything else in this menu. To confirm the size of the job, press OK at the bottom left. If you want to go back to this menu to edit the size of the cut, go to Edit > Job Size and Position.
Once you confirm, you will see the workspace.
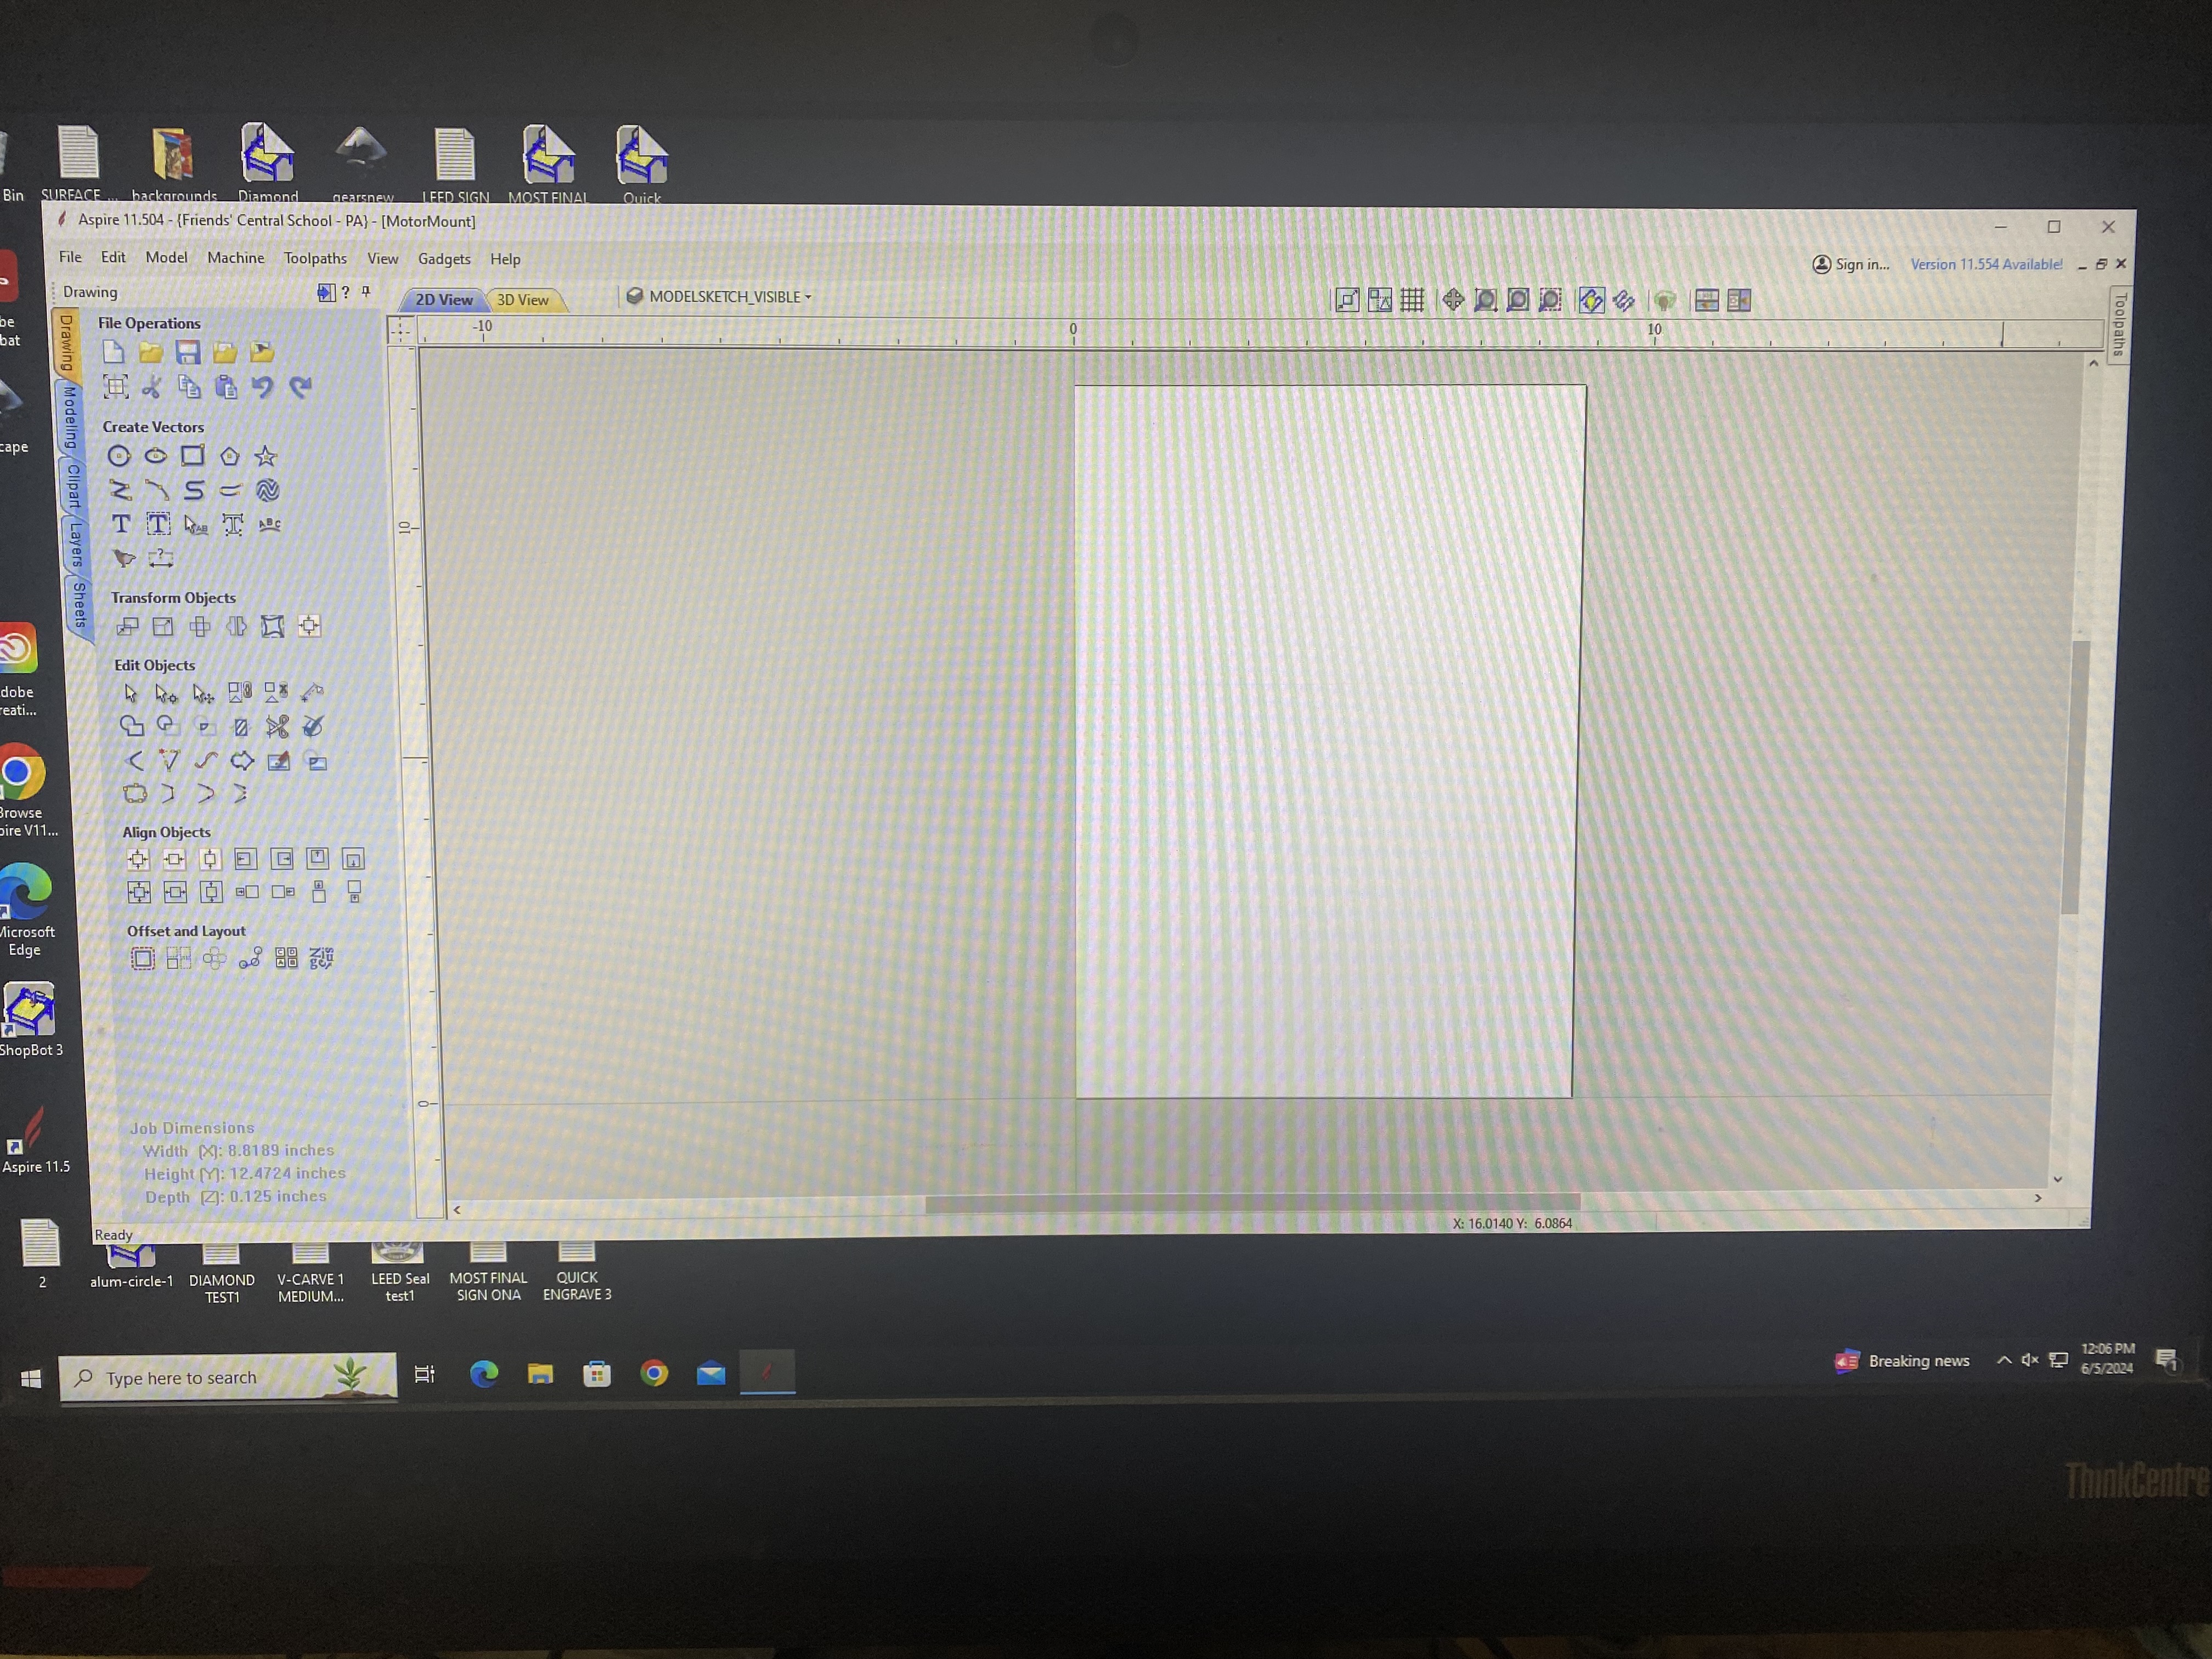
You can import vectors into Aspire by going into Aspire and clicking File > Import… > Import Vectors. You can then import a .svg vector file.

You can also make vectors within Aspire. You can do this by pressing one of the buttons in the “Create Vectors” section of the “Drawing” tab.
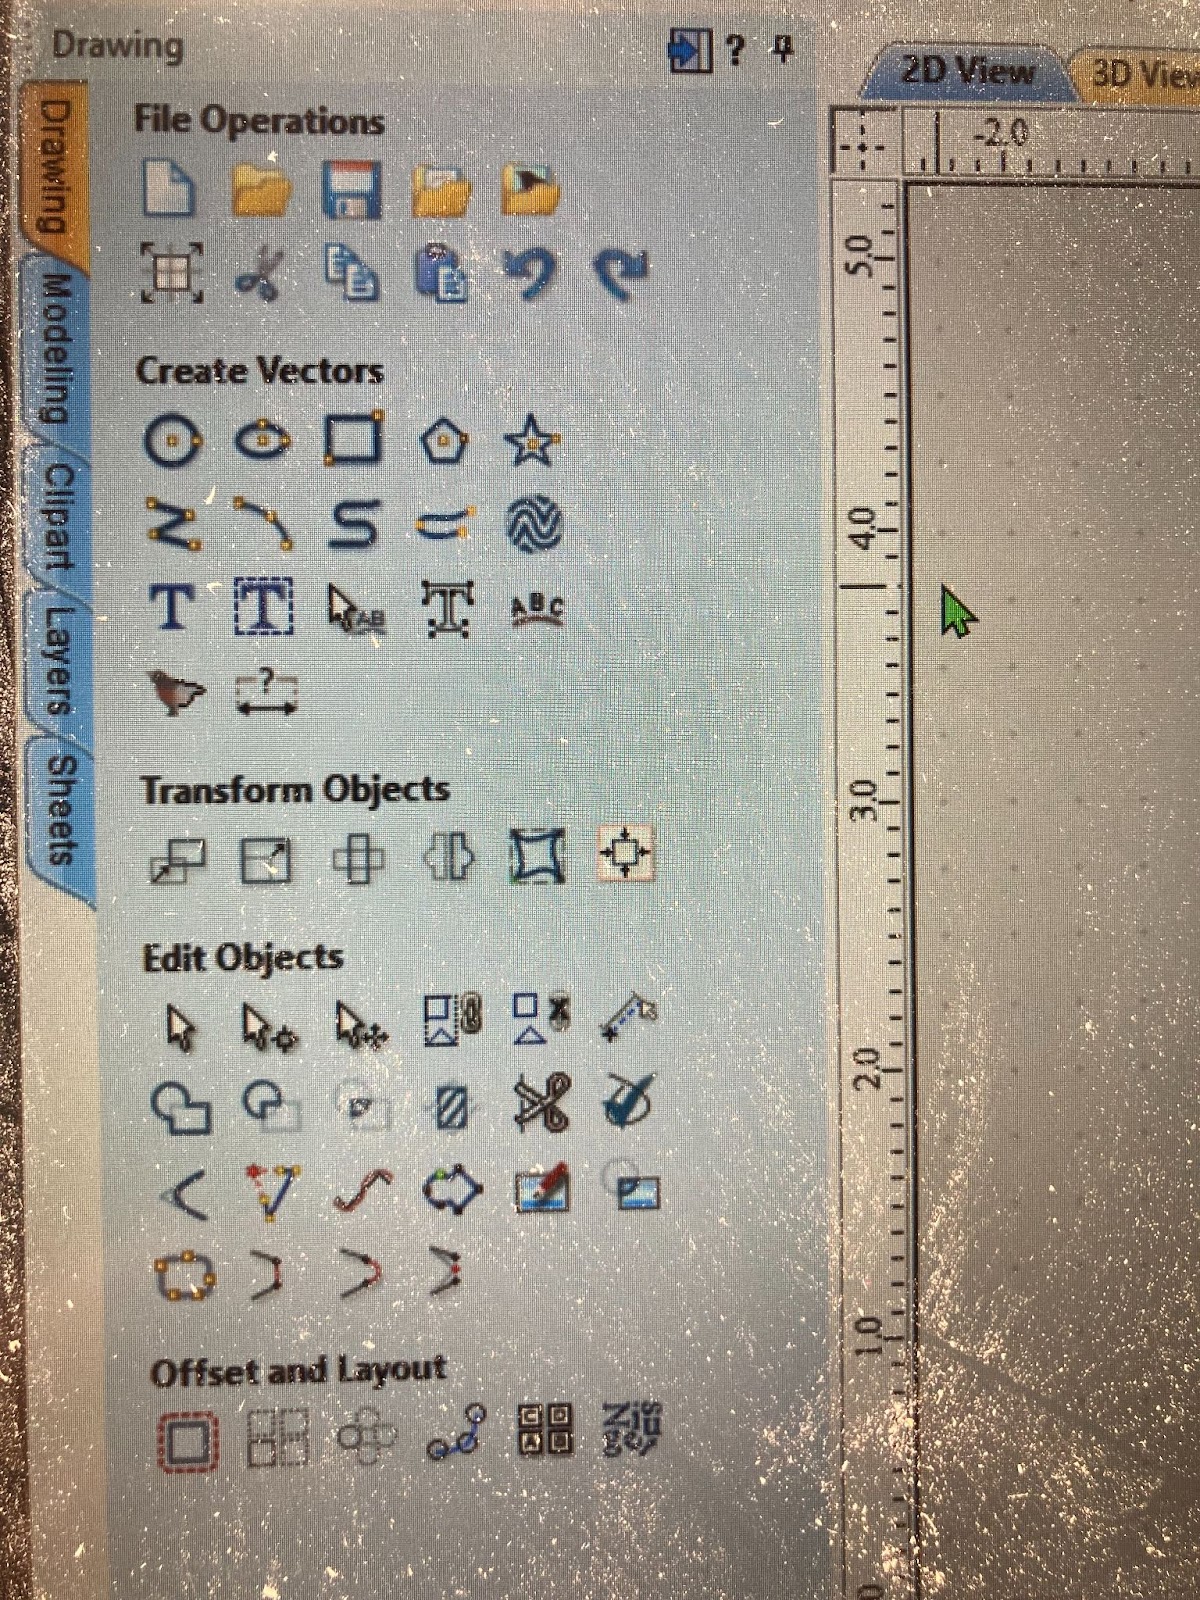
To move things around in Aspire, use “Transform Mode” - the third tool from the left of the “Edit Objects” section of the “Drawing” tab.
You can save Aspire files by pressing File > Save or pressing Ctrl + S. Aspire does not autosave your files, so remember to save them before you close the program.
Once you have uploaded or created your vectors, move to the Creating 2D Paths section.
Path Settings
Once you have your vector file, we will create cut paths for the file.
Once you have the vectors, you need to turn them into toolpaths in order for the shopbot to be able to cut them.
Open the toolpaths tab on the top right corner of Aspire. It will create a menu on the right side.
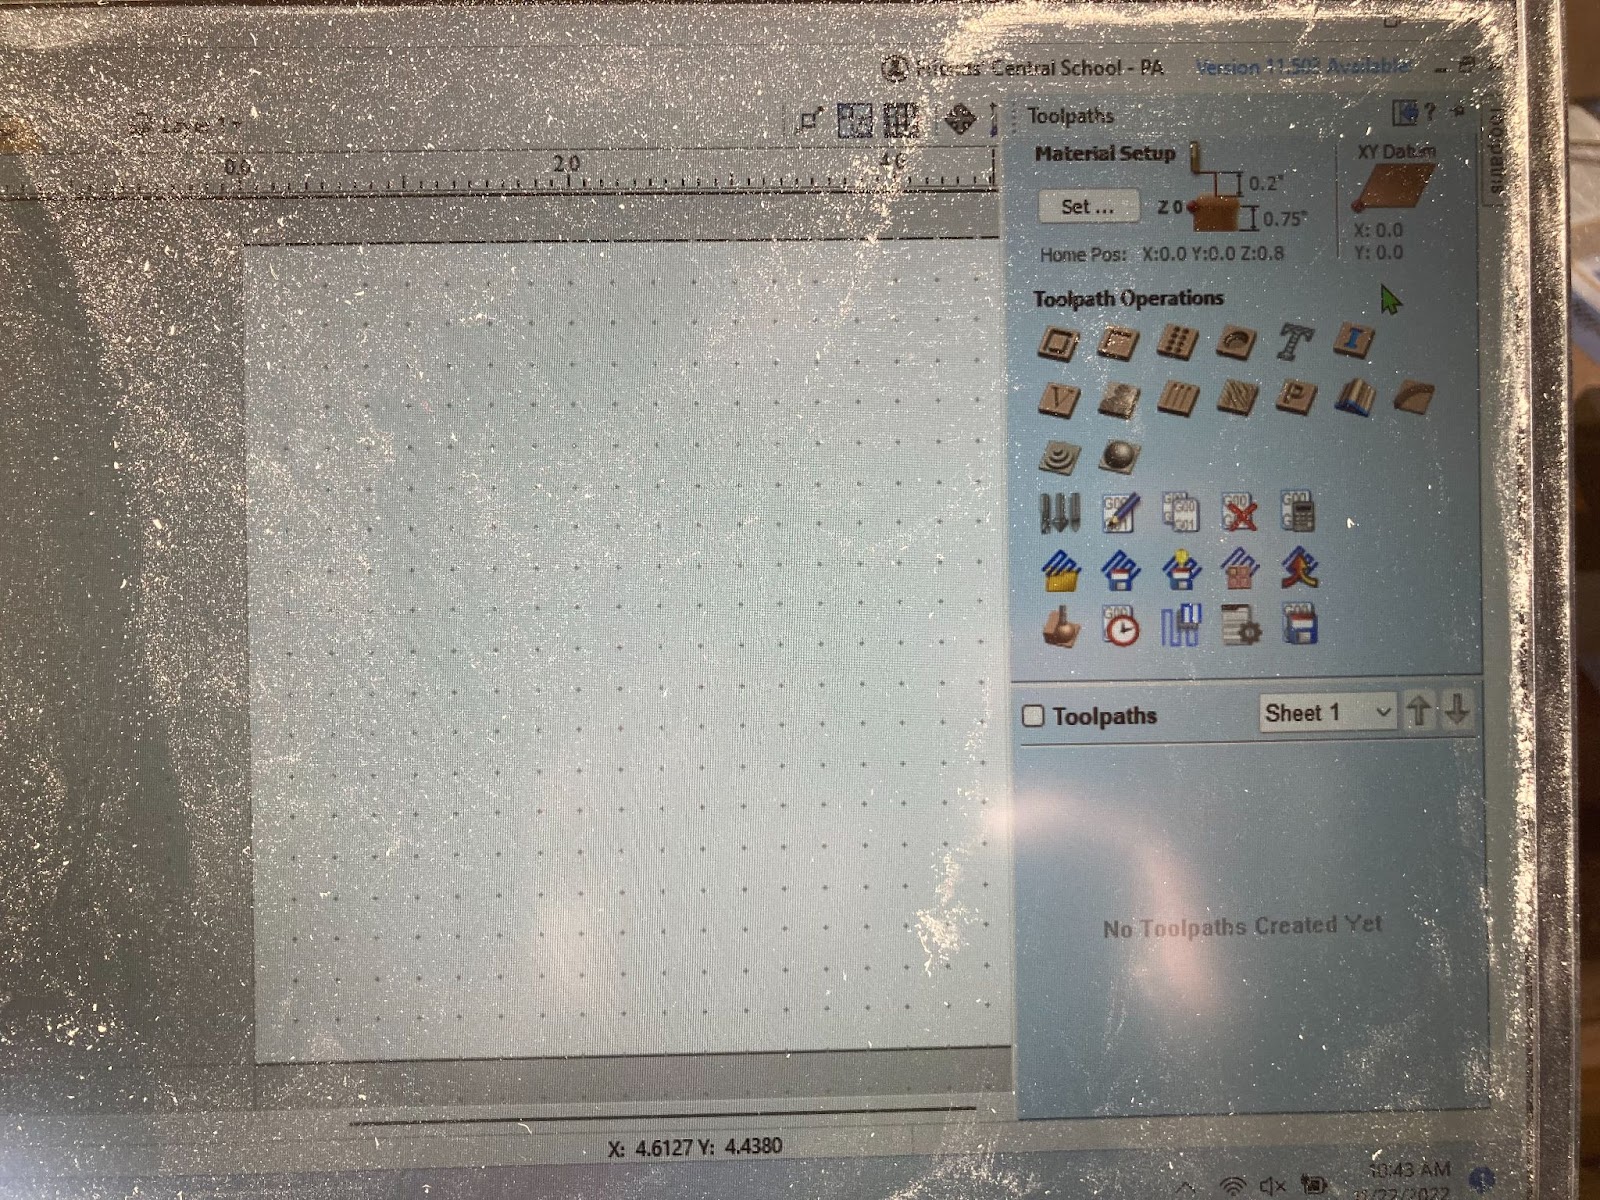
Pin this menu by clicking the pin button in the top right corner of the menu that opens up so it’s easier to access.

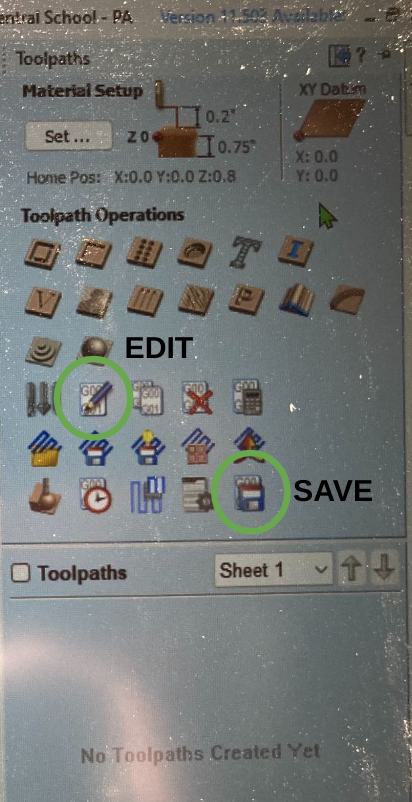
To create a toolpath: first, select the vector that you would like to turn into a toolpath. Then, press one of the buttons in “Toolpath Operations” that look like wood (in the top three rows). This will make a toolpath out of the selected vector. There are some settings that you will have to adjust in the menu that appears.
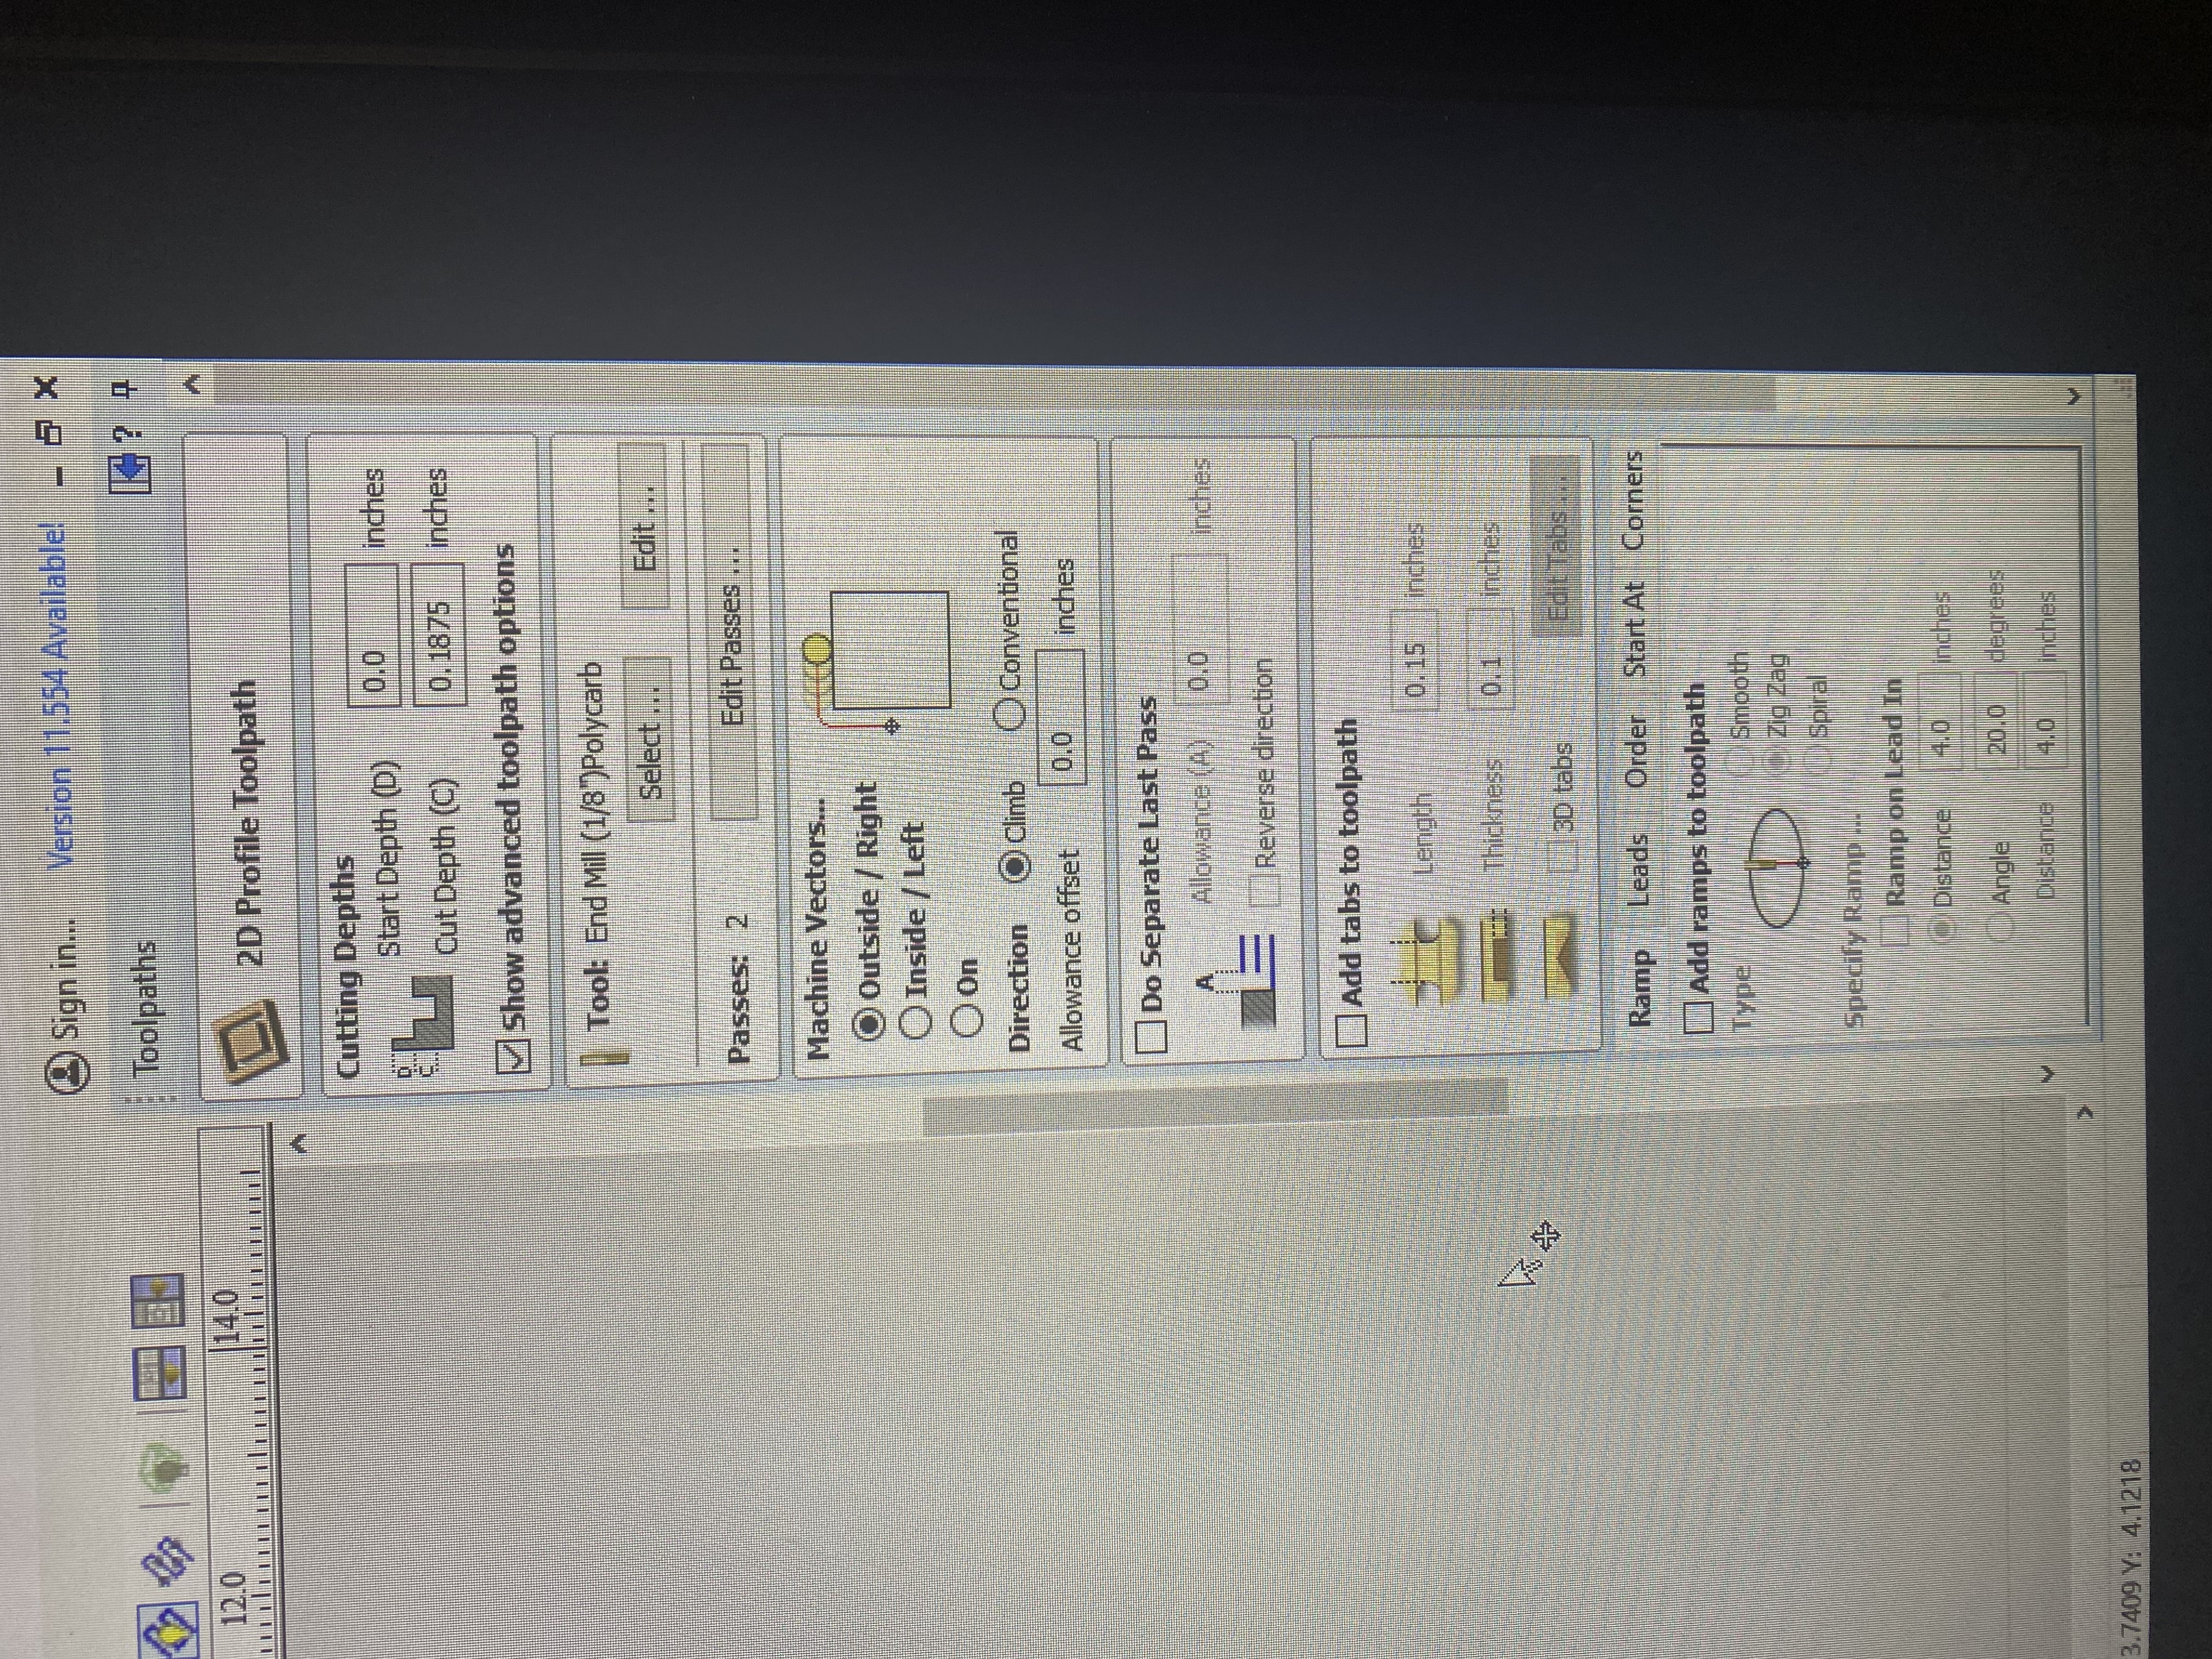
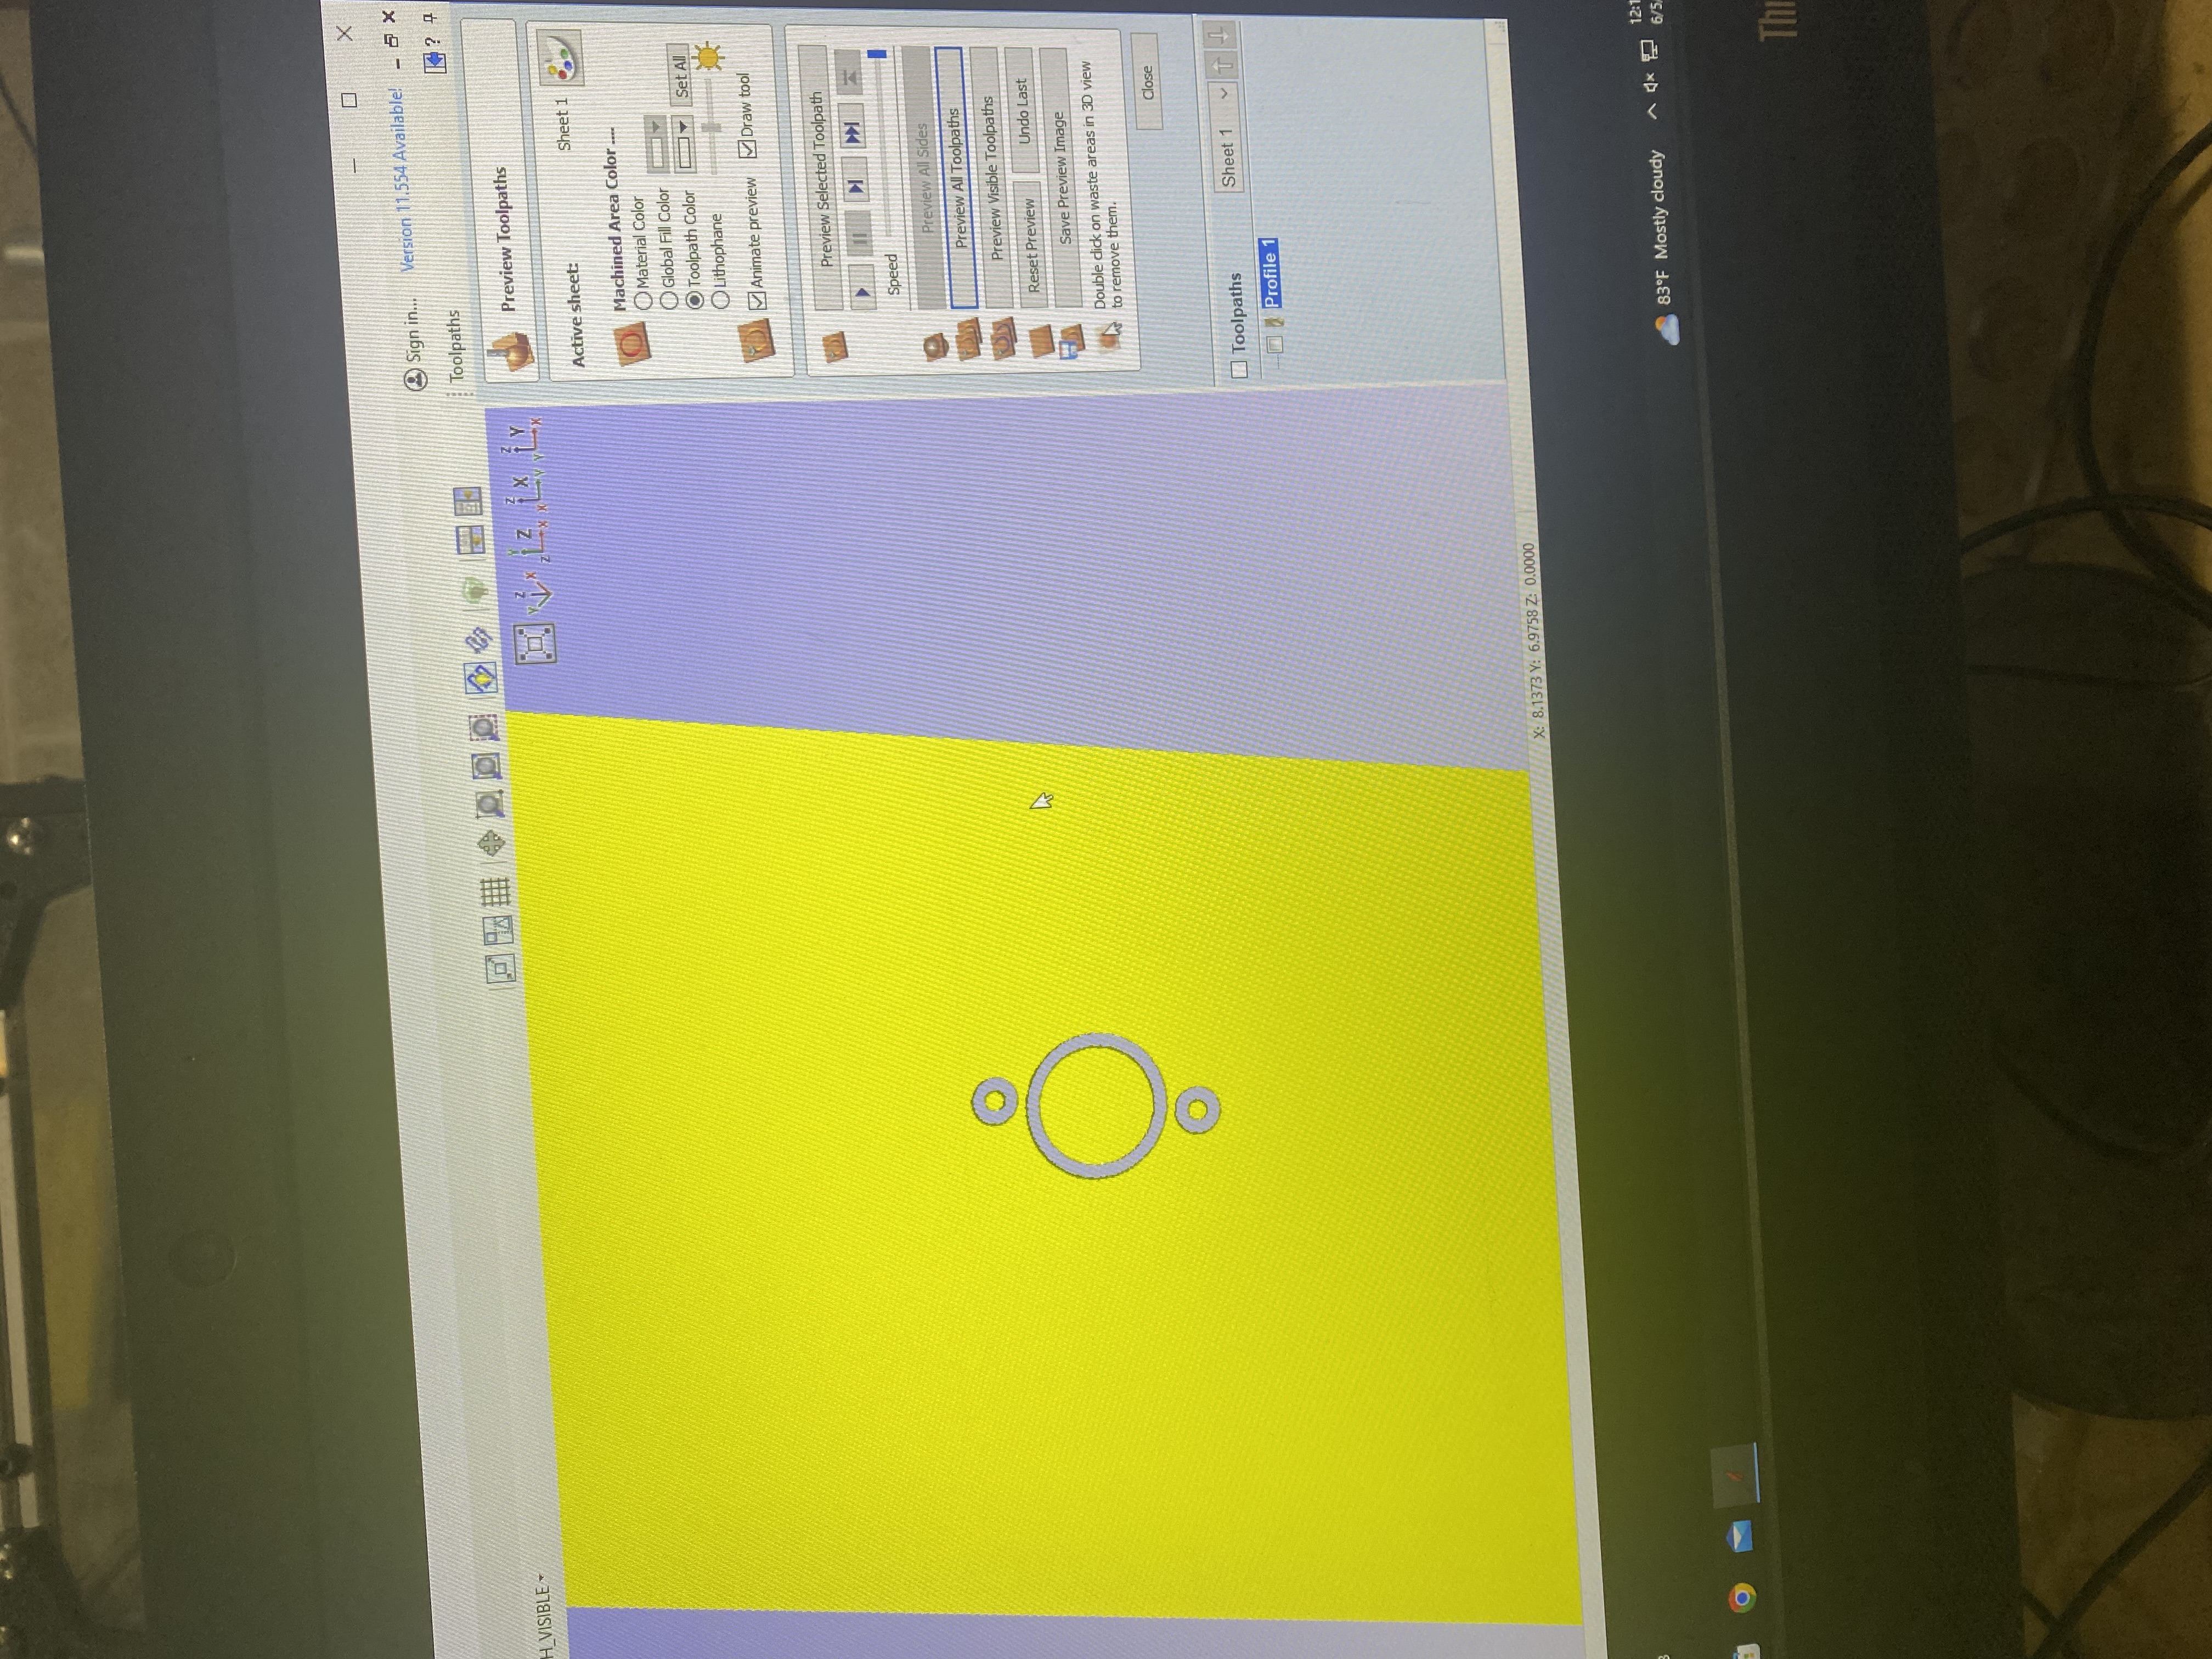
When the settings are correct, scroll down to the bottom of the tab with the scrollbar on the right and click the Calculate button to finish making the toolpath. This will display a preview of your cuts. Hit Clear Preview and then Preview all Paths to see what the paths will carve.
Repeat this step with each vector part to create all of the toolpaths.
If you want to edit a toolpath, press the Edit Toolpaths button. To delete a toolpath, right click it in the toolpaths section below and press delete > this.
When you are done with creating and editing the toolpaths, export them by pressing the Save Toolpaths button. Make sure the toolpaths you want to export have the checkmark next to them checked.
In the menu that appears after clicking the Save Toolpaths button, make sure these settings are selected:
- Visible toolpaths to one file
- Machine: CID Shopbot
- Post Processor: ShopBot TC (inch)(`.sbp)
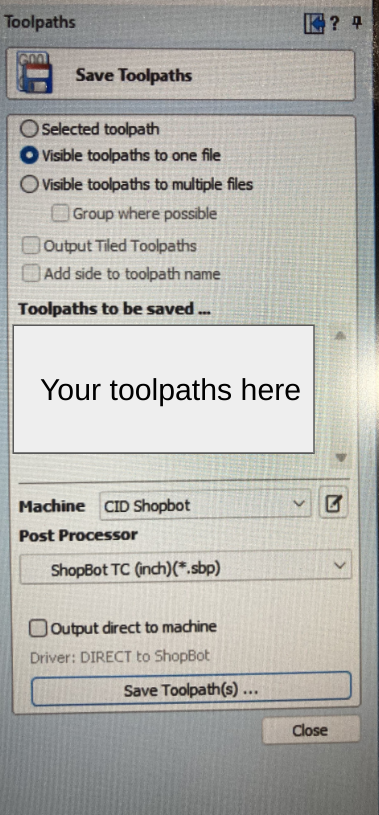
Then press the Save Toolpath(s) … button at the bottom.
This will export your toolpaths as a .sbp file.
Once you have done this, move to the Securing Material page.
3D Cutting
The CNC machine has some good options for cutting simple but large 3D parts. Careful use of the settings is important here to get good results. Use these guides for 3D file setup:
Subsections of 3D Cutting
Uploading Files
To begin to create a 3D part, meaning any shape that is not a flat design or simple prism, you will want to create the file outside of Aspire first. There is some modeling functionality in Aspire but it will be much easier to create the part with a different software.Once you have your 3d part created, export it as an .obj or .stl file.
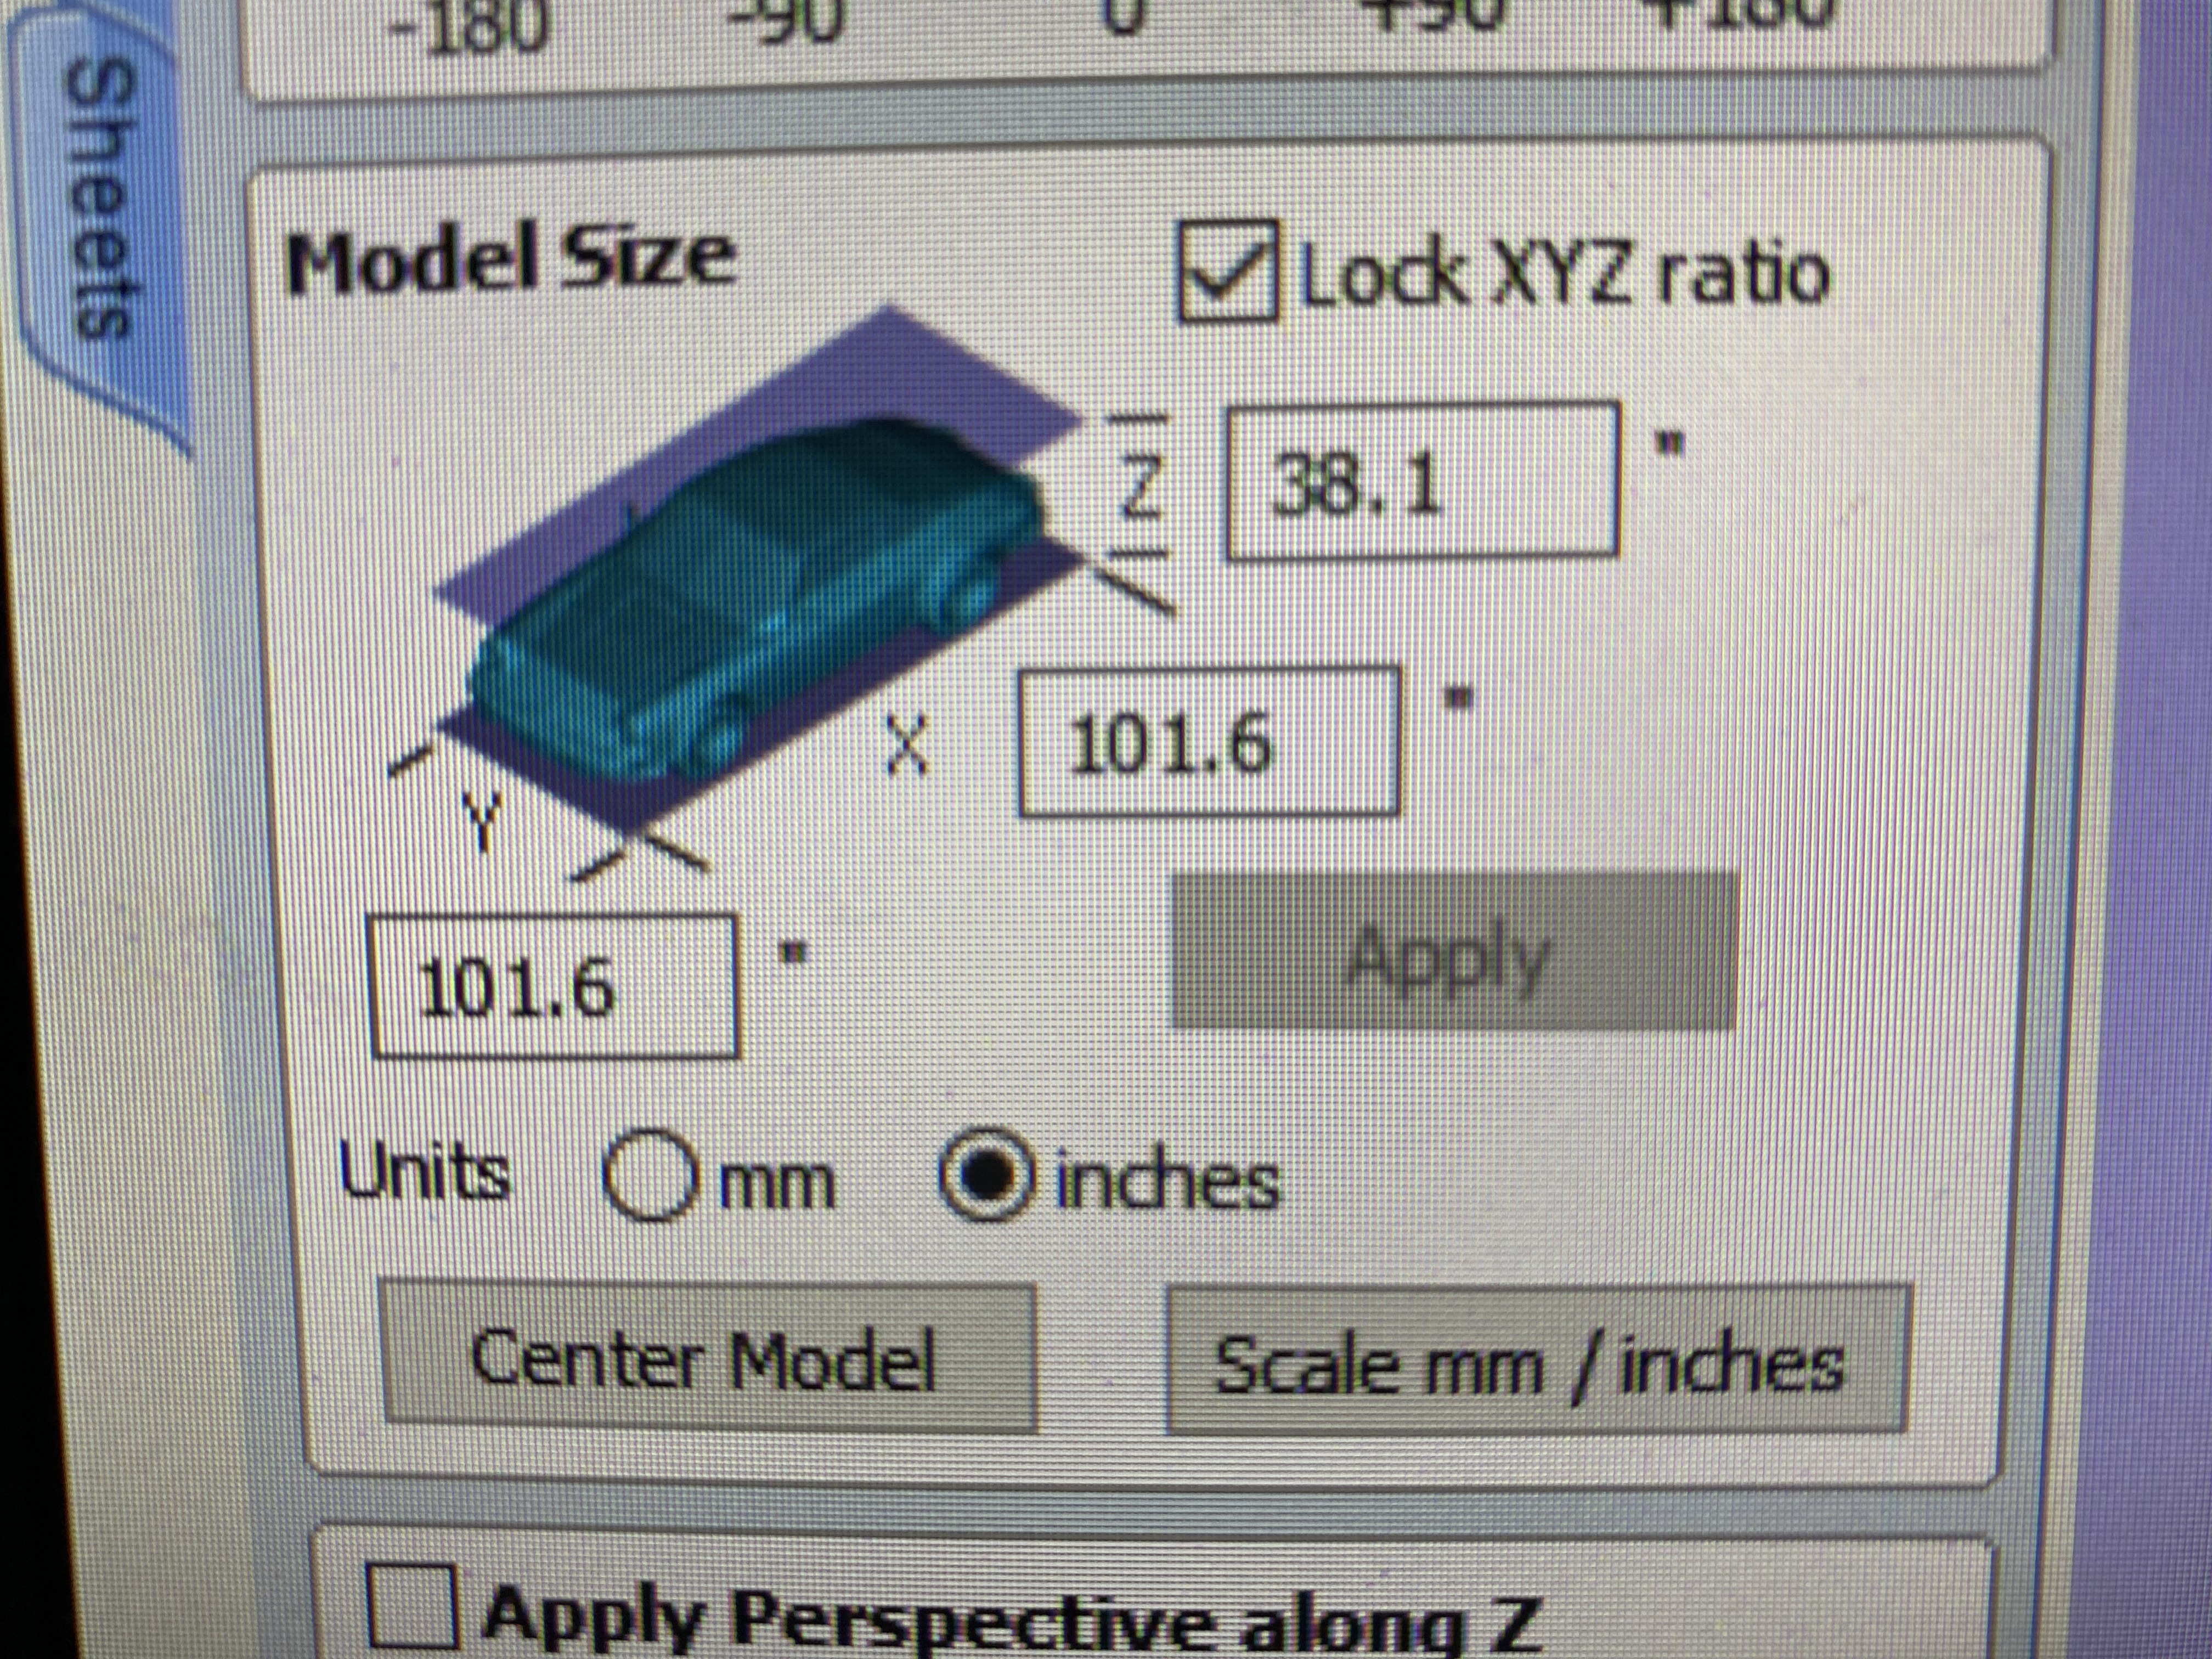
Once you have your file, open it with Aspire, edit the job settings as you would with a 2d part, and you will have your file, likely much larger than you intended.
To fix this you should change the dimensions in the options box that appears on the side of the screen.
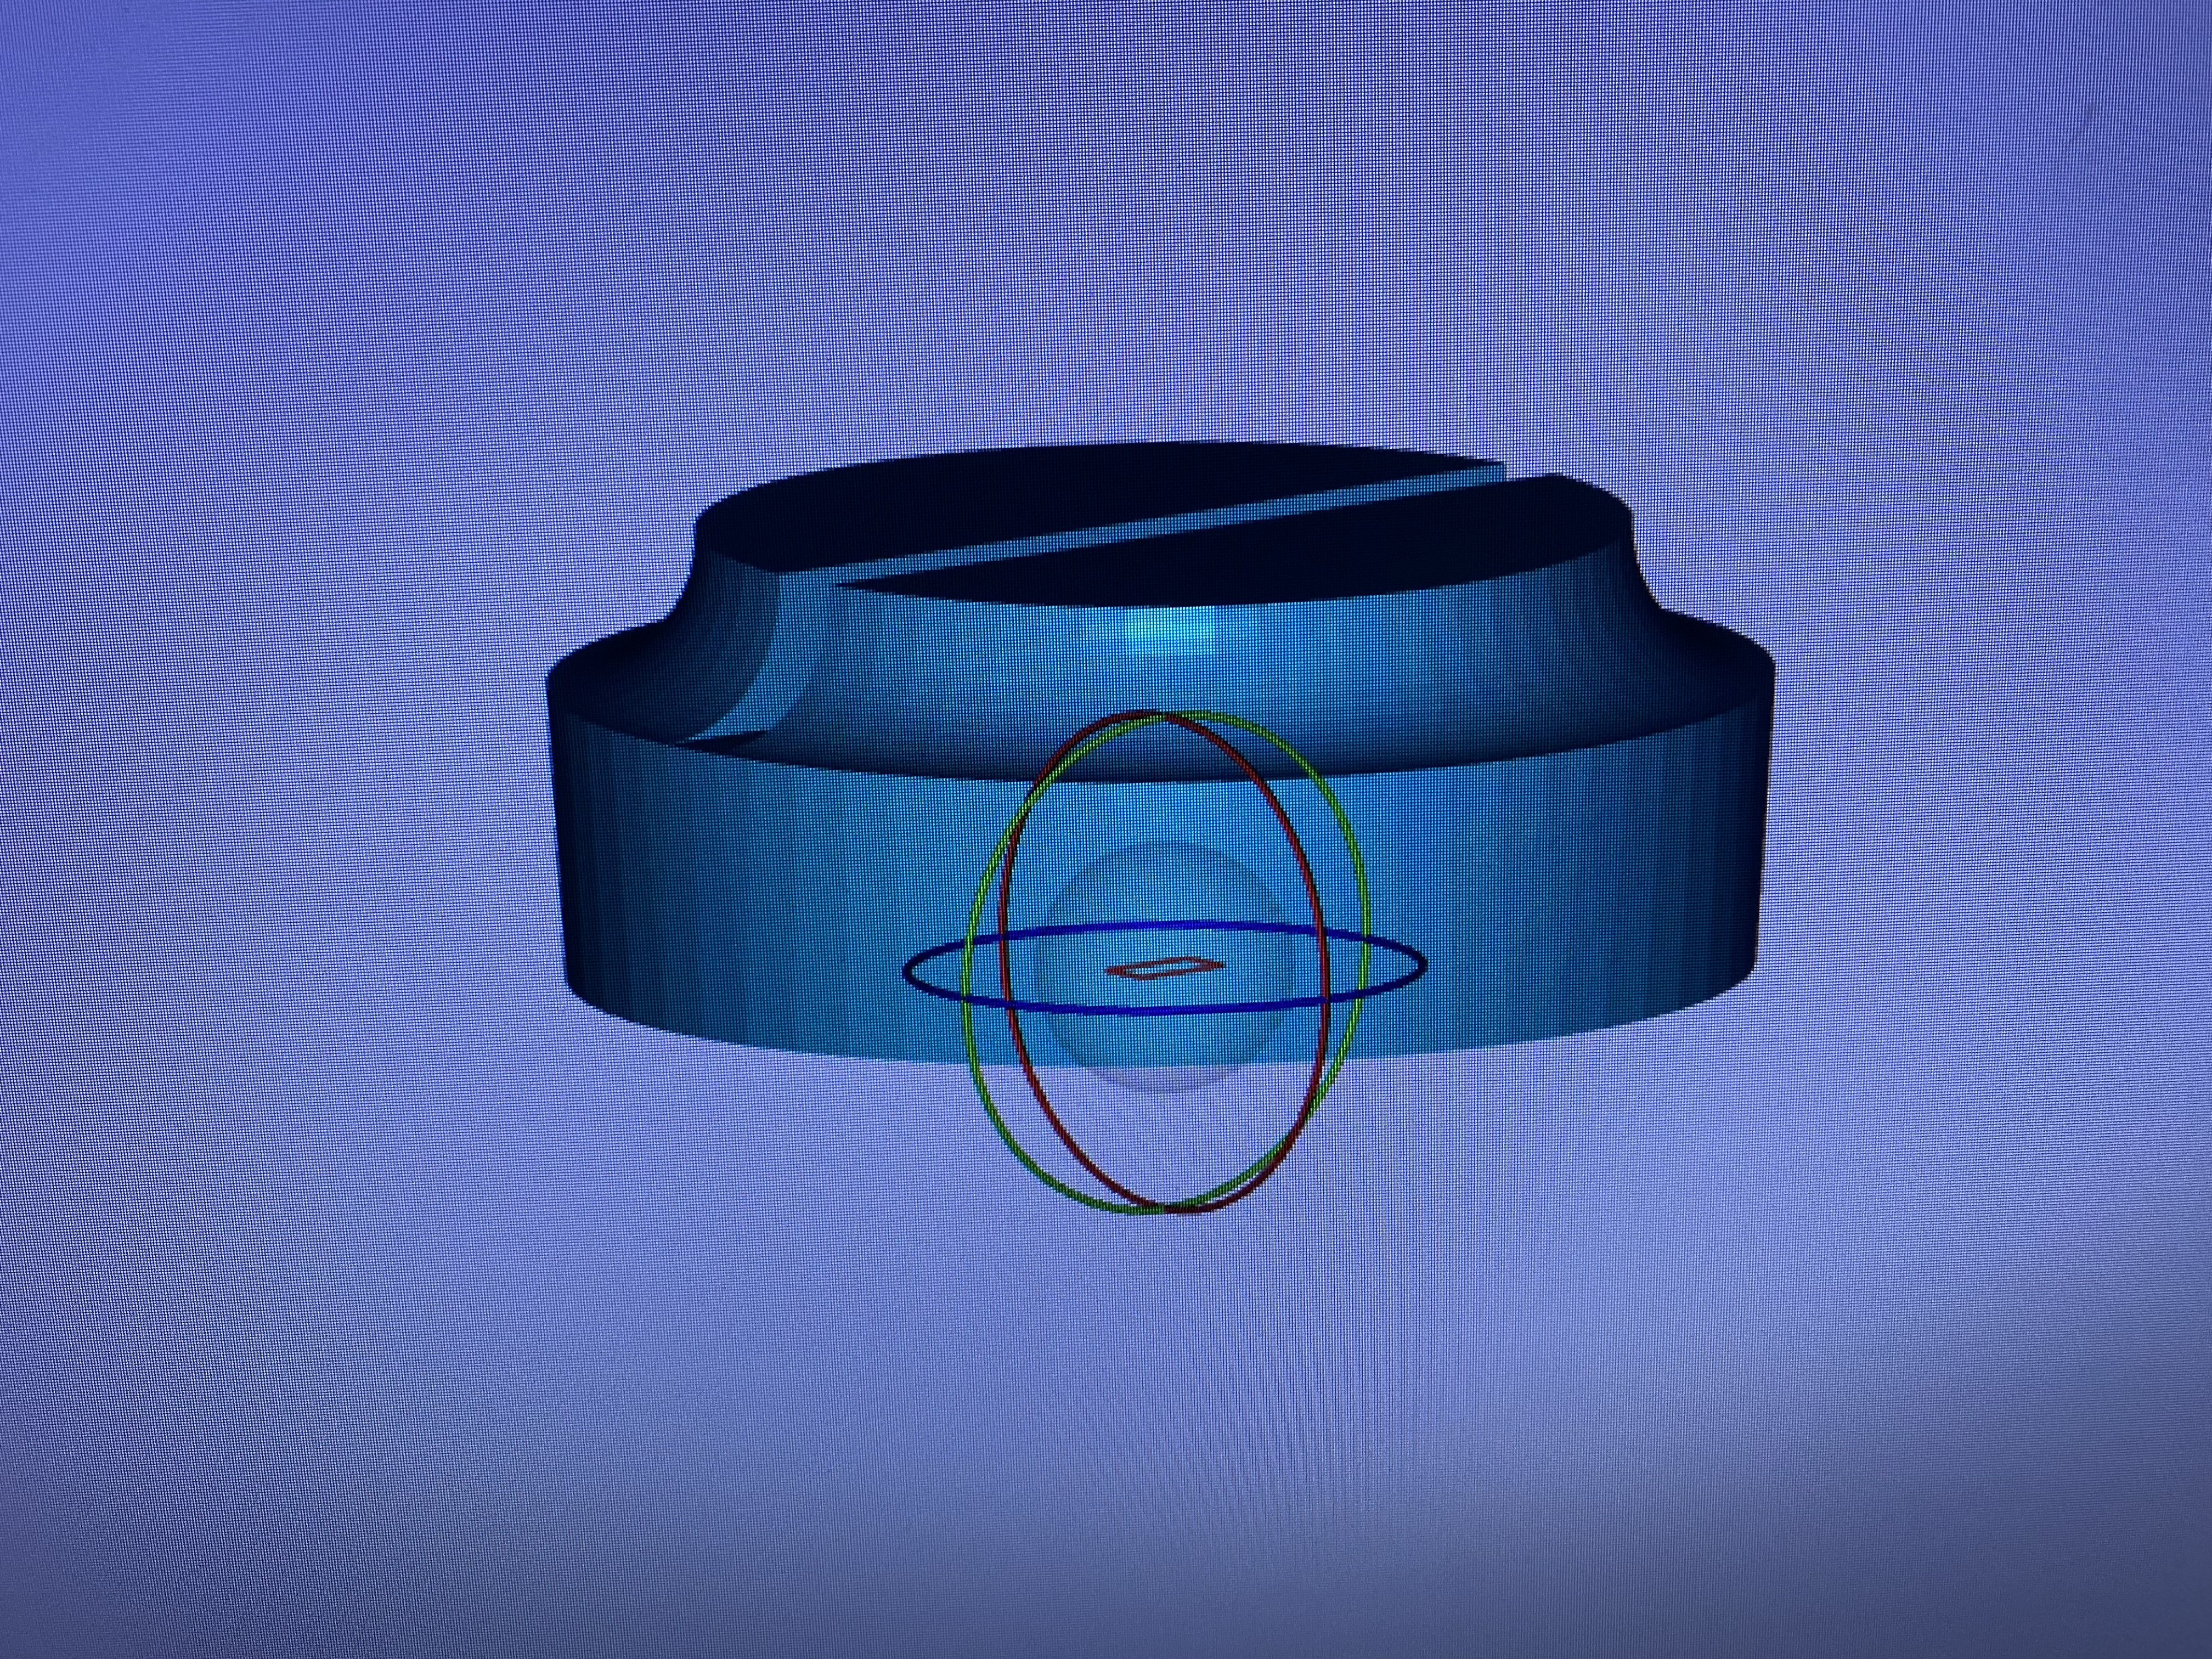
Within this box you can also rotate it with the profile buttons and the boxes for rotation. Keep in mind that the Shopbot can only cut downwards and not to the side, so keep in mind how your model is oriented and you will have all of the holes you intended.
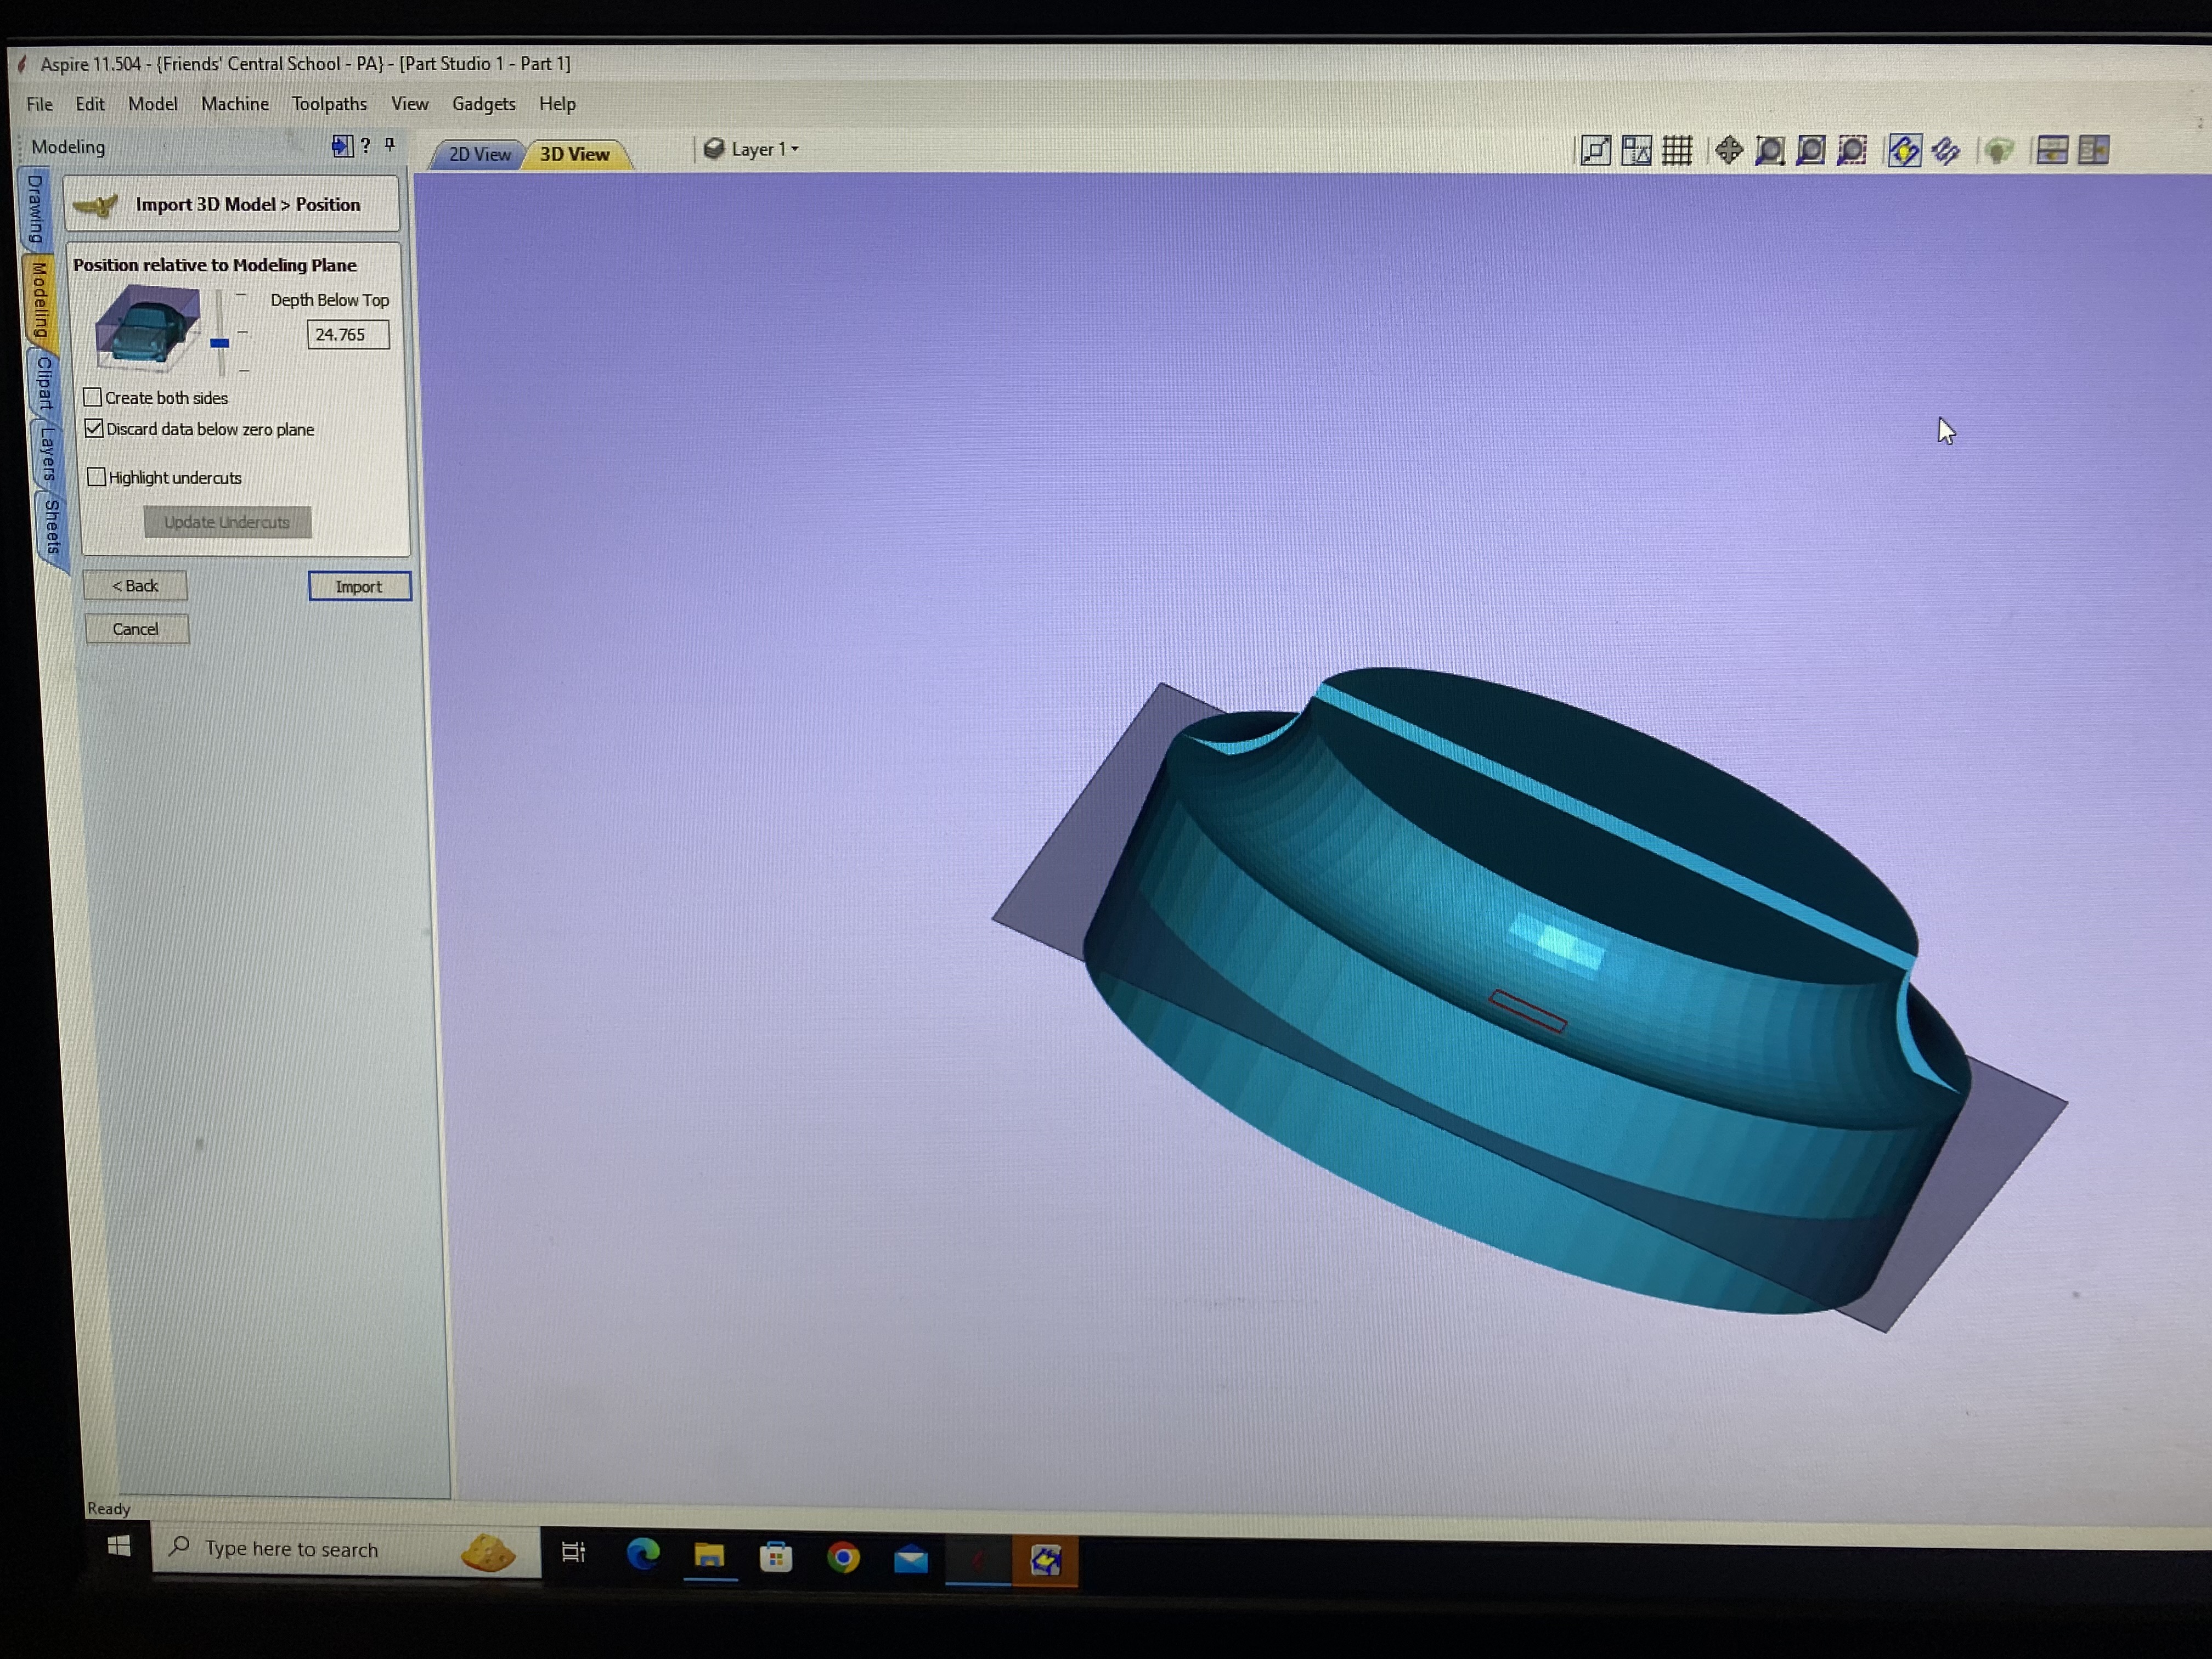
When you are satisfied hit the Position And Import button.
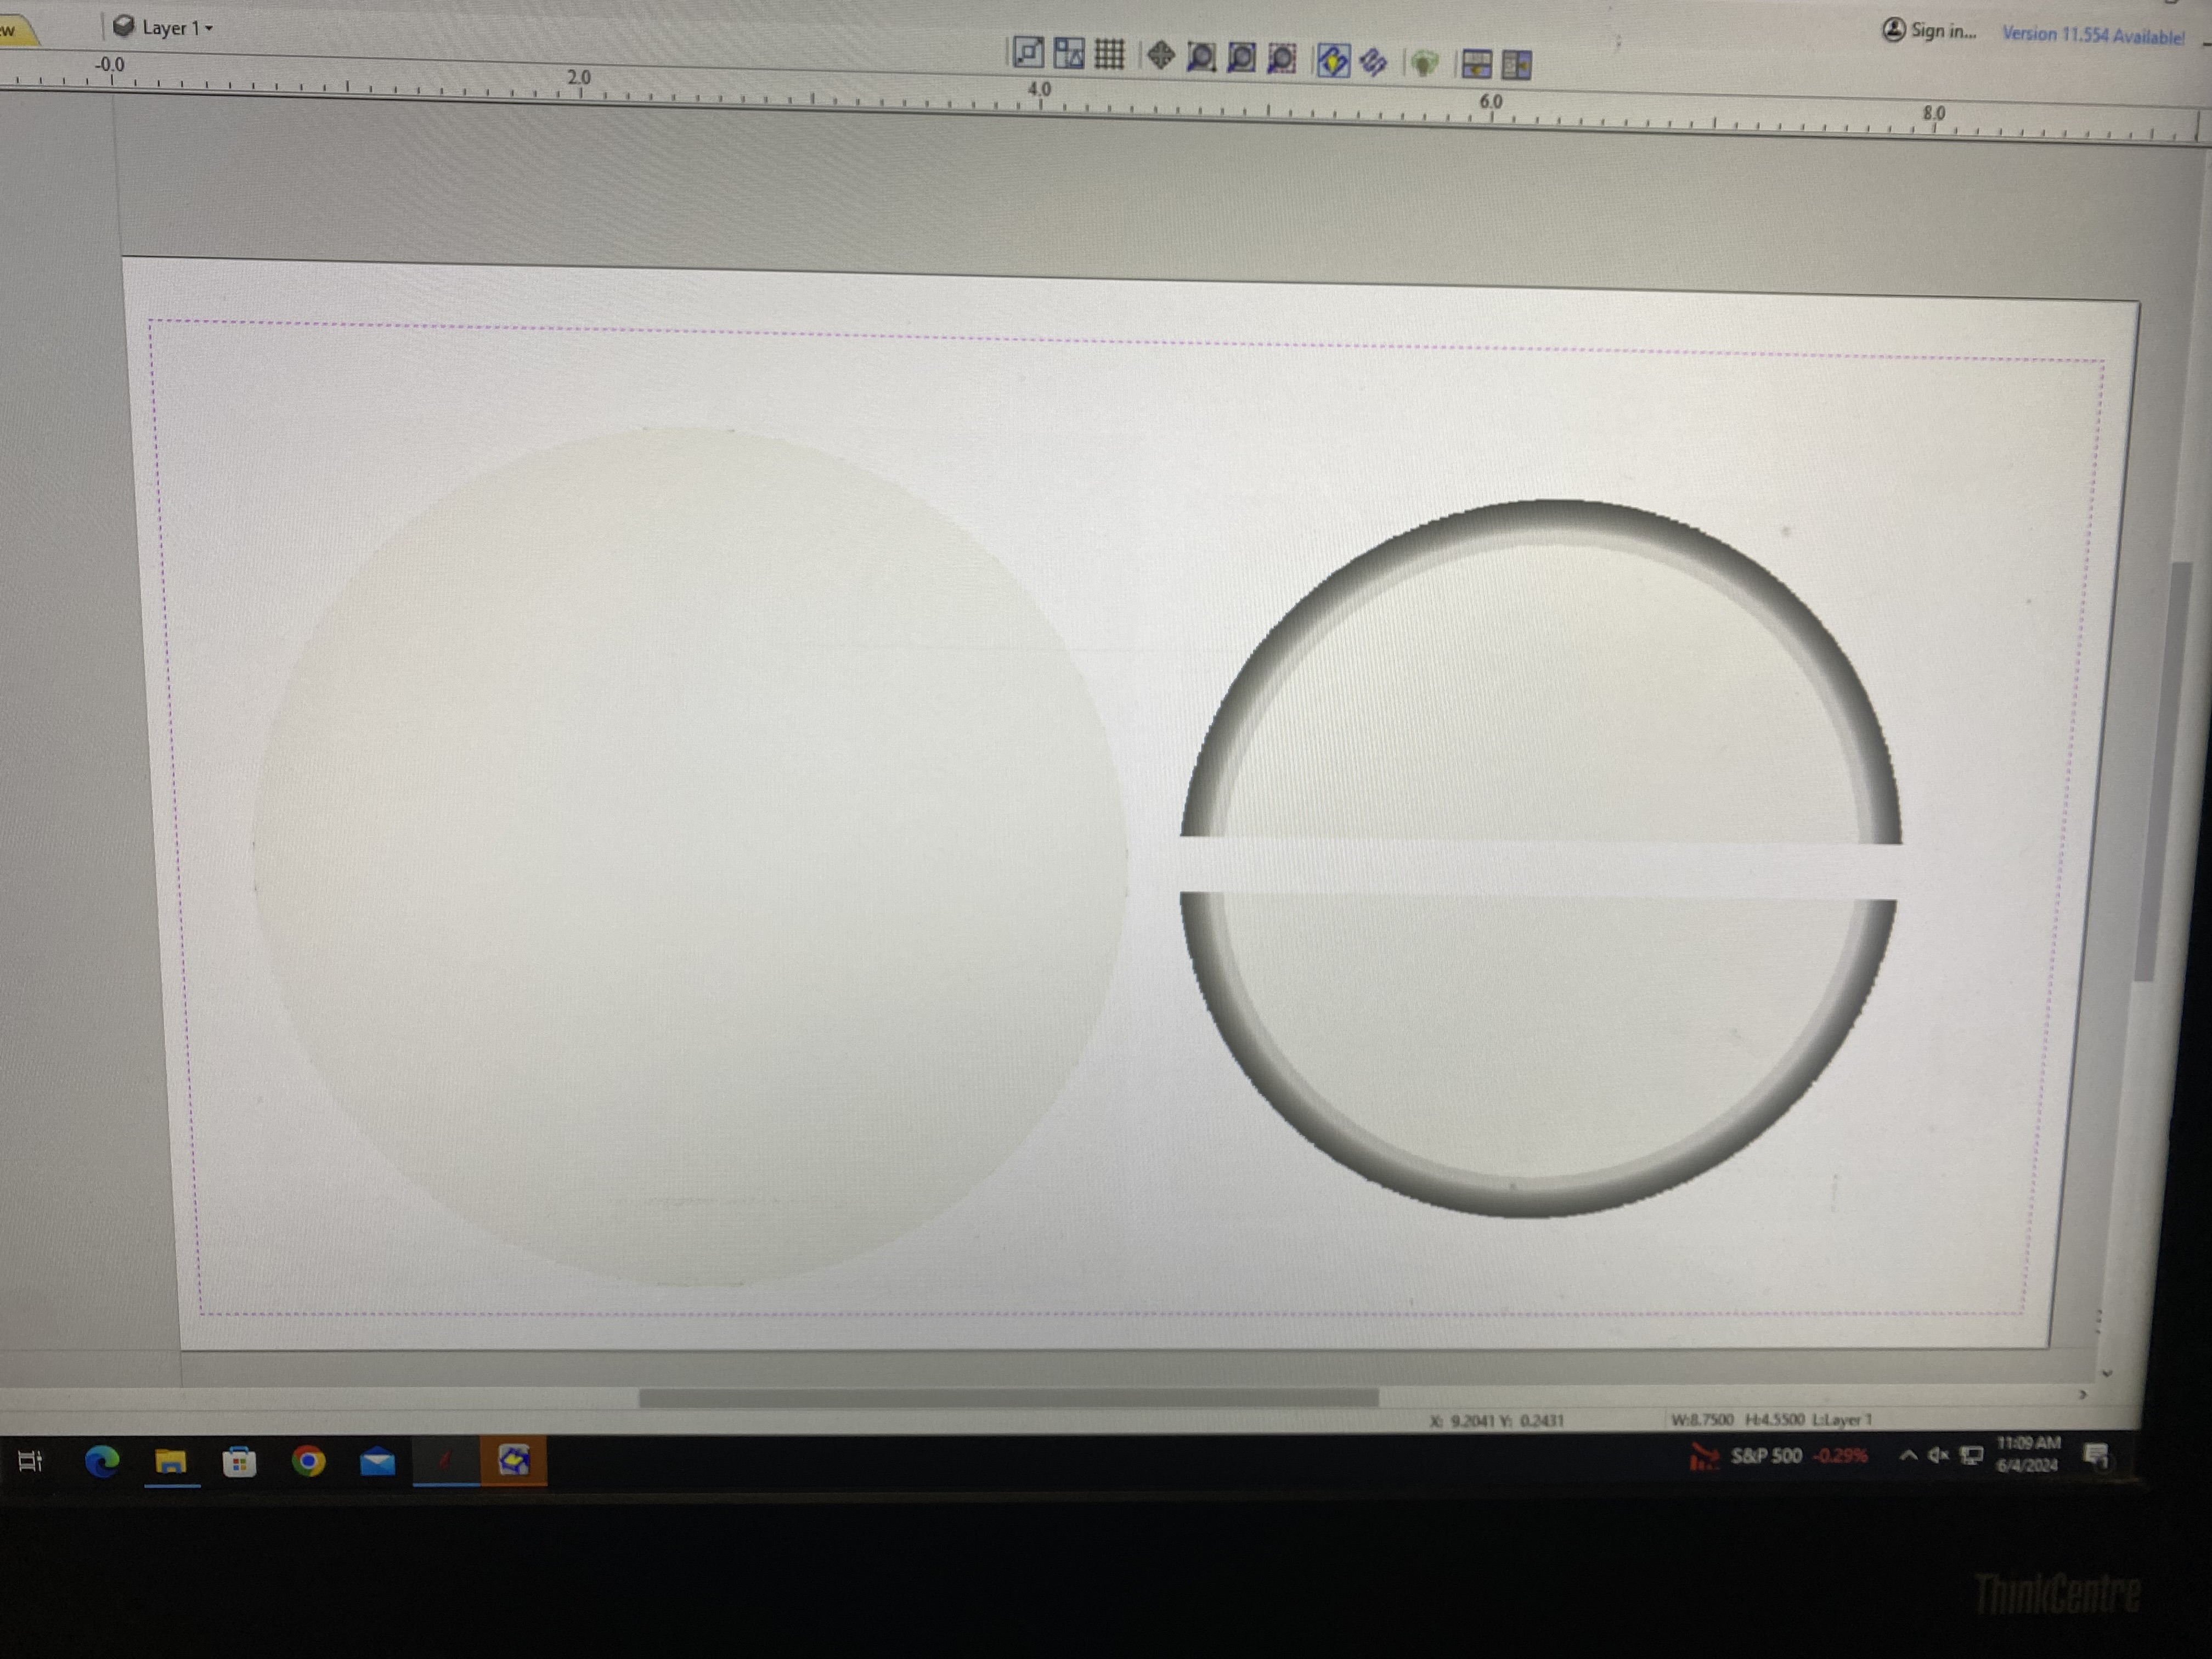
Since the Shopbot cannot cut both the top and bottom of a piece at the same time, it will cut the top and bottom halves separately. You can adjust this by changing the number in the second option box.
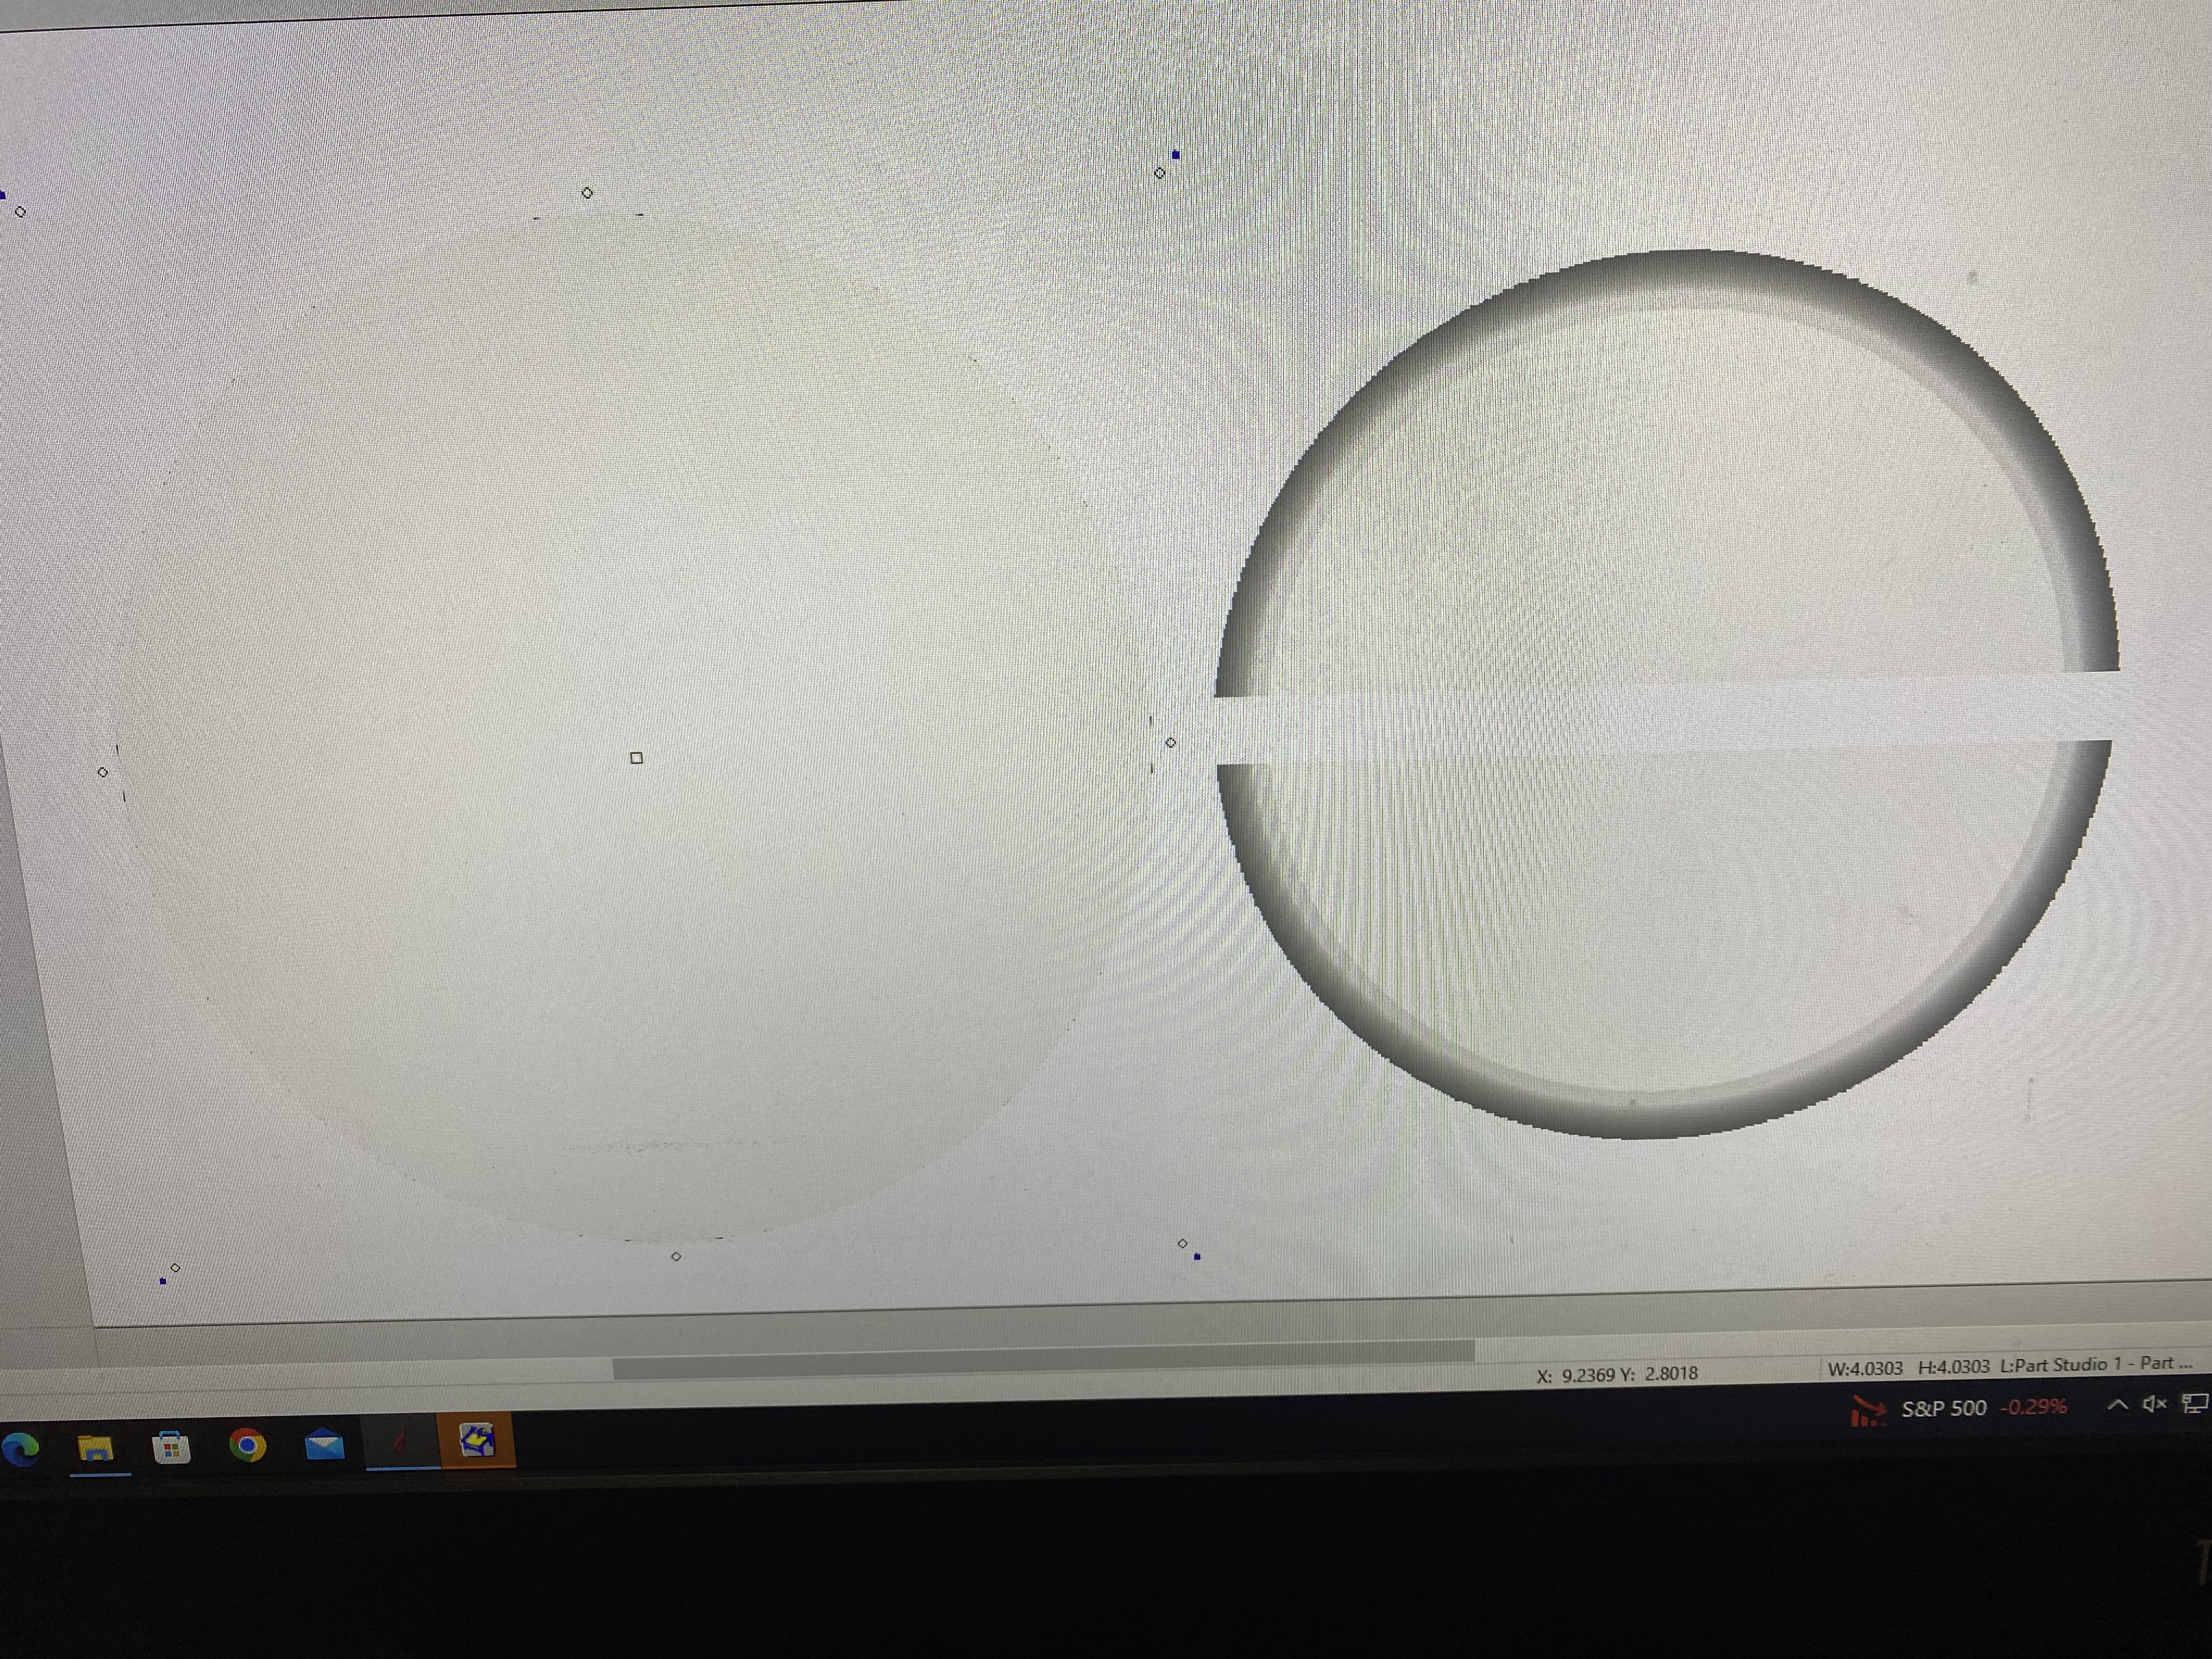
When you do that, the models will appear on top of each other in the 2d view, choose the move tool (cursor with a cross) and move one of the 2 objects away so they do not overlap.
Next go to the drawing tools and get the rectangle tool. Create a rectangle around both of your parts.
Then move to the Smooth and Rough Carving section.
Smooth and Rough Carves
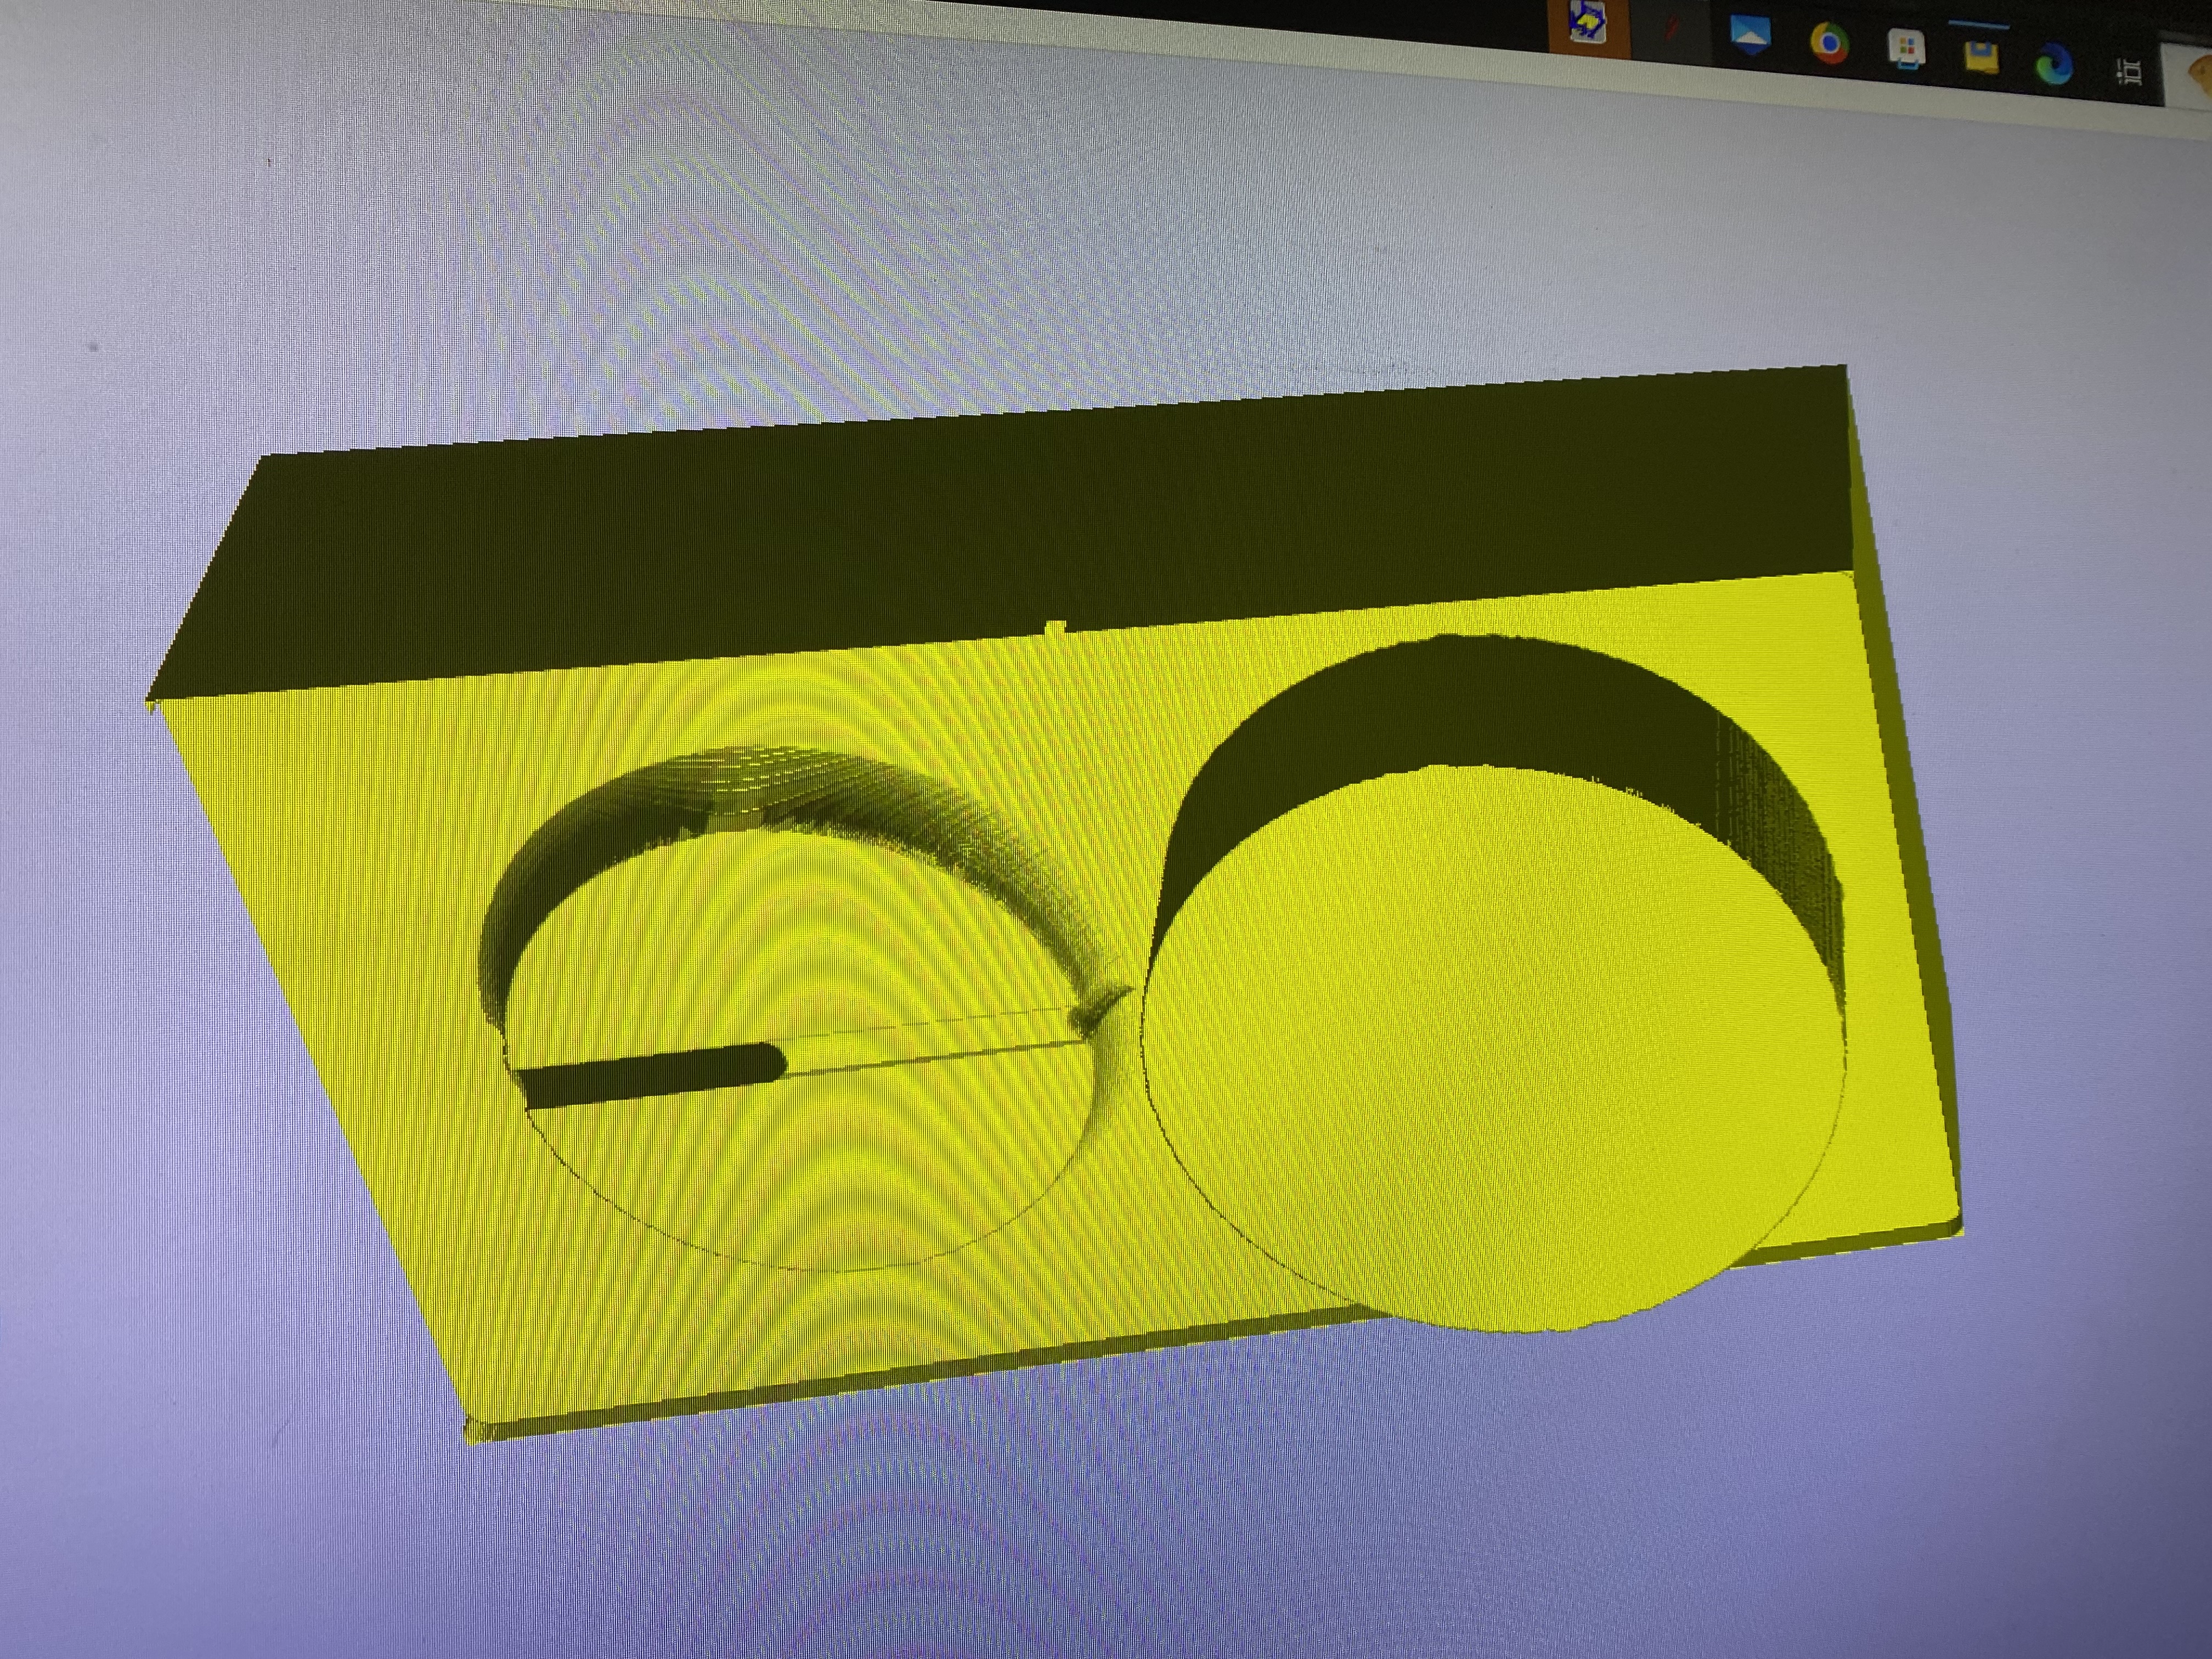
Once you have your file set up correctly, select both of your pieces and the rectangle around them and select the rough machining toolpath.
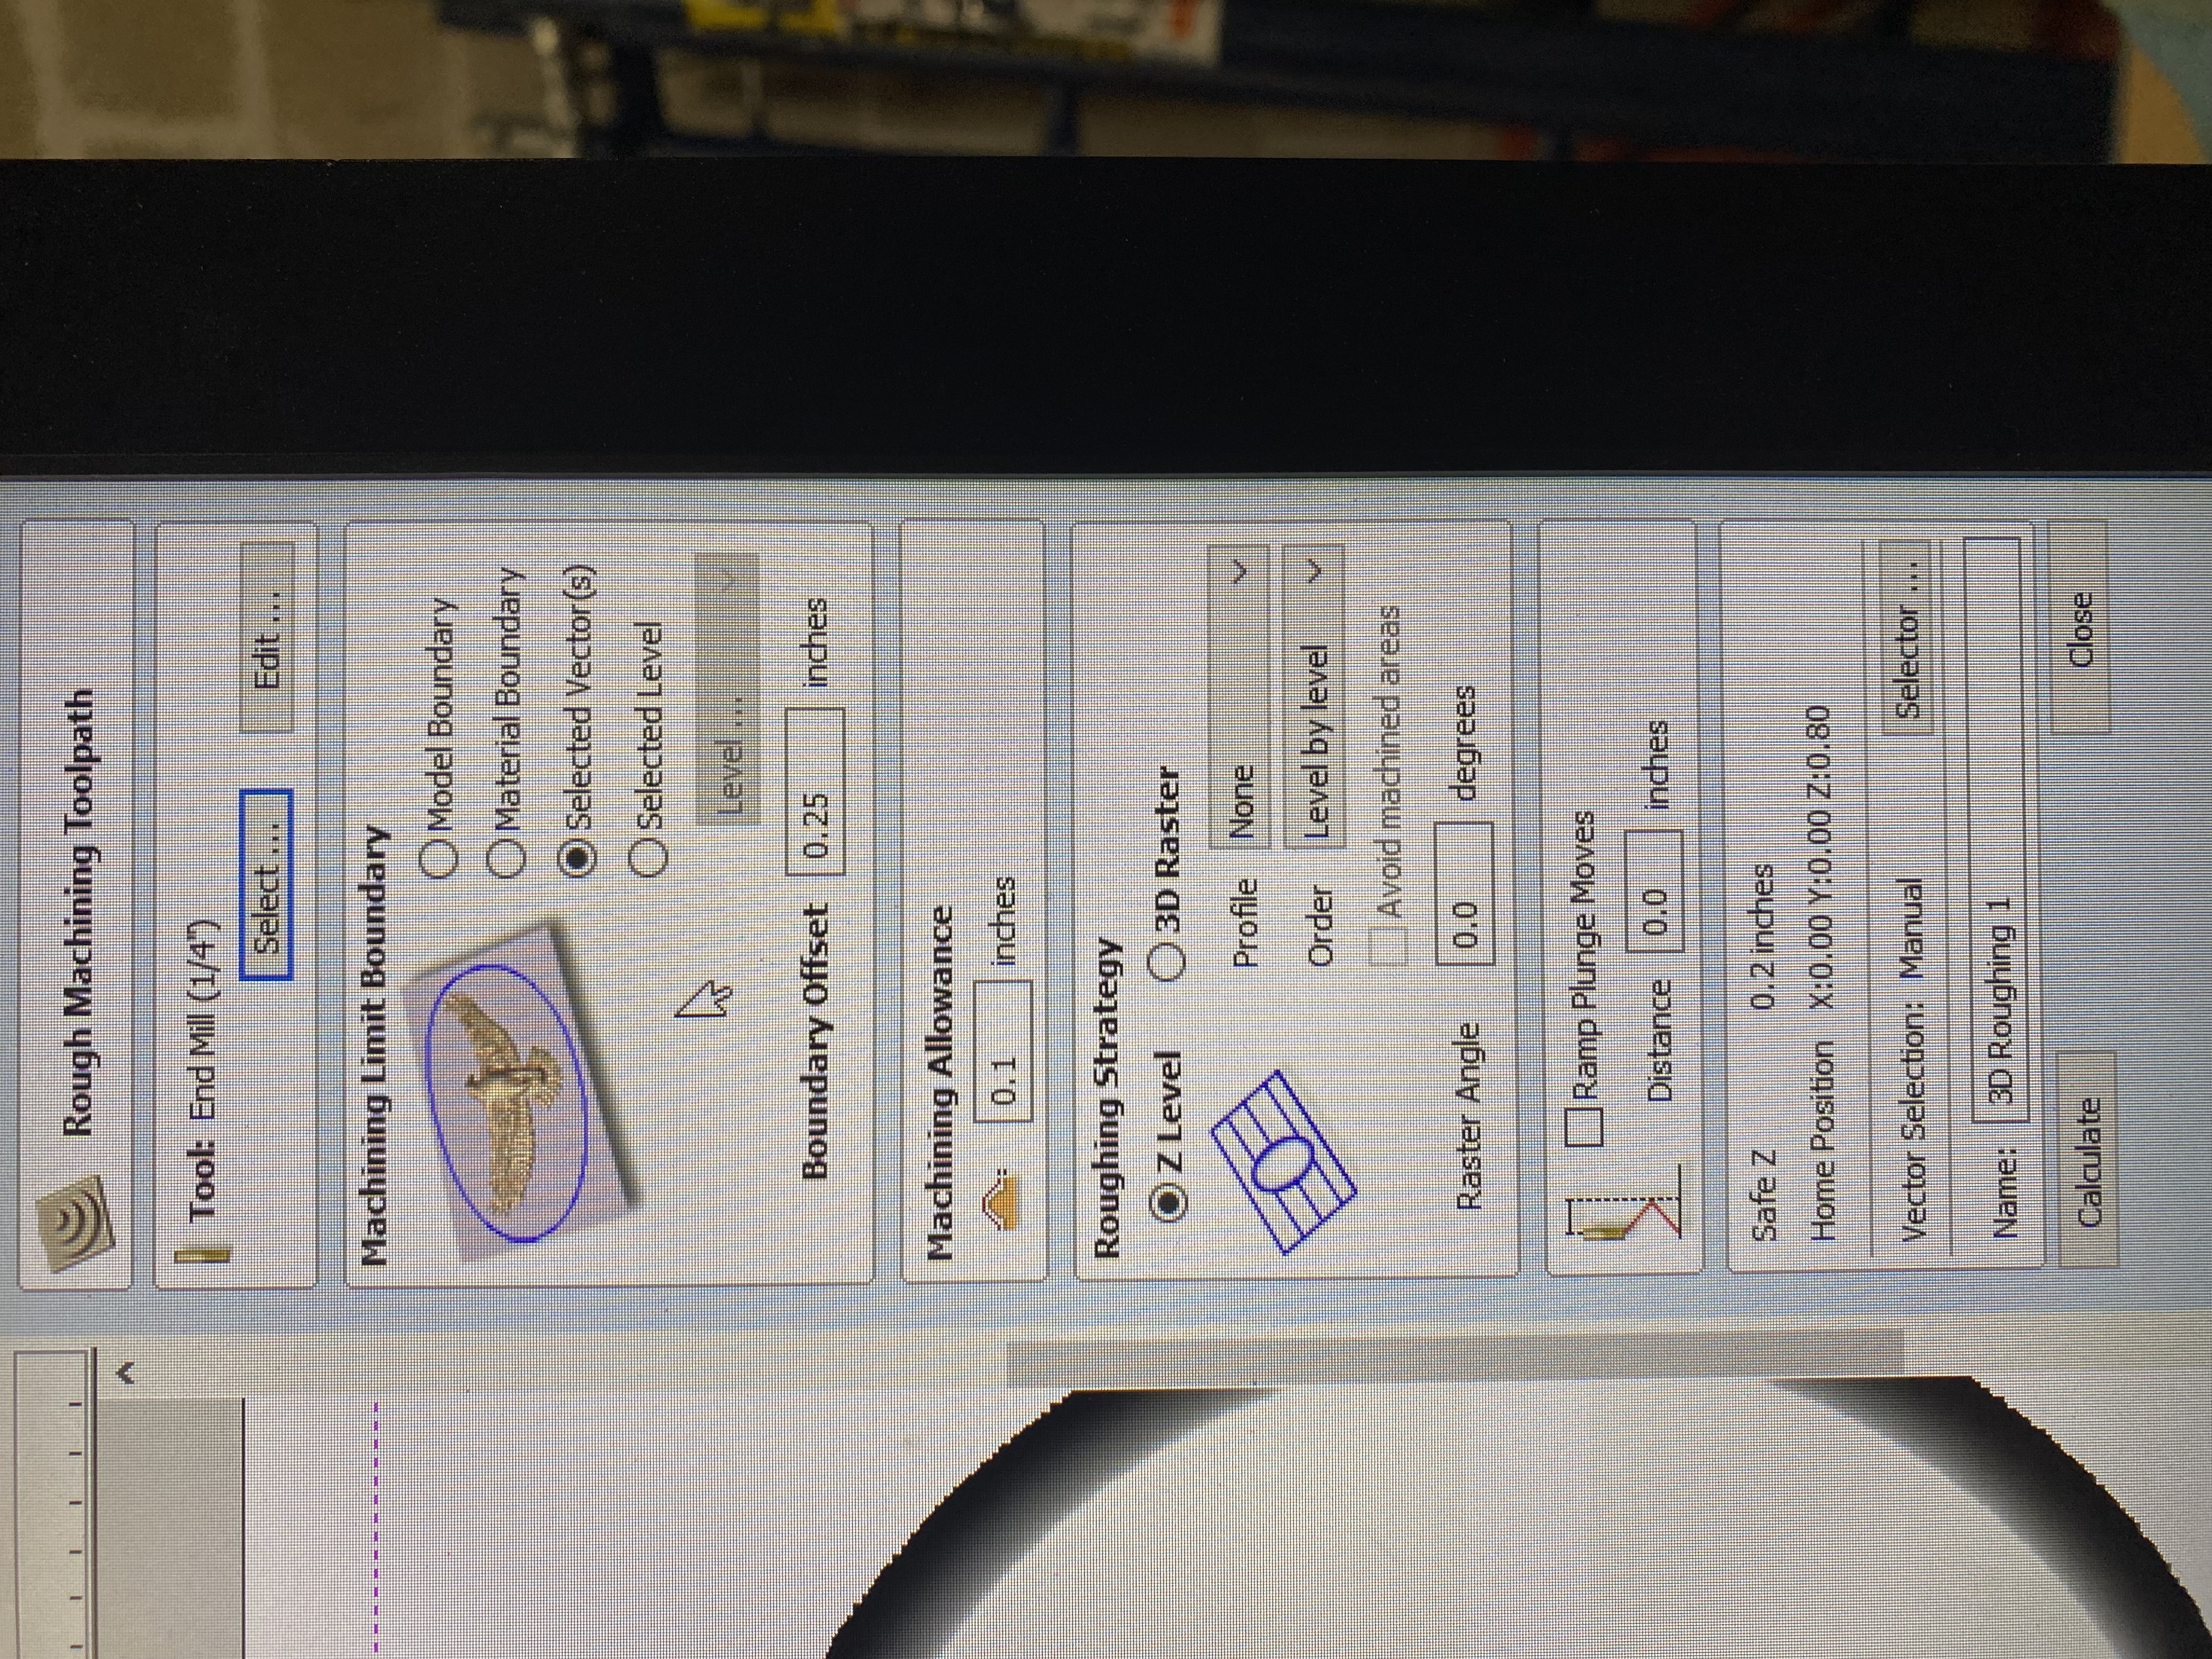
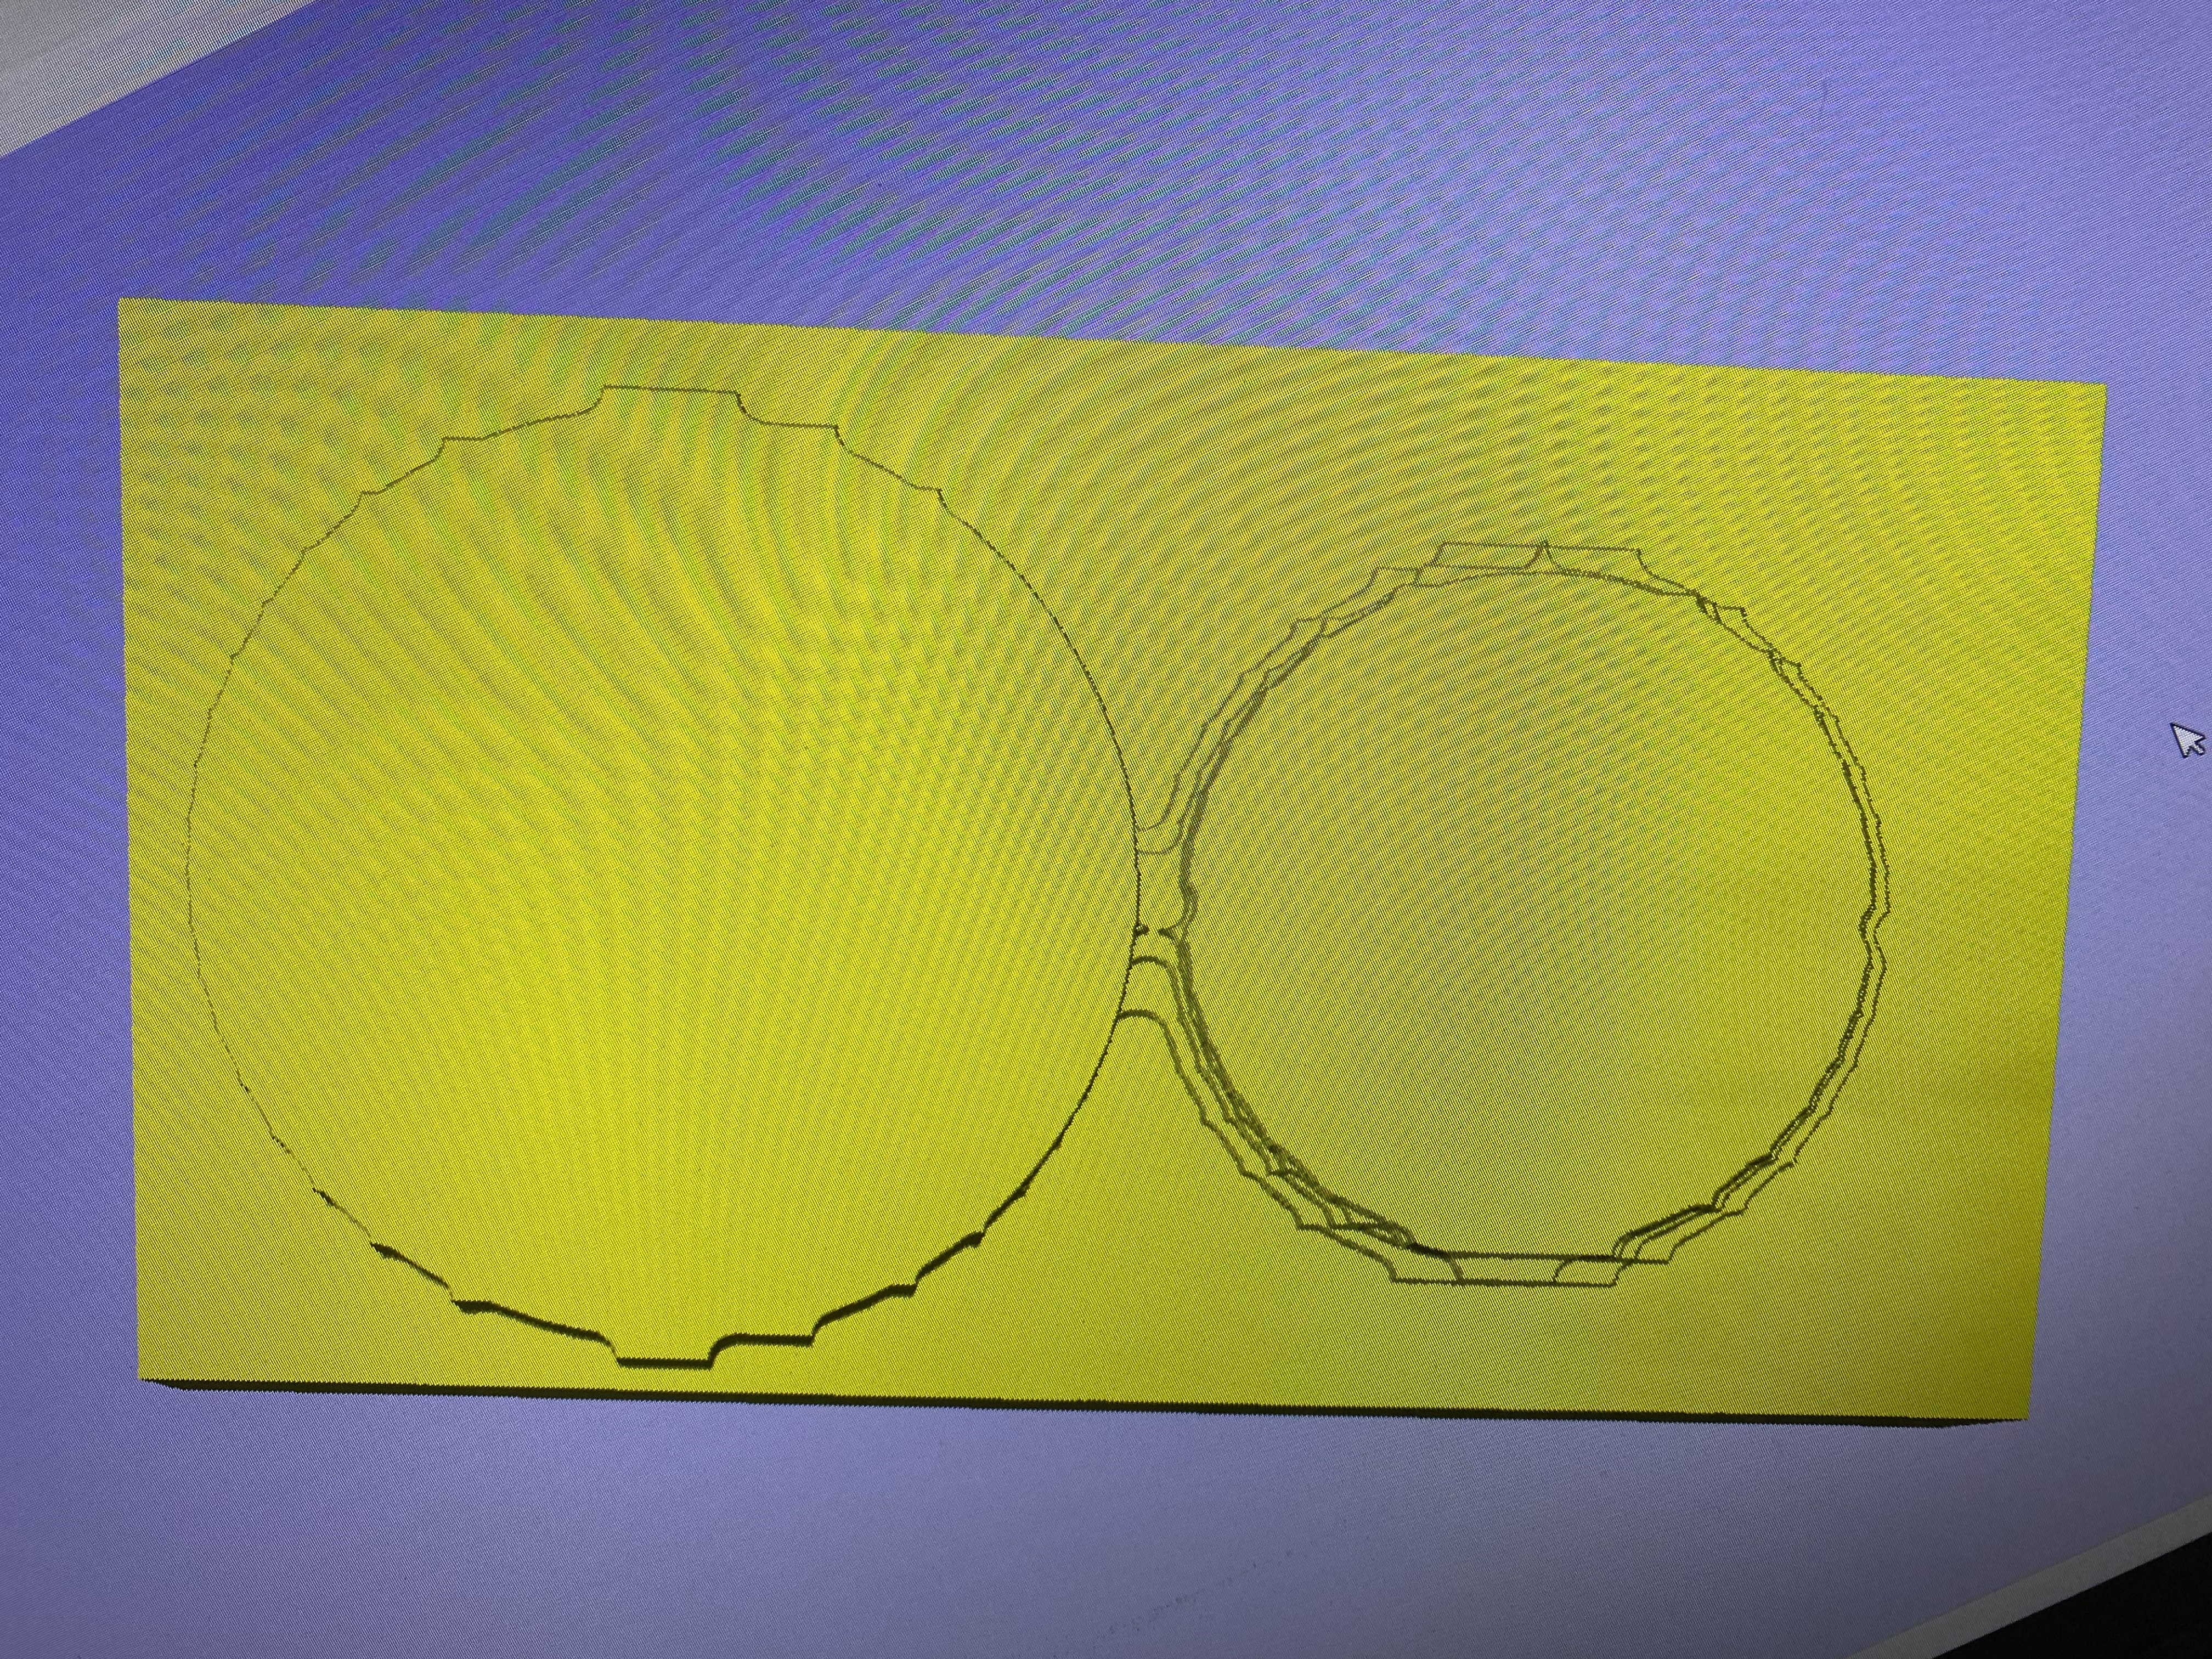
Select your bit and make sure that `Machining Limit Boundary is set to “Selected Vectors.” Then Hit calculate. Your toolpath should look like a rough outline of your shape
Now go back, select both pieces and the rectangle, and select Finish Machining Toolpath.
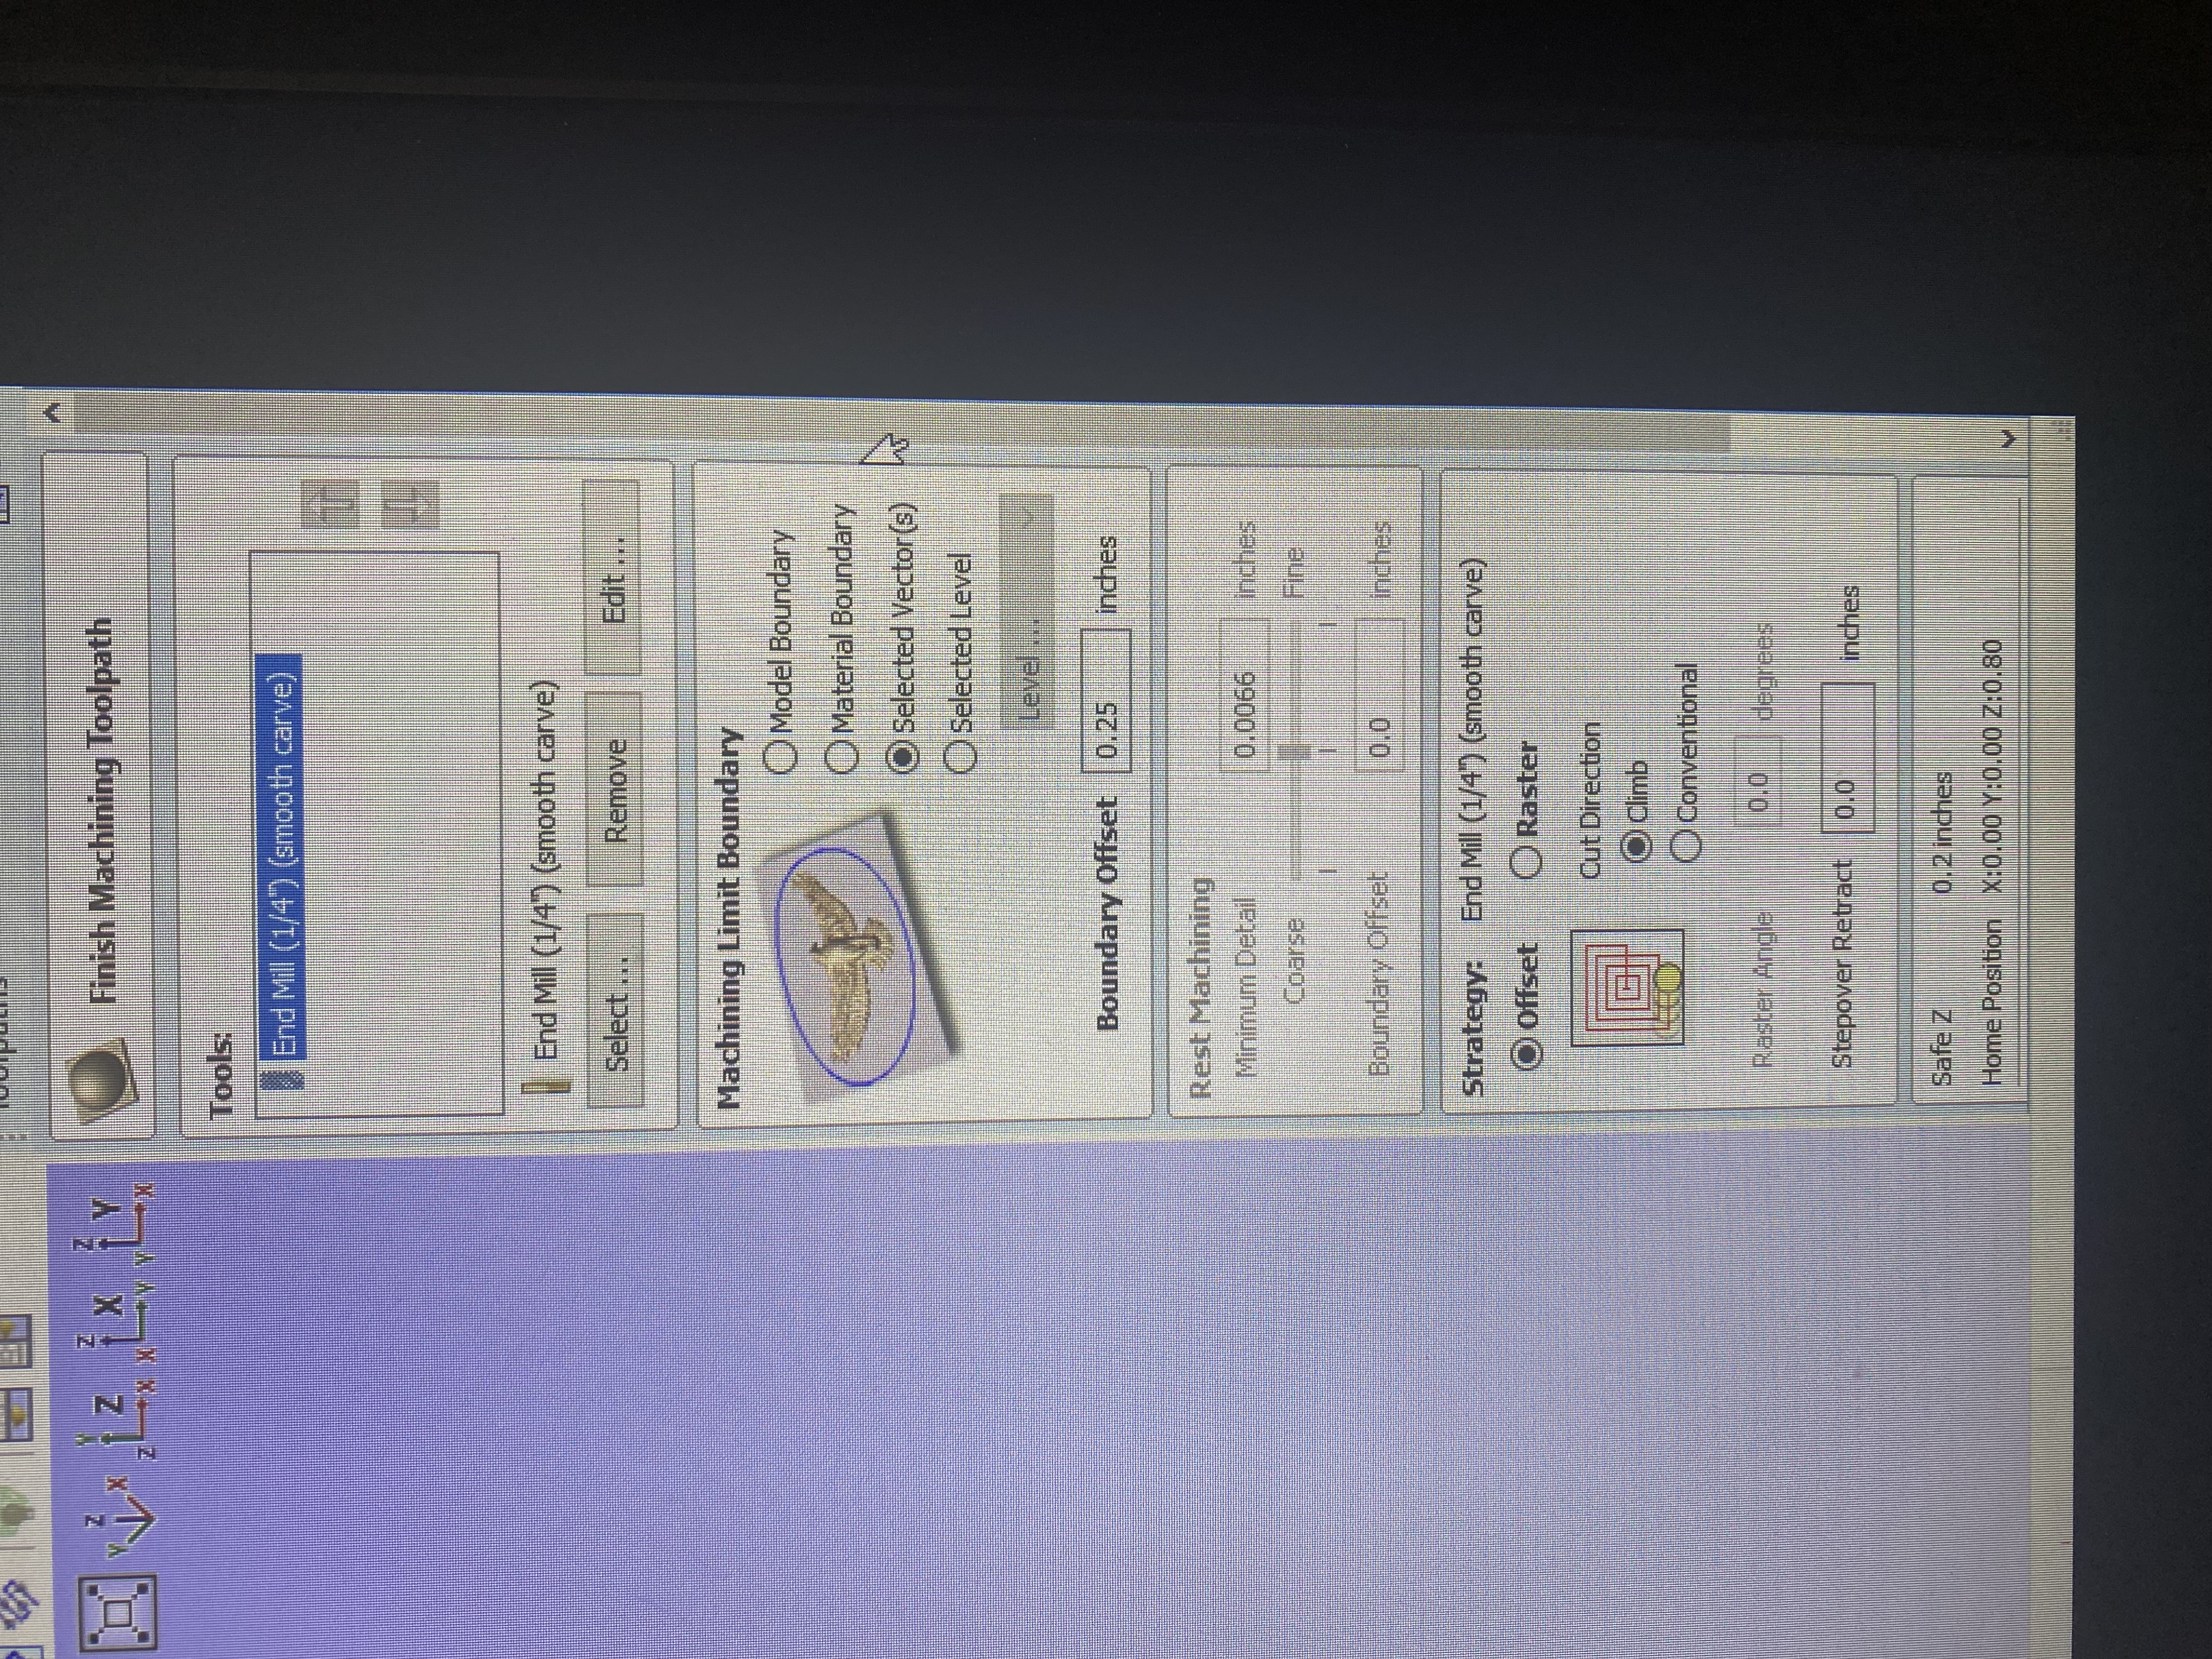
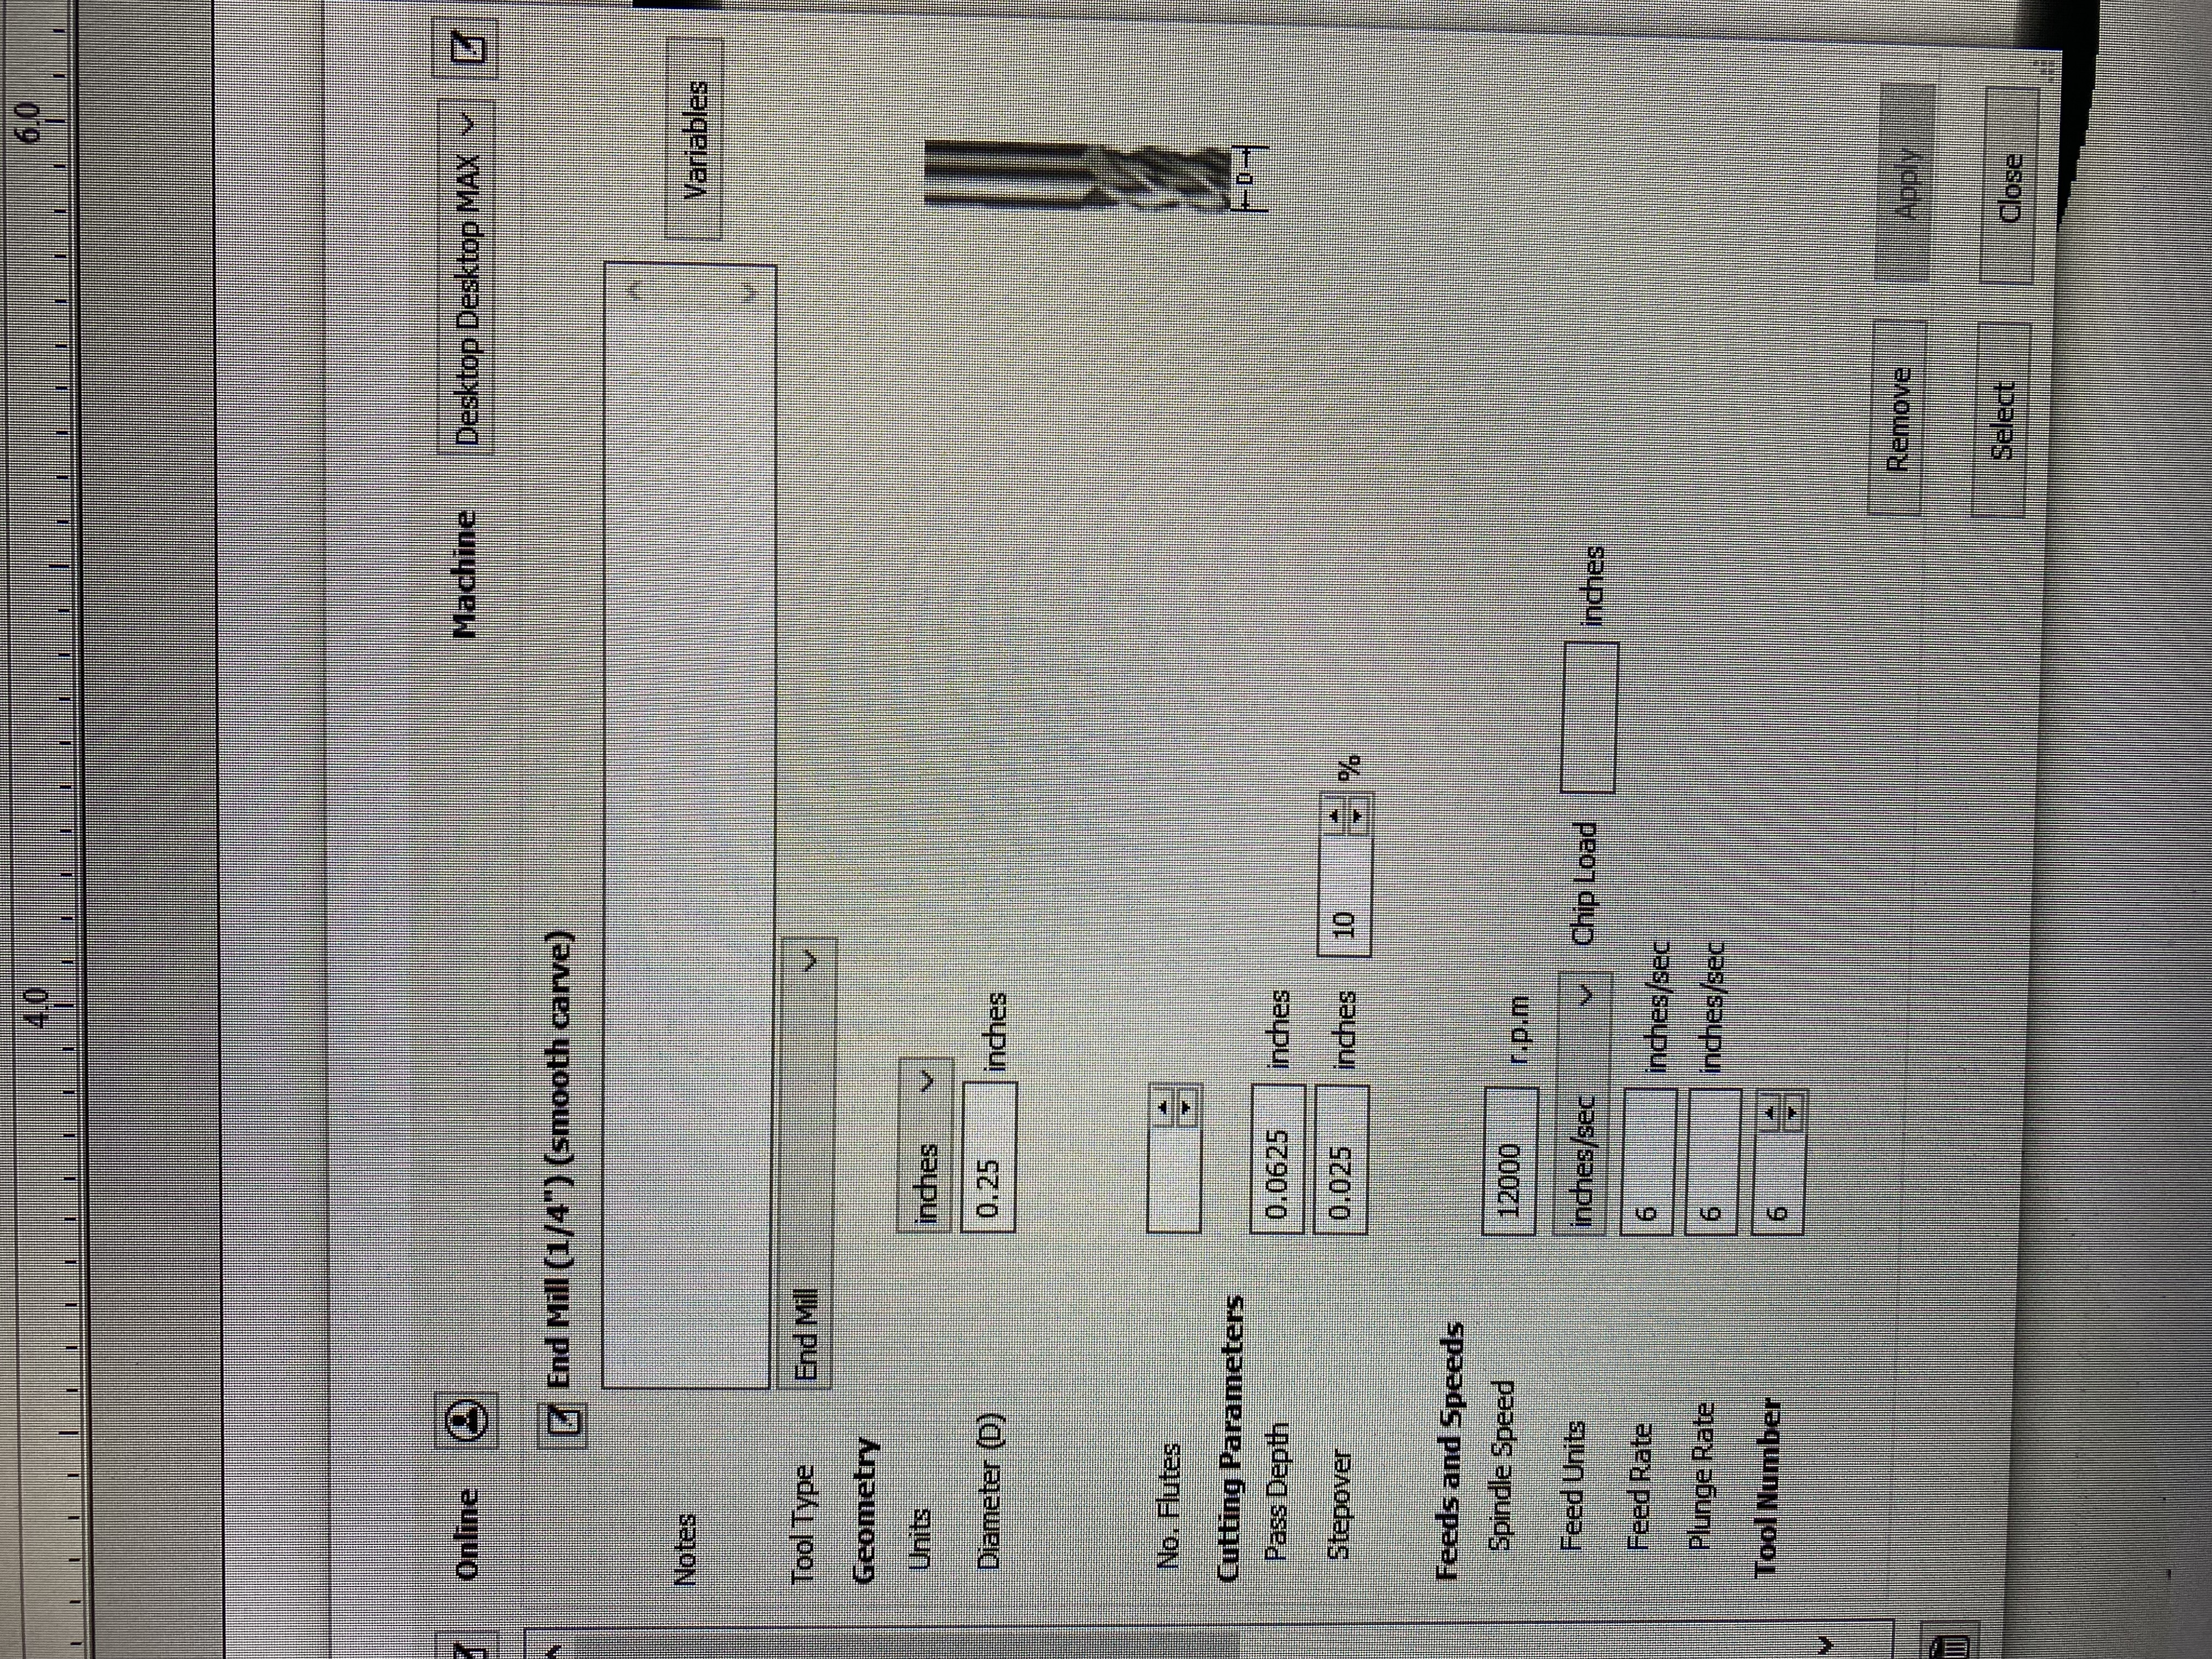
Now for the bit selection, hit Select and then look for a bit that is the same size as the one you used for the first path, but says (Smooth Carve) on the end. If this bit exists, simply select it and use it. If not, create a new bit with the same settings as your original bit, but with a Stepover of 10% or less, a spindle speed of 12000 RPM, and a feed rate and plunge rate of 6. Rename it the name of your bit followed by “(Smooth Carve)”. Then select that bit you just made.
Make sure that `Machining Limit Boundary is set to “Selected Vectors” and calculate your path.
You now have your cut file, and you are free to cut like any other piece. Go to the Securing Material section.
Securing Material
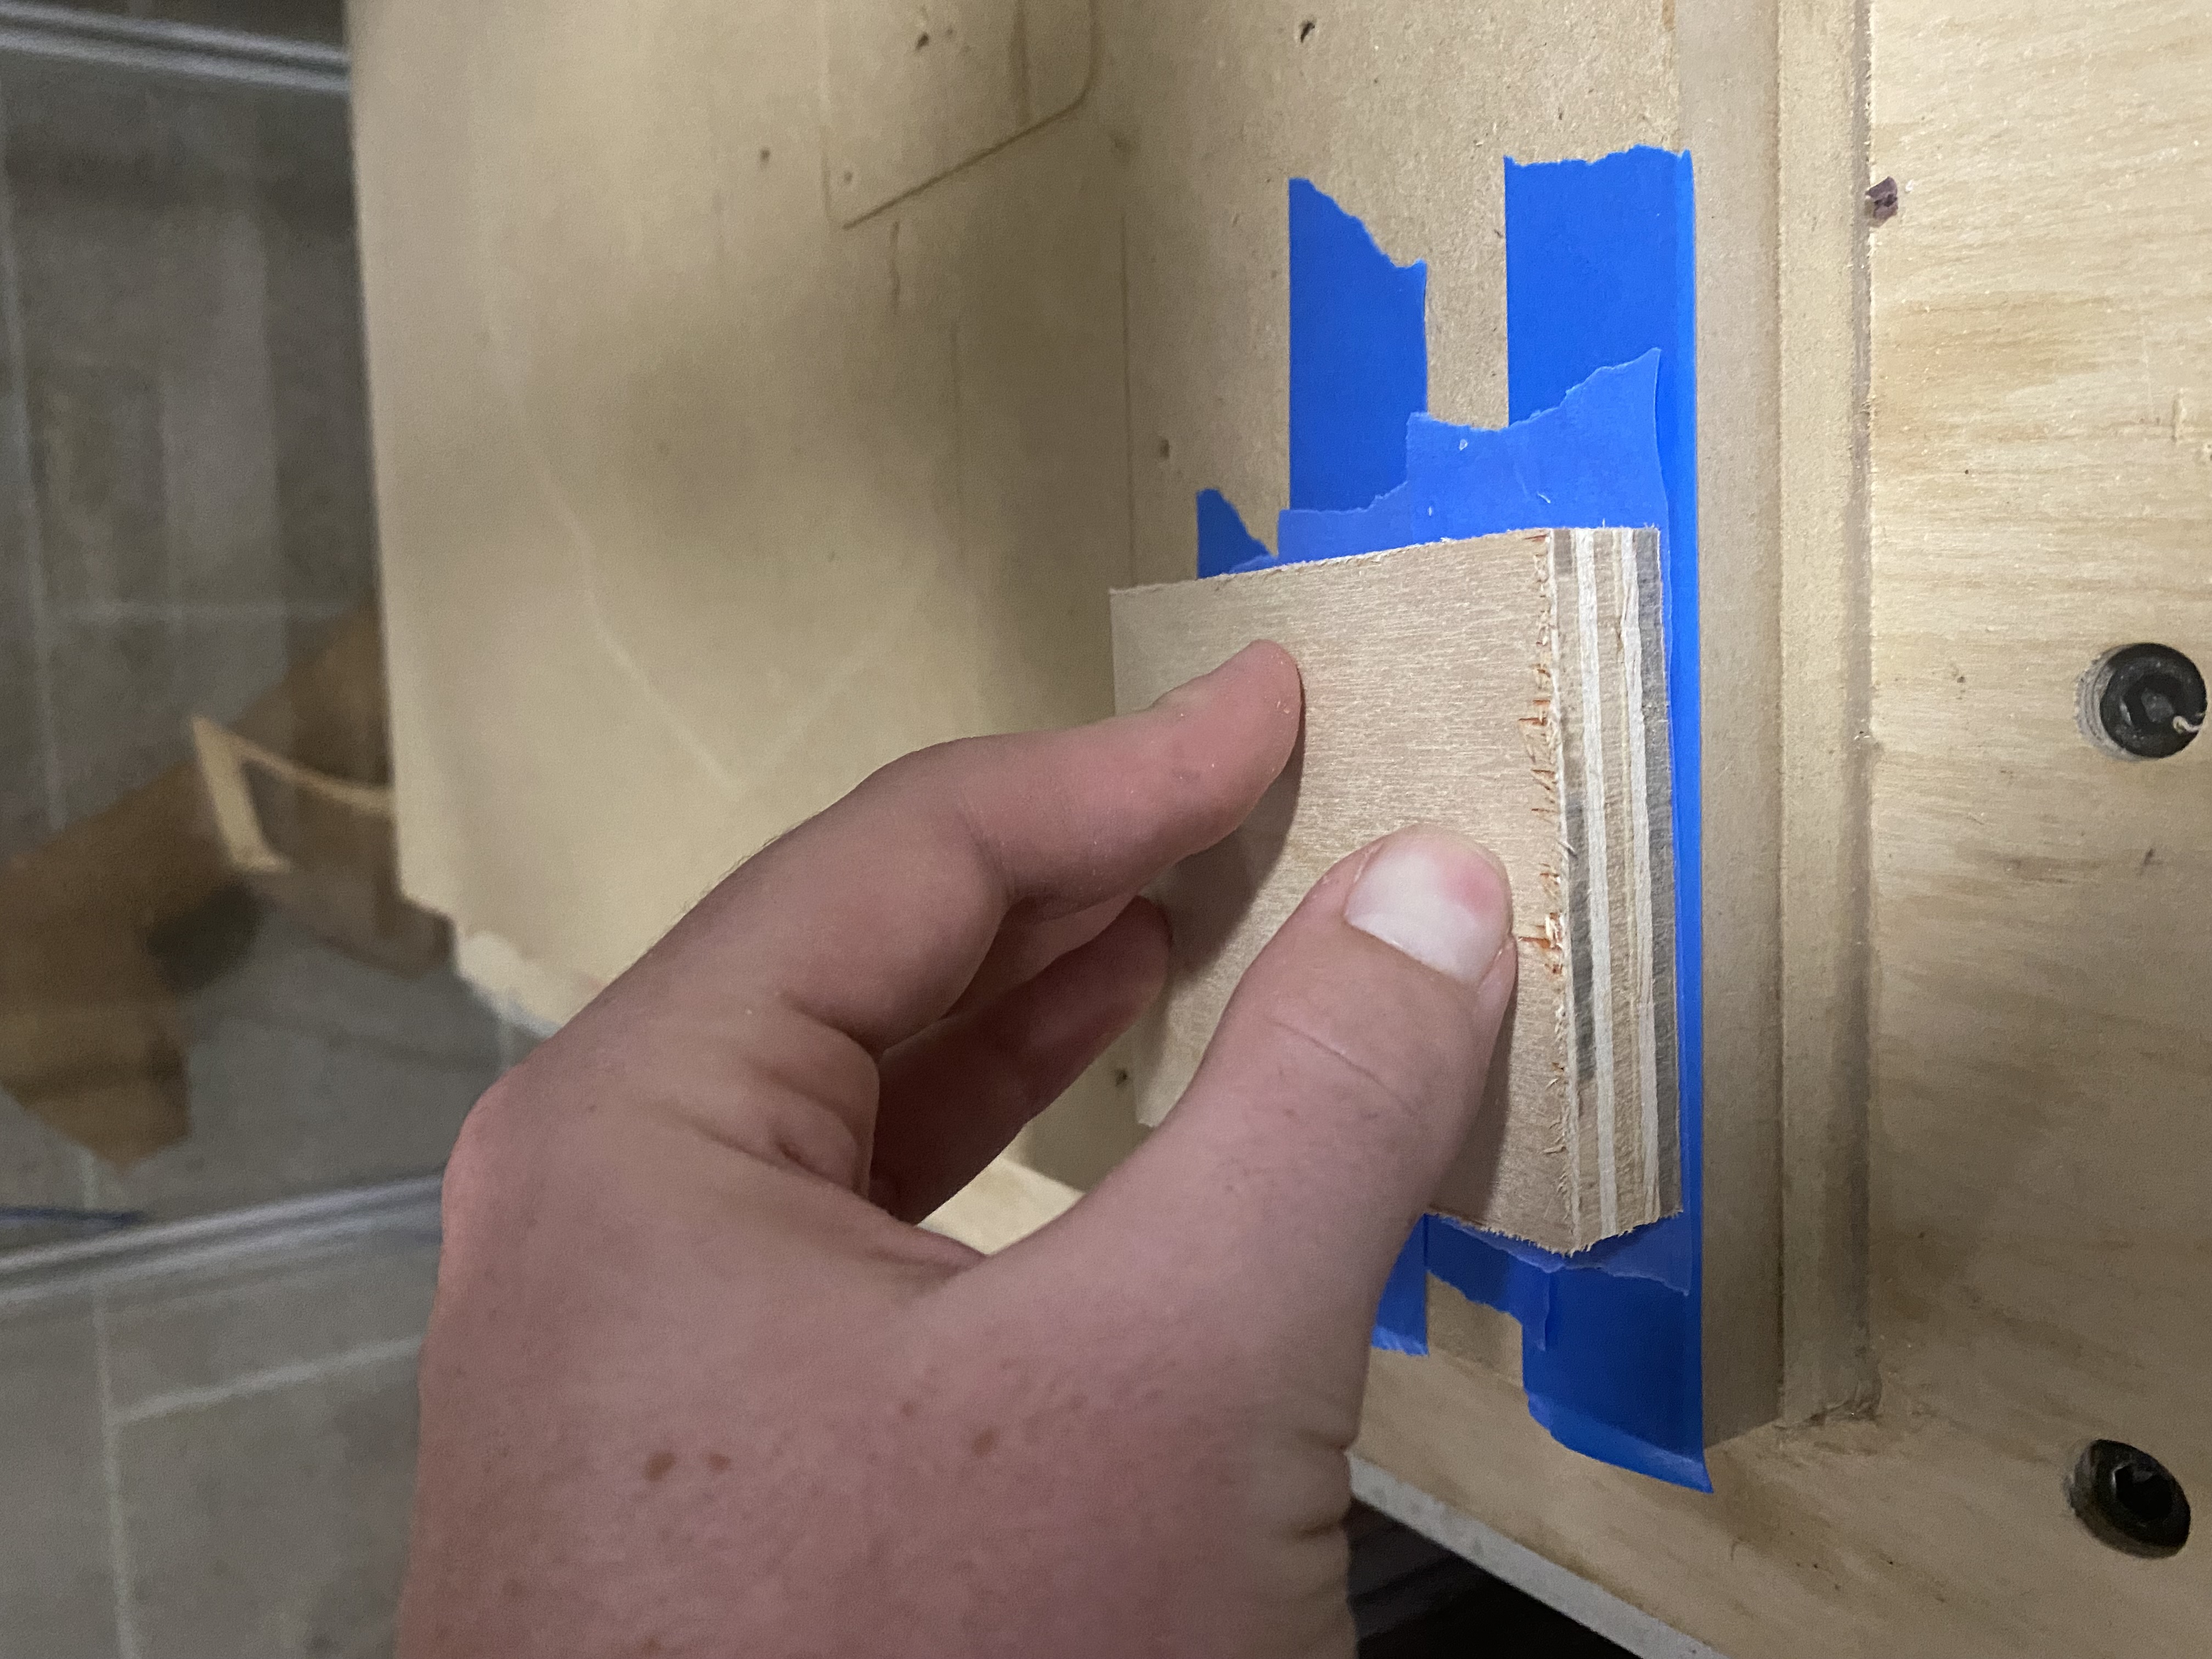
Once you are ready to secure your material to the bed, first take blue tape or painters tape and cover the bottom surface of your material in the area of your cut and the area on the bed where you want to attach the object.

Then take superglue and put a thin spread on the tape on the bed. DO NOT PUT SUPERGLUE ON THE BED ITSELF. Take the accelerant and spray it onto the tape on the bottom of your object, and push the object down onto the bed and hold it there for a few seconds.
Your object will be attached to the bed securely. Move to the Spindle Warmup section to begin your cutting process. Once you are done cutting, simply pull the tape off of the bed and your object.
CNC Spindle Warmup
Before the first cut of the day, be sure to warm up the spindle. Afterwards, the spindle will be warm from other cuts that you do, but make sure to warm it up before the first cut of the day so that it doesn’t break.
First, go to shopbot full mode by pressing the blue question mark button ? and then pressing Switch to FULL at the bottom of the menu that comes up afterwards. In shopbot full mode, press the keyboard keys, C, and then 5 to start the process, or navigate there with the top menu.
The process consists of the spindle spinning at 3 different speeds for 3 minutes each. After roughly 9 minutes and 3 seconds, the warm-up routine will be complete. When you are done, be sure to change the shopbot controls back to easy mode by pressing the blue EASY button. You are all ready to cut, move to the Zeroing and Cutting section.
Zeroing and Cutting
Once you have the file, and have secured your material and warmed up the machine, open the shopbot app and make sure you’re in shopbot easy mode.
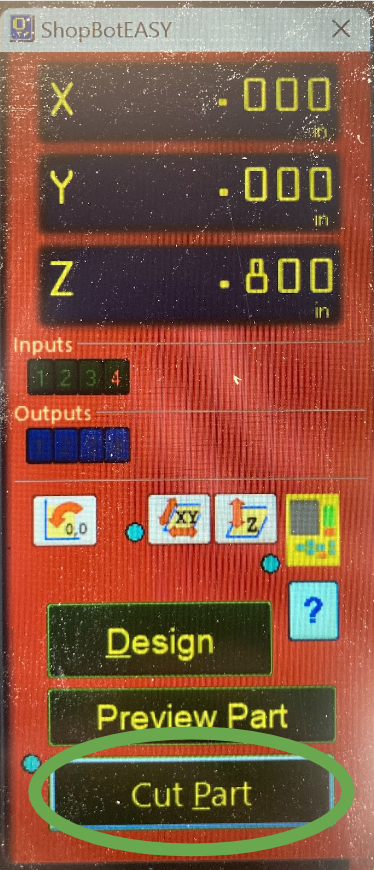
Then open the manual control panel by clicking the yellow box.
You will zero the X and Y at the same time. Before you zero the X and Y, make sure the piece of wood (or other material) is in the machine, not crooked, and is held down in some way. Then use the right set of arrows to lift the head of the machine up so that the bit will not get caught or drag across any of the parts.
Then use the left arrows to move the bit until it is exactly lined up with the bottom left corner of the area you want to cut.
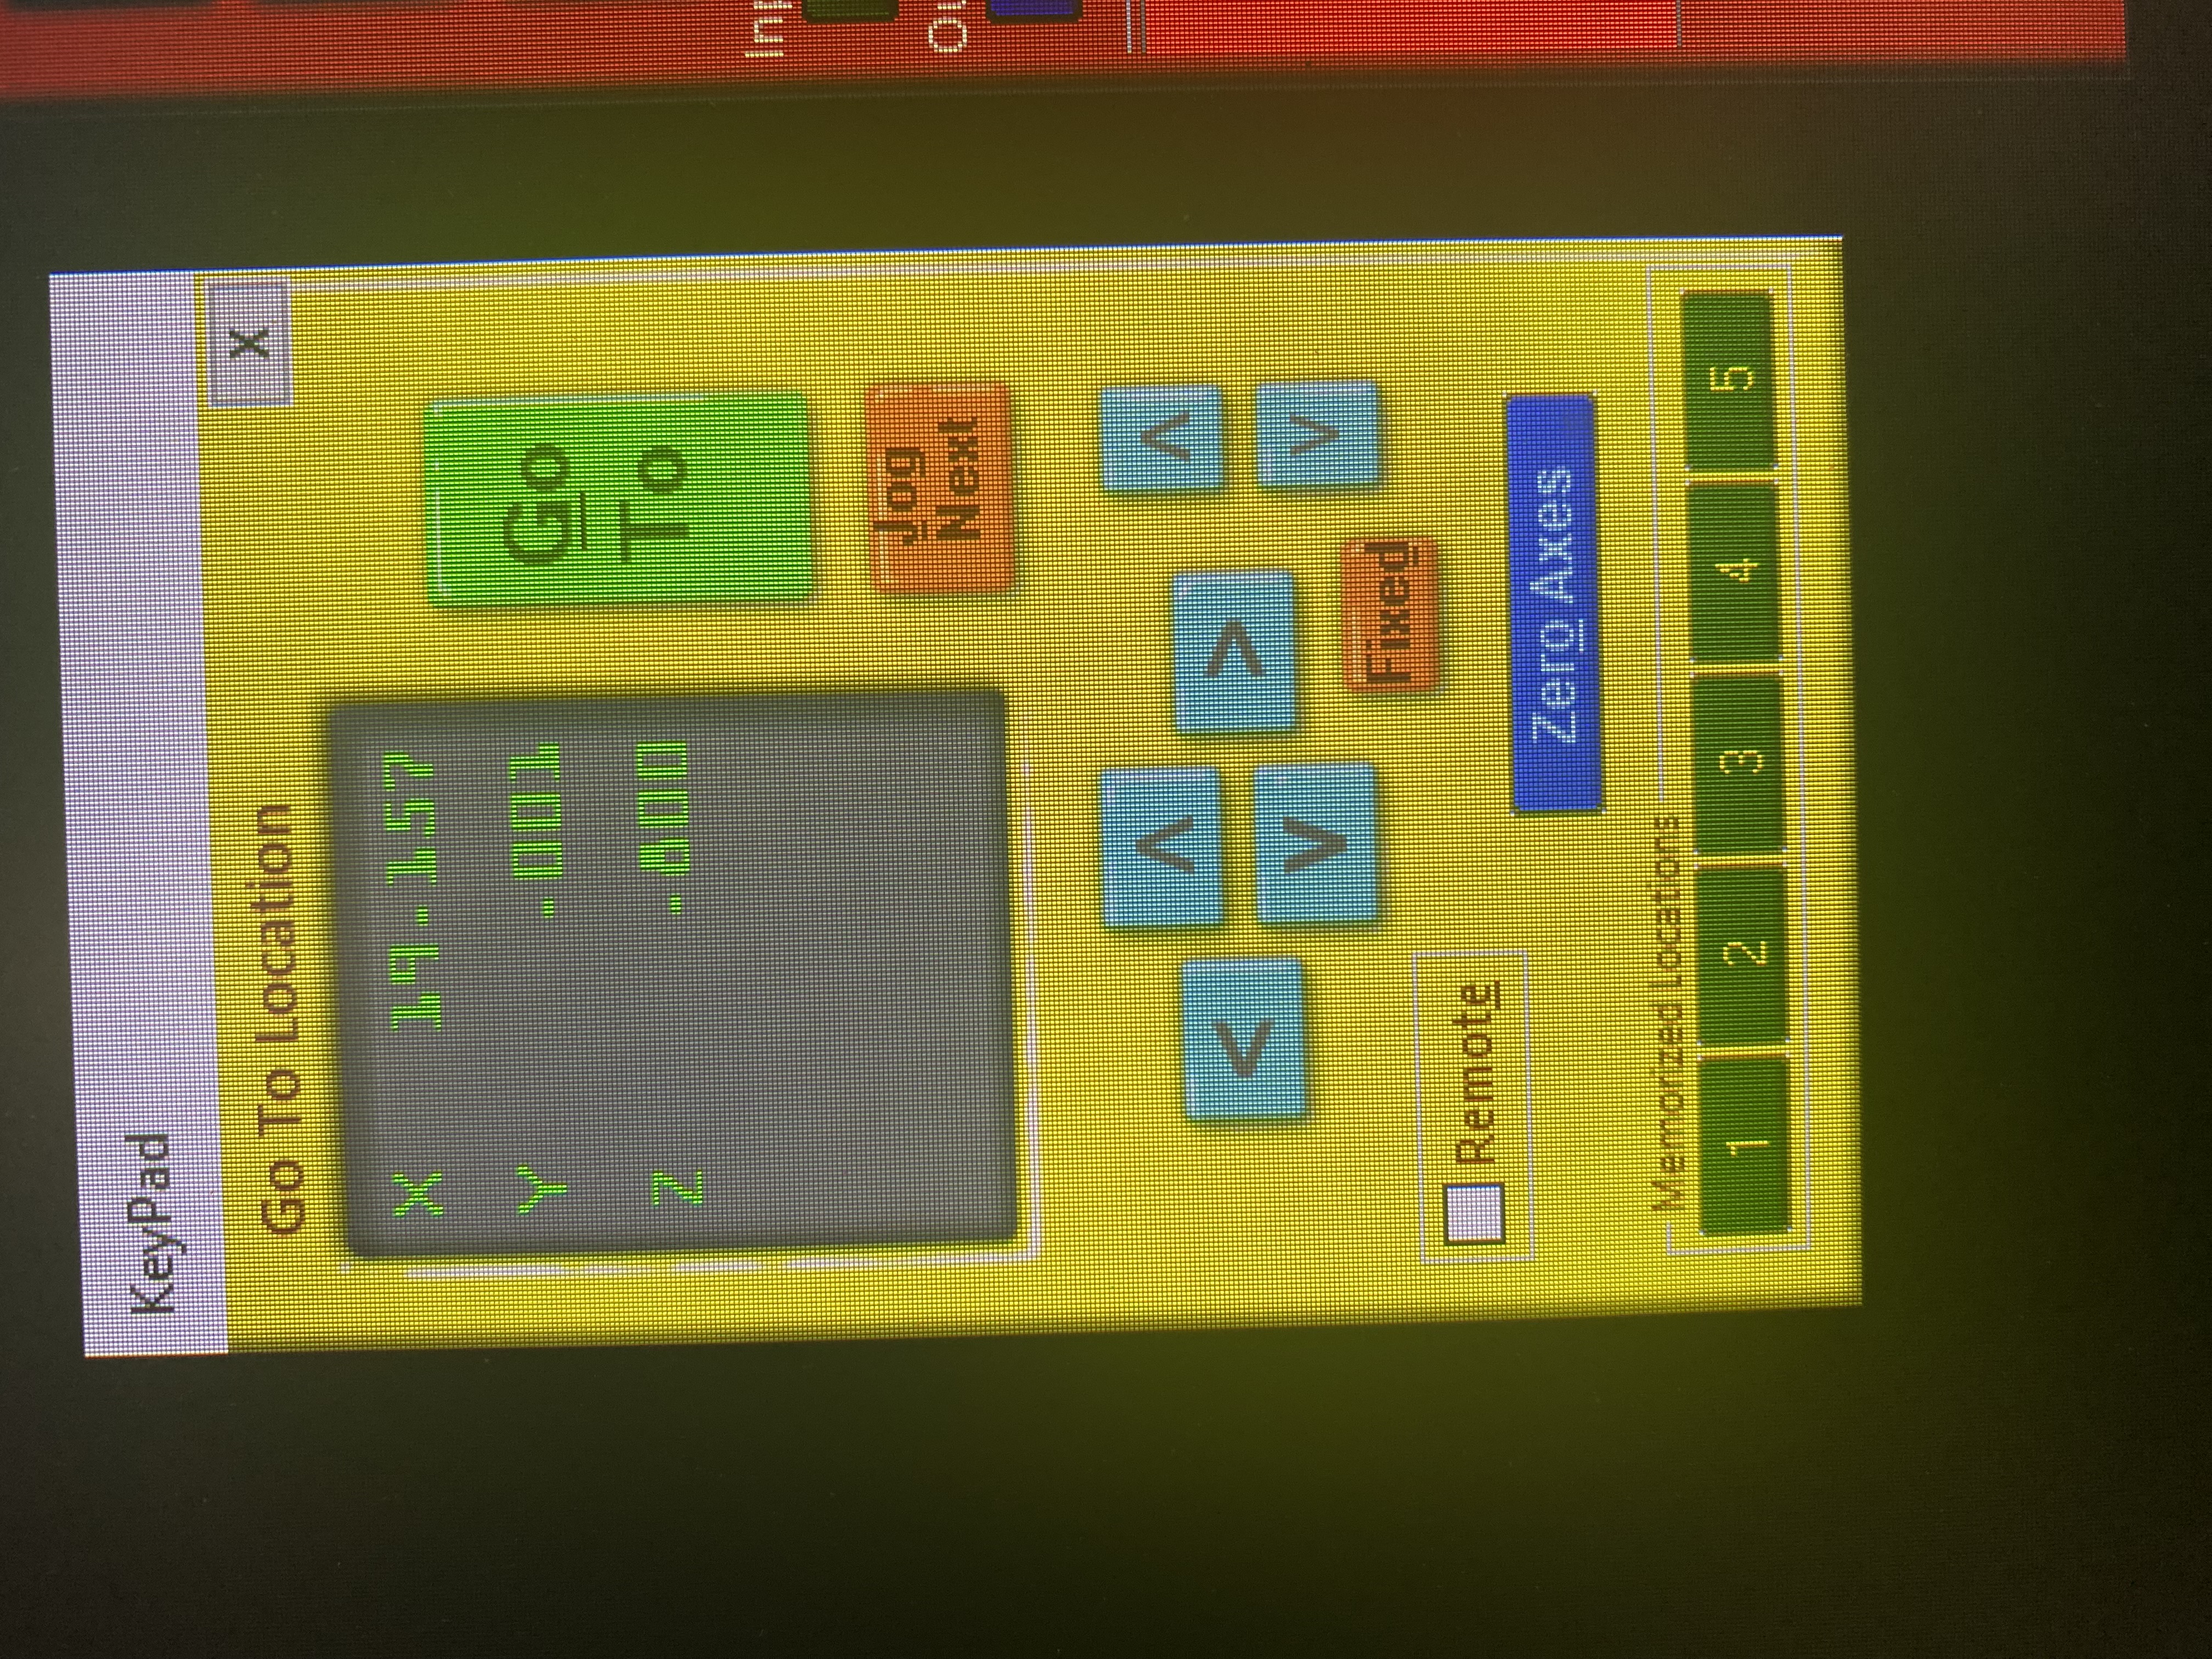
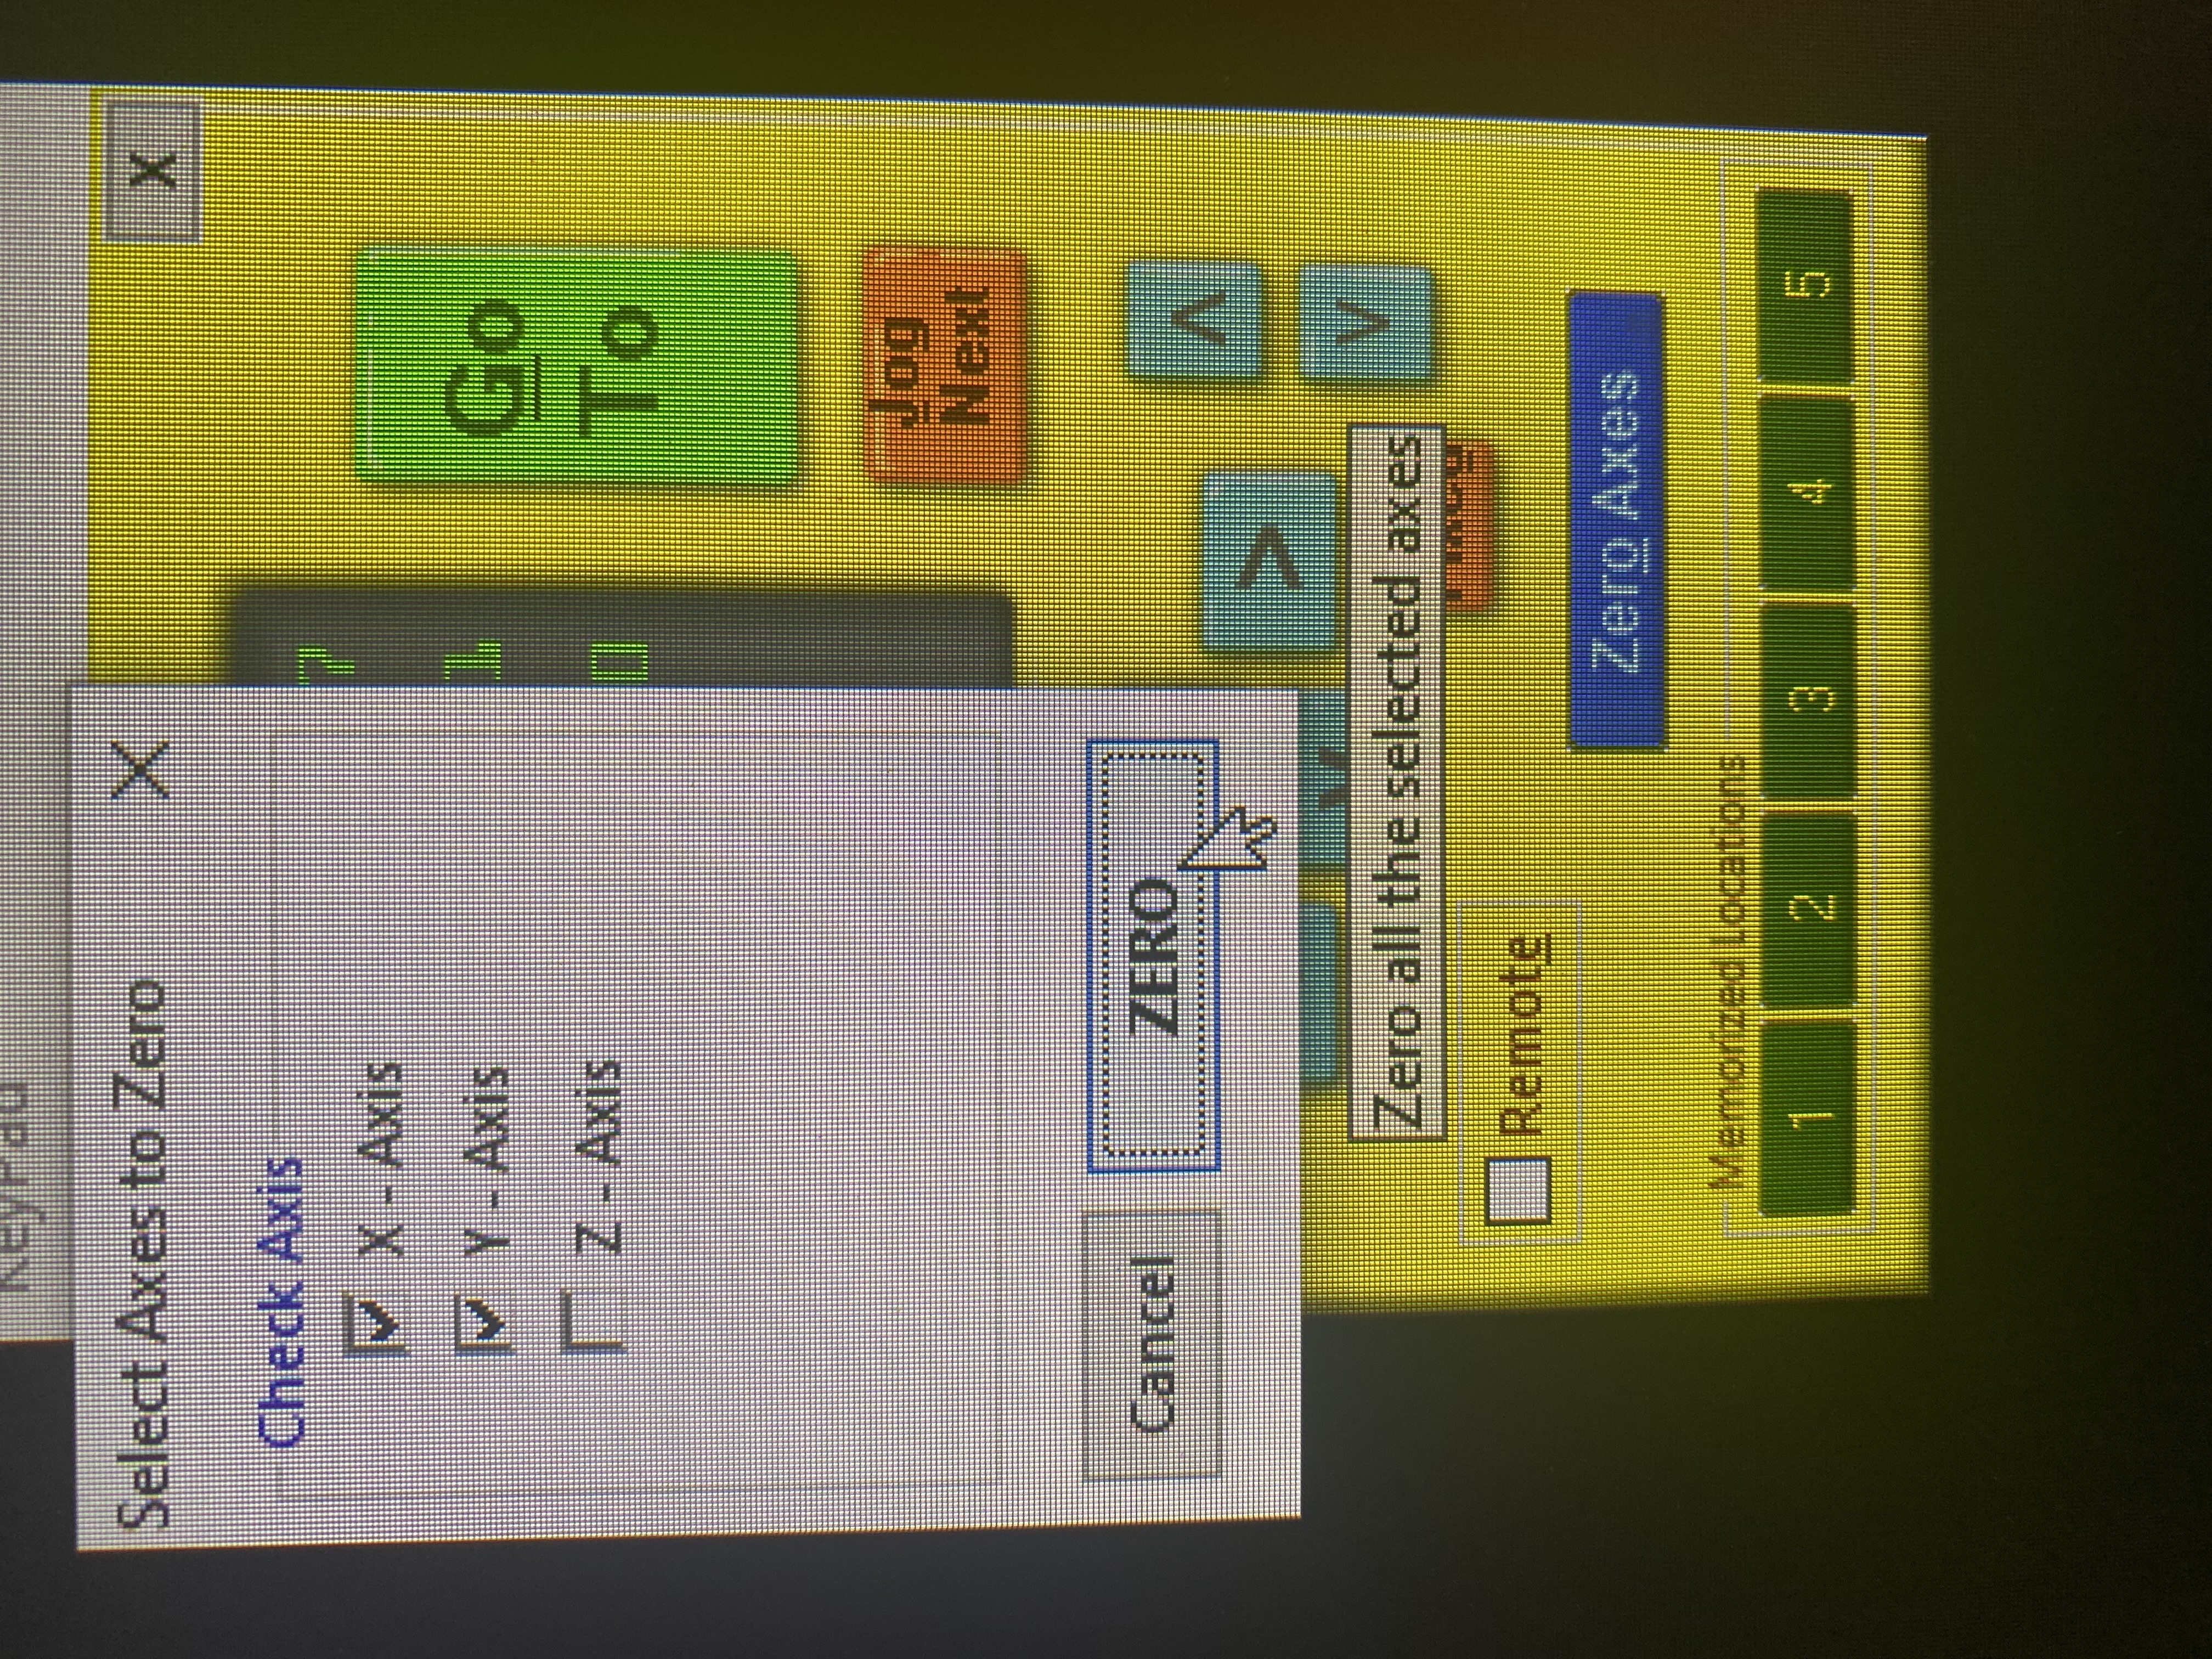
It will place 0,0 in your aspire file at this location. Click Zero Axis, select X and Y, and then hit Zero.
Once the X and Y is zeroed, you can zero the Z. Open up the keypad and move the bit so that it is over the material. Place the metal Z-zero plate on the material beneath the bit.
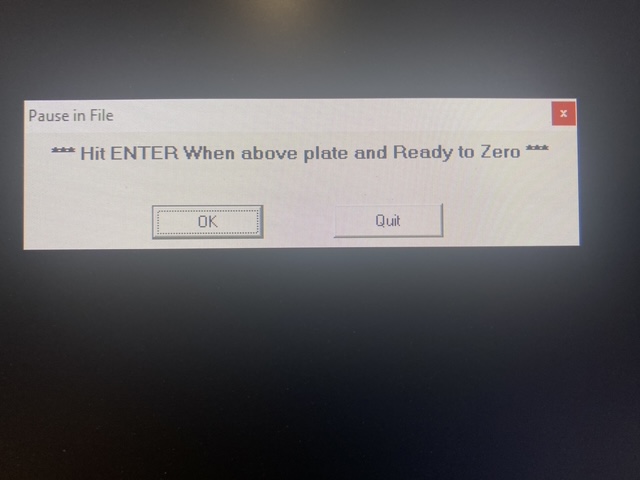
Close the keypad and click the Z-zero button on the computer controller, then press enter to confirm.

The bit will go down until it hits the Z-zero plate, and then go back up, down again, and finally back up again. Once the bit stops moving, you can remove the Z-zero plate, and the Z is now zeroed. You should re-zero the Z before each cut.
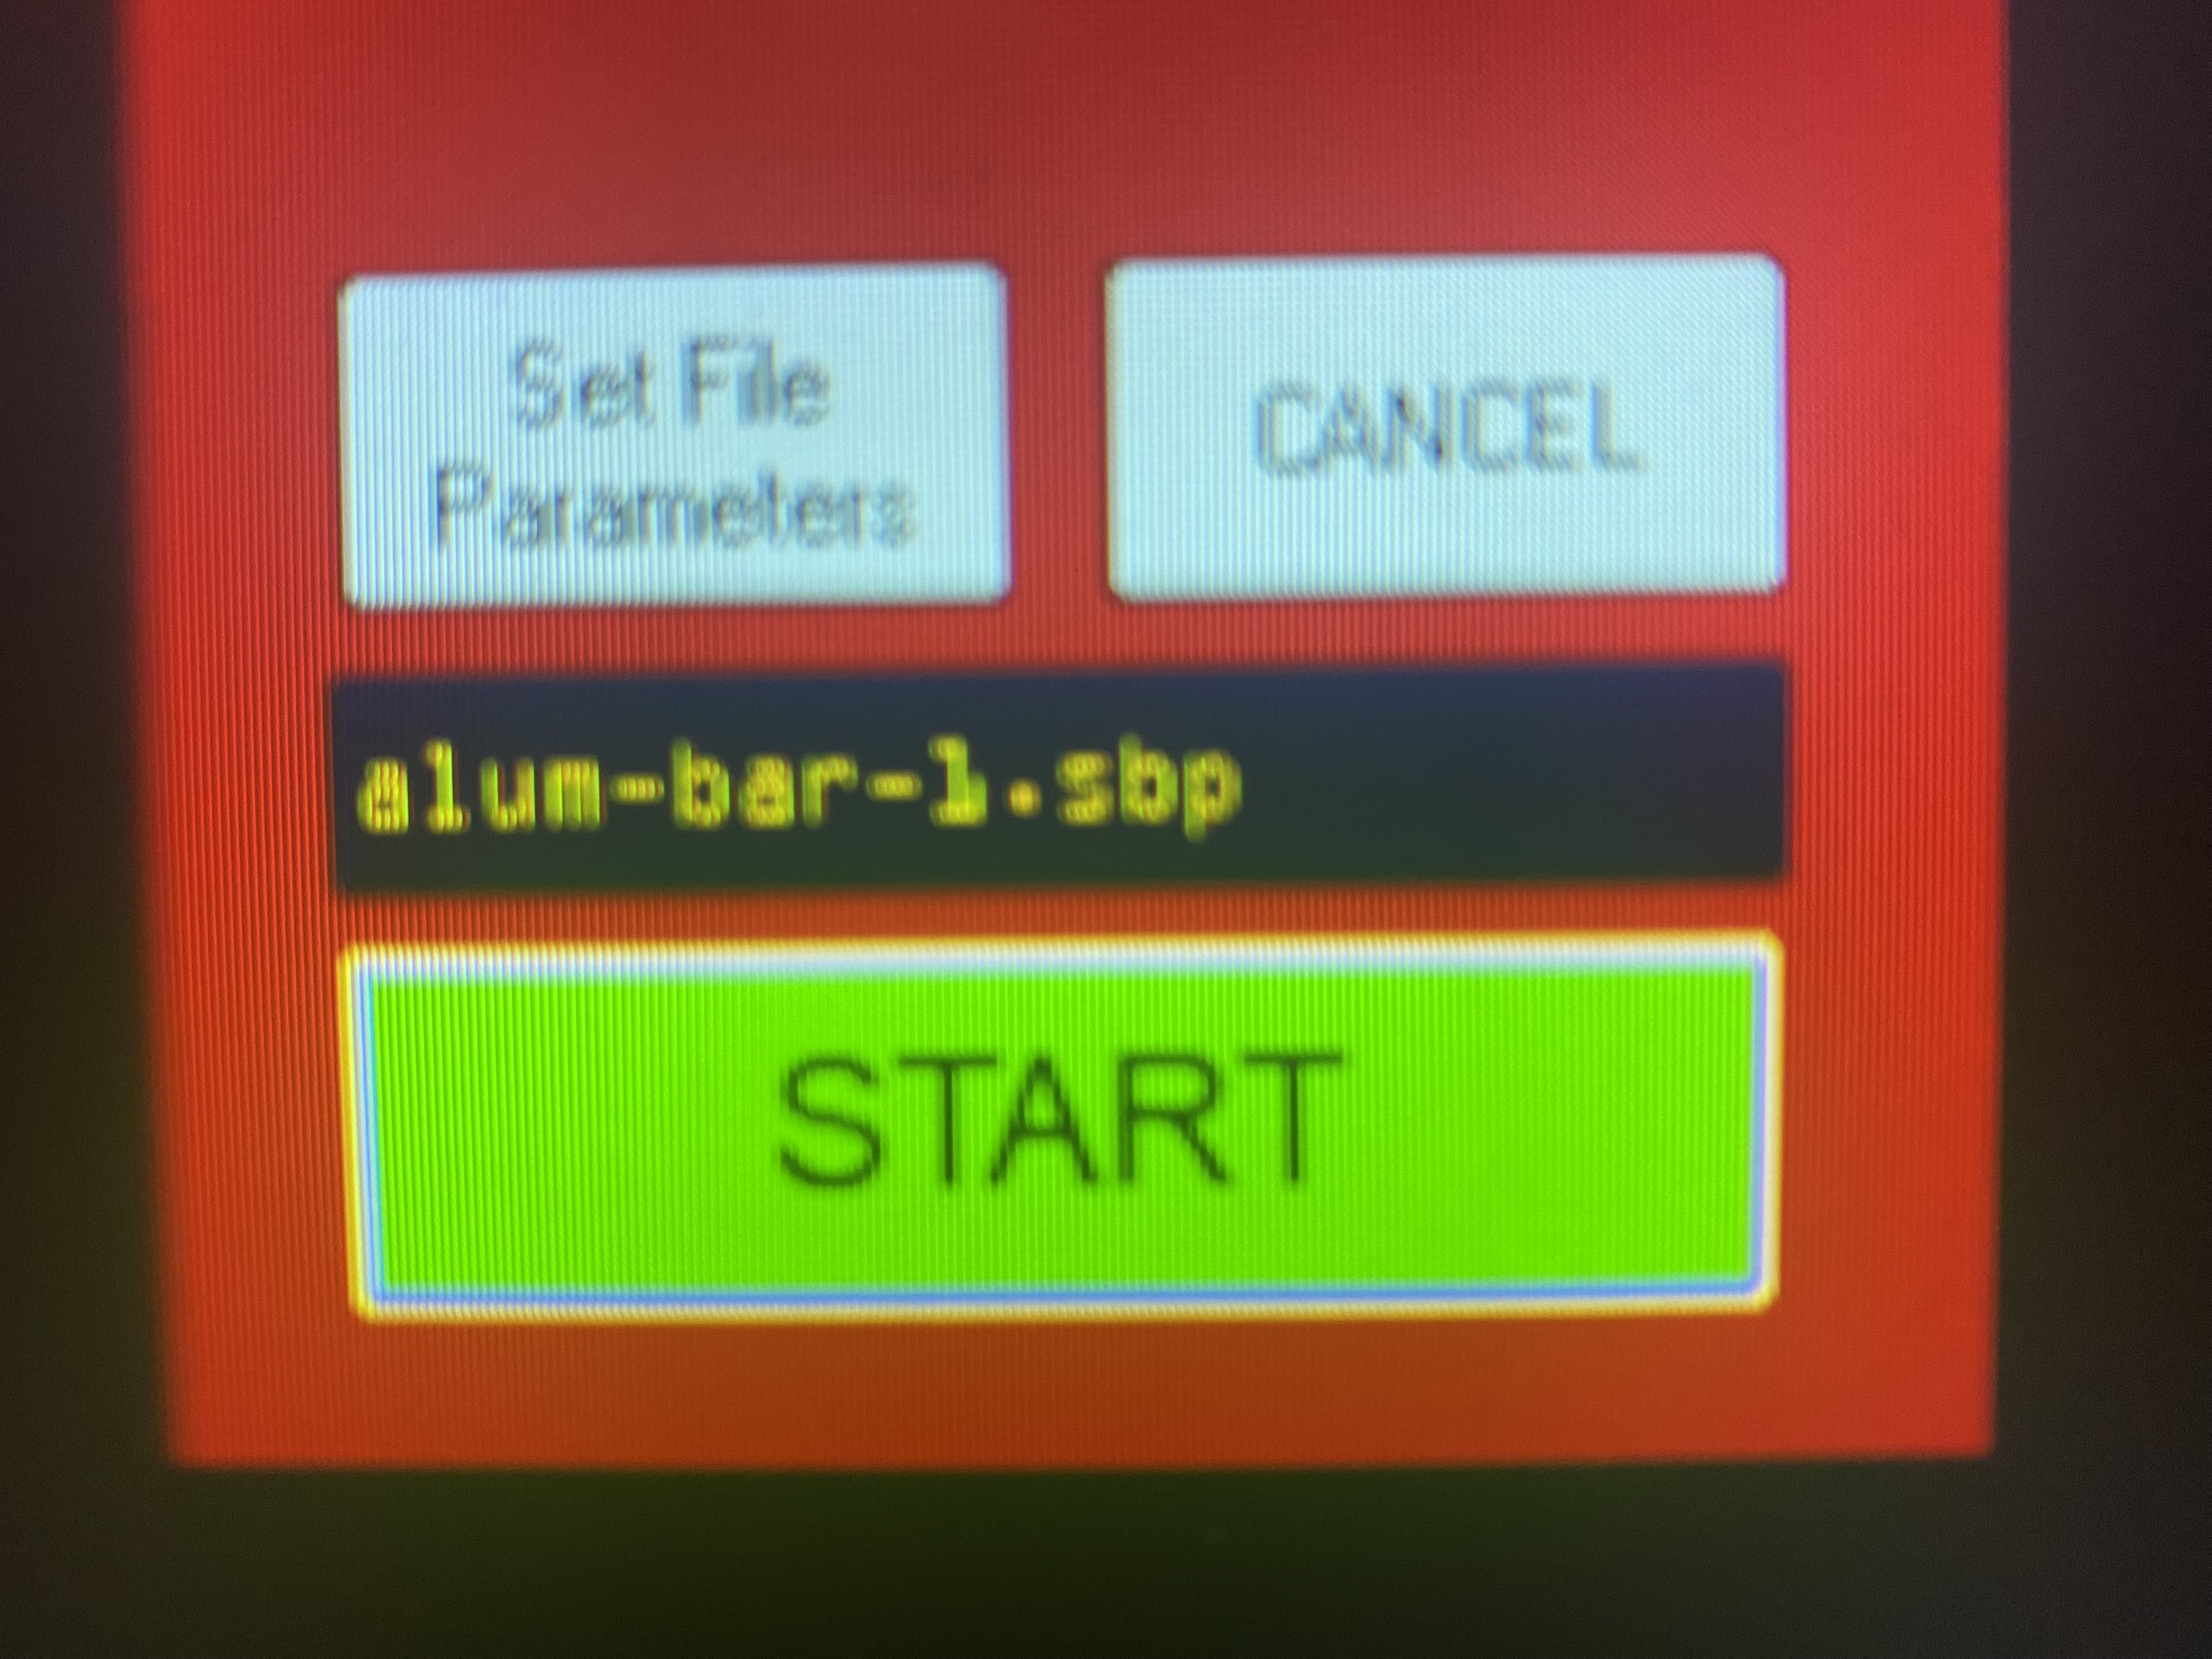
The machine now is properly zeroed. Press “Cut Part”. This will ask you to open a file. Select the .sbp file you want to cut.
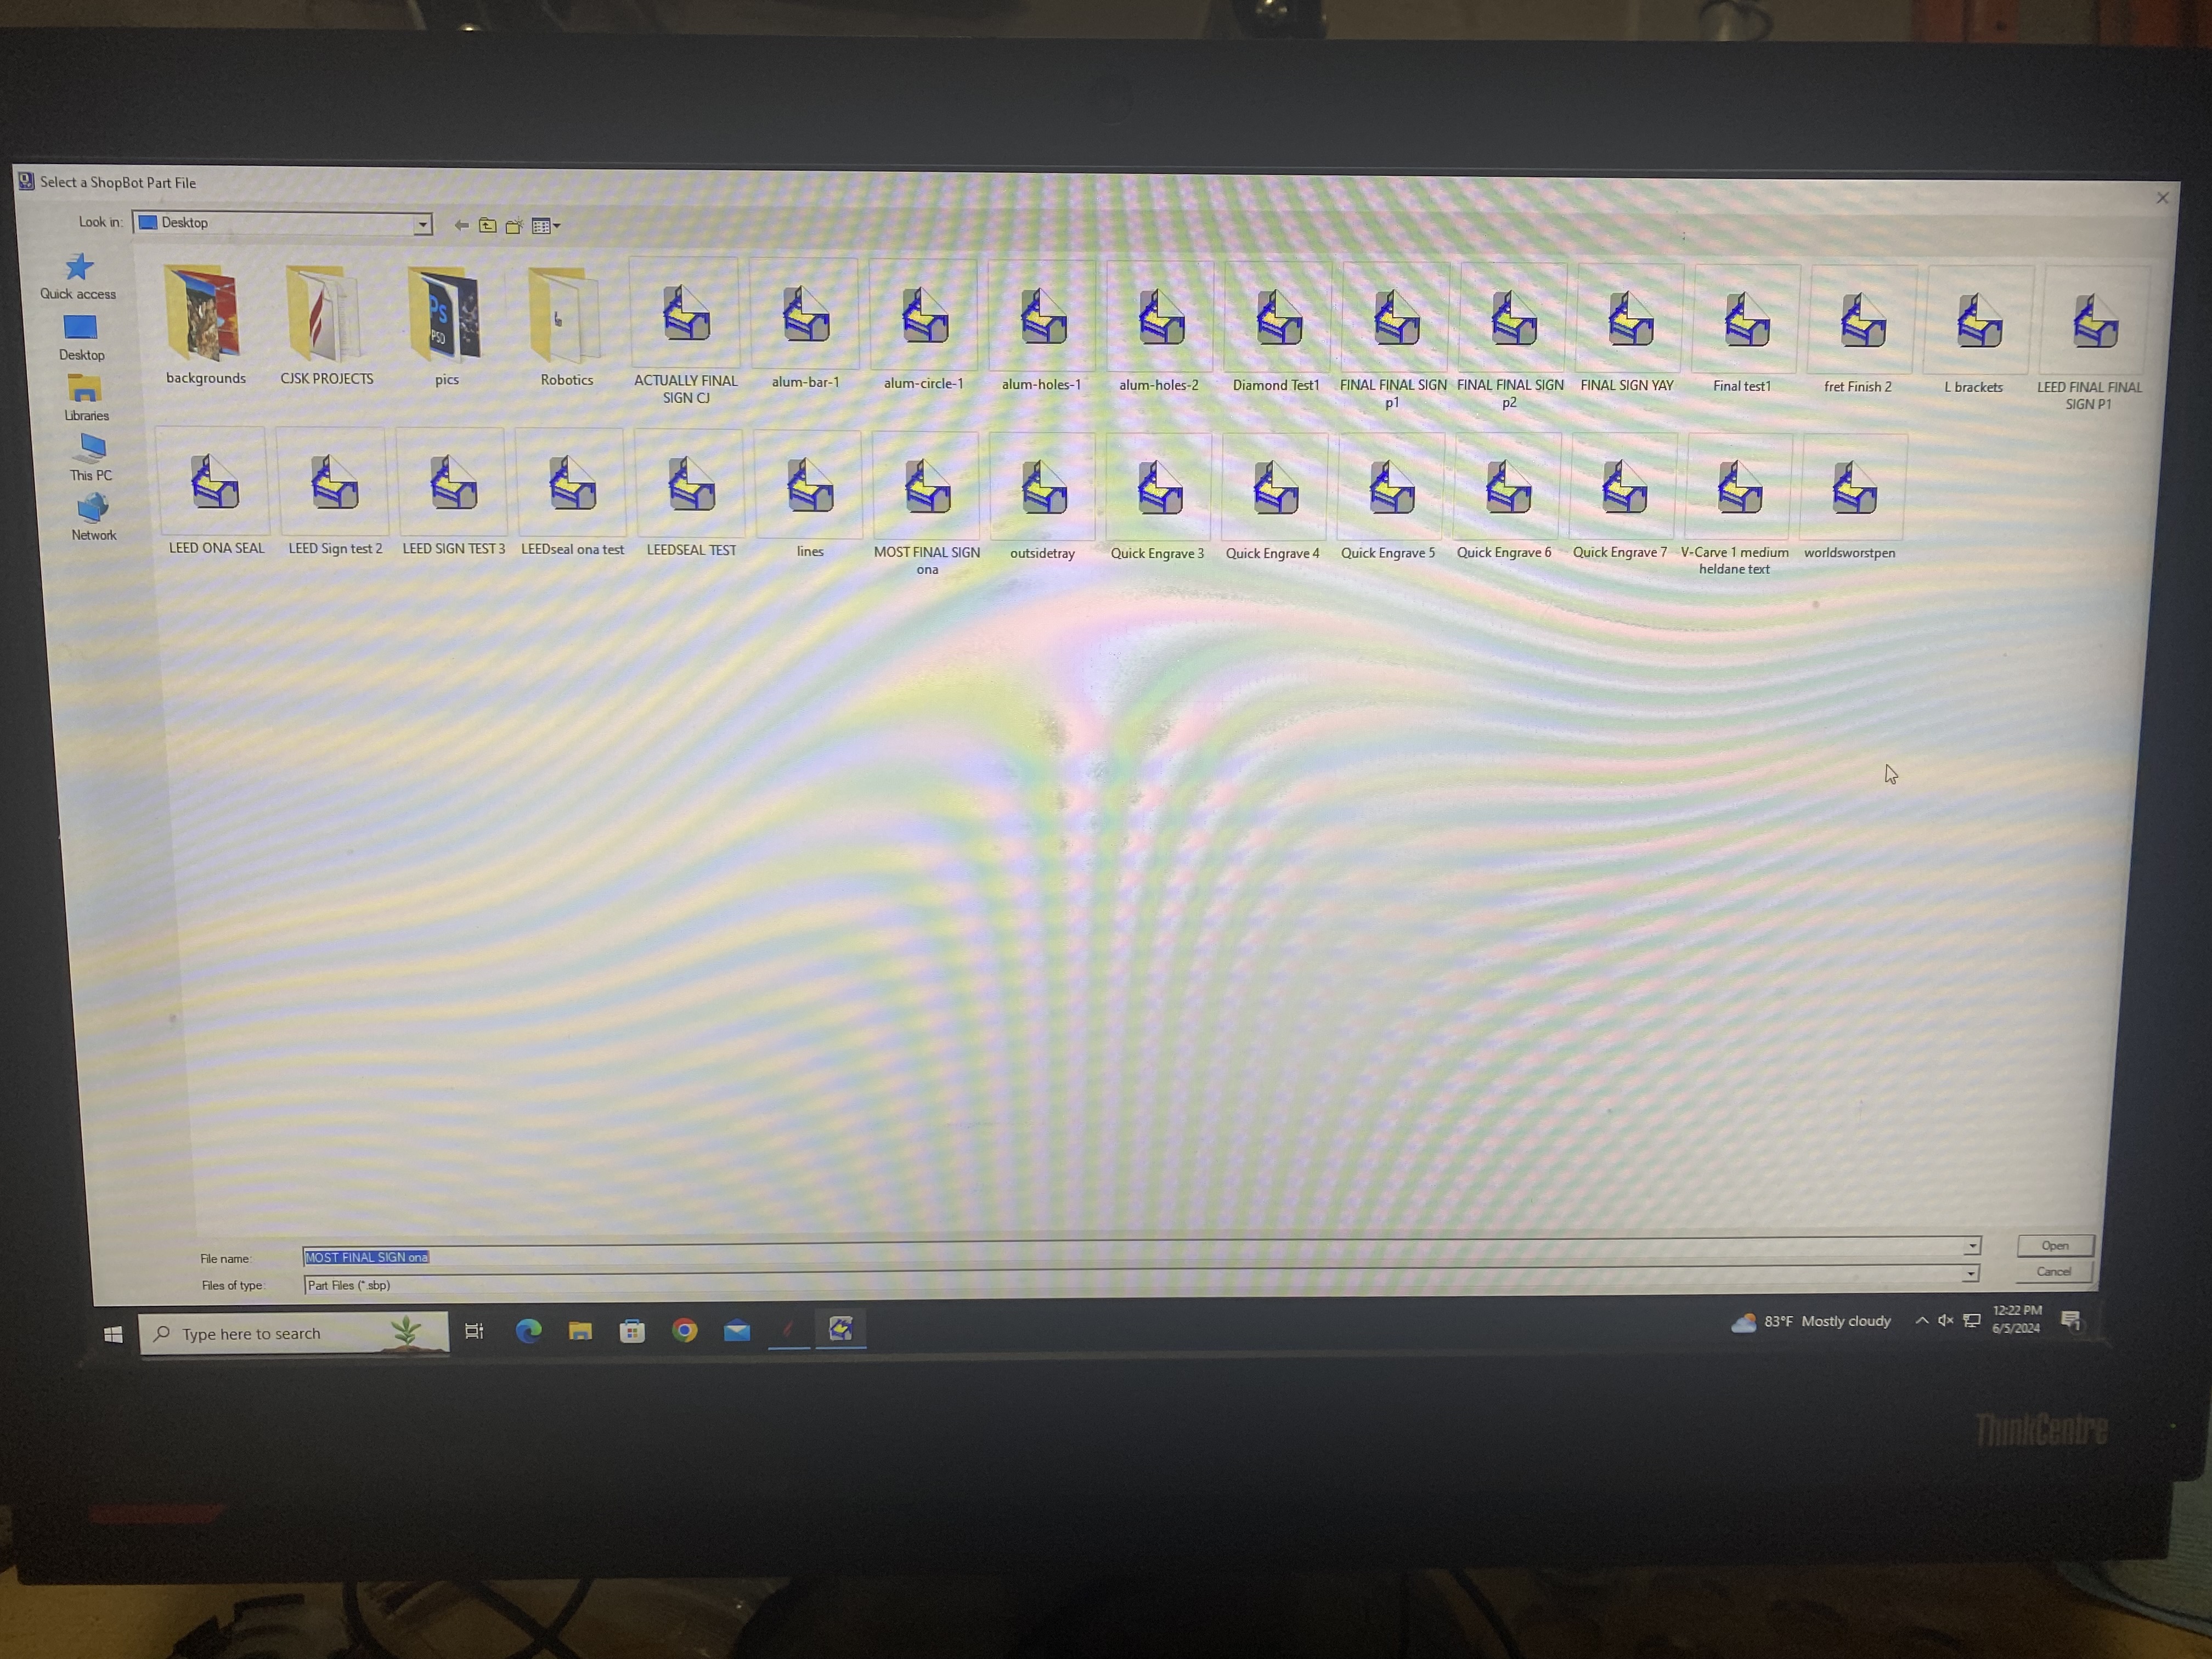
Once the file loads in, you are ready to start the cut by hitting the Start button.
Troubleshooting
The two most common things to go wrong are a USB Control Box Problem or True Zero getting reset wrong.
USB Control Box Problems
A USB control box problem happens when there is a yellow box on the computer that says there’s a “USB control box problem!”.
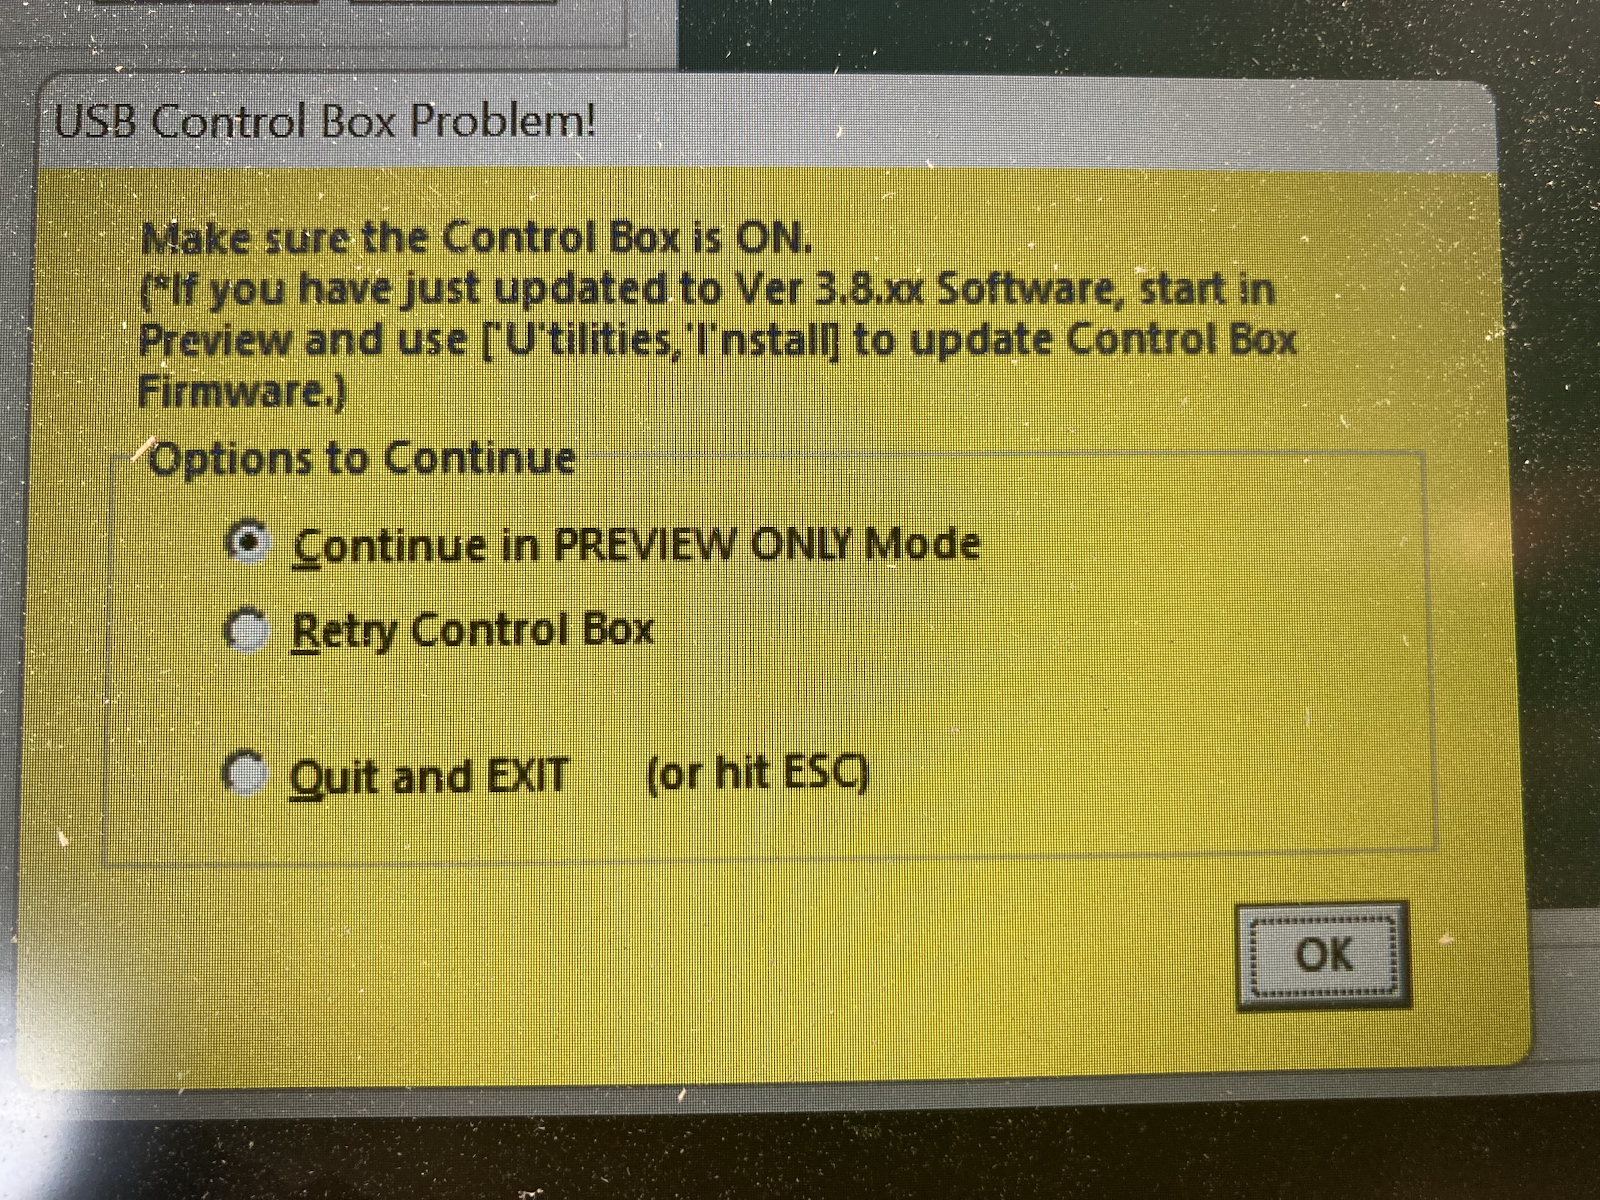
When there is a USB control box problem, it usually means there has been a problem with the power. Reset the power box, and then press “retry control box” on the computer.
If resetting the power box does not fix the problem, try these steps:
- Turning the shopbot on and off via the red on switch on the right side
- Closing and restarting the shopbot program on the computer (if it does not close, you may have to end the task in the task manager).
- Unplugging and then re-plugging the shopbot cord from the computer. The shopbot cord is the one on the left. You could try another port, but the one on the right seems to not work for the shopbot. So use the left one.
- Restarting the computer. Ask a CID co-director for the password when it turns back on.