Uploading Files
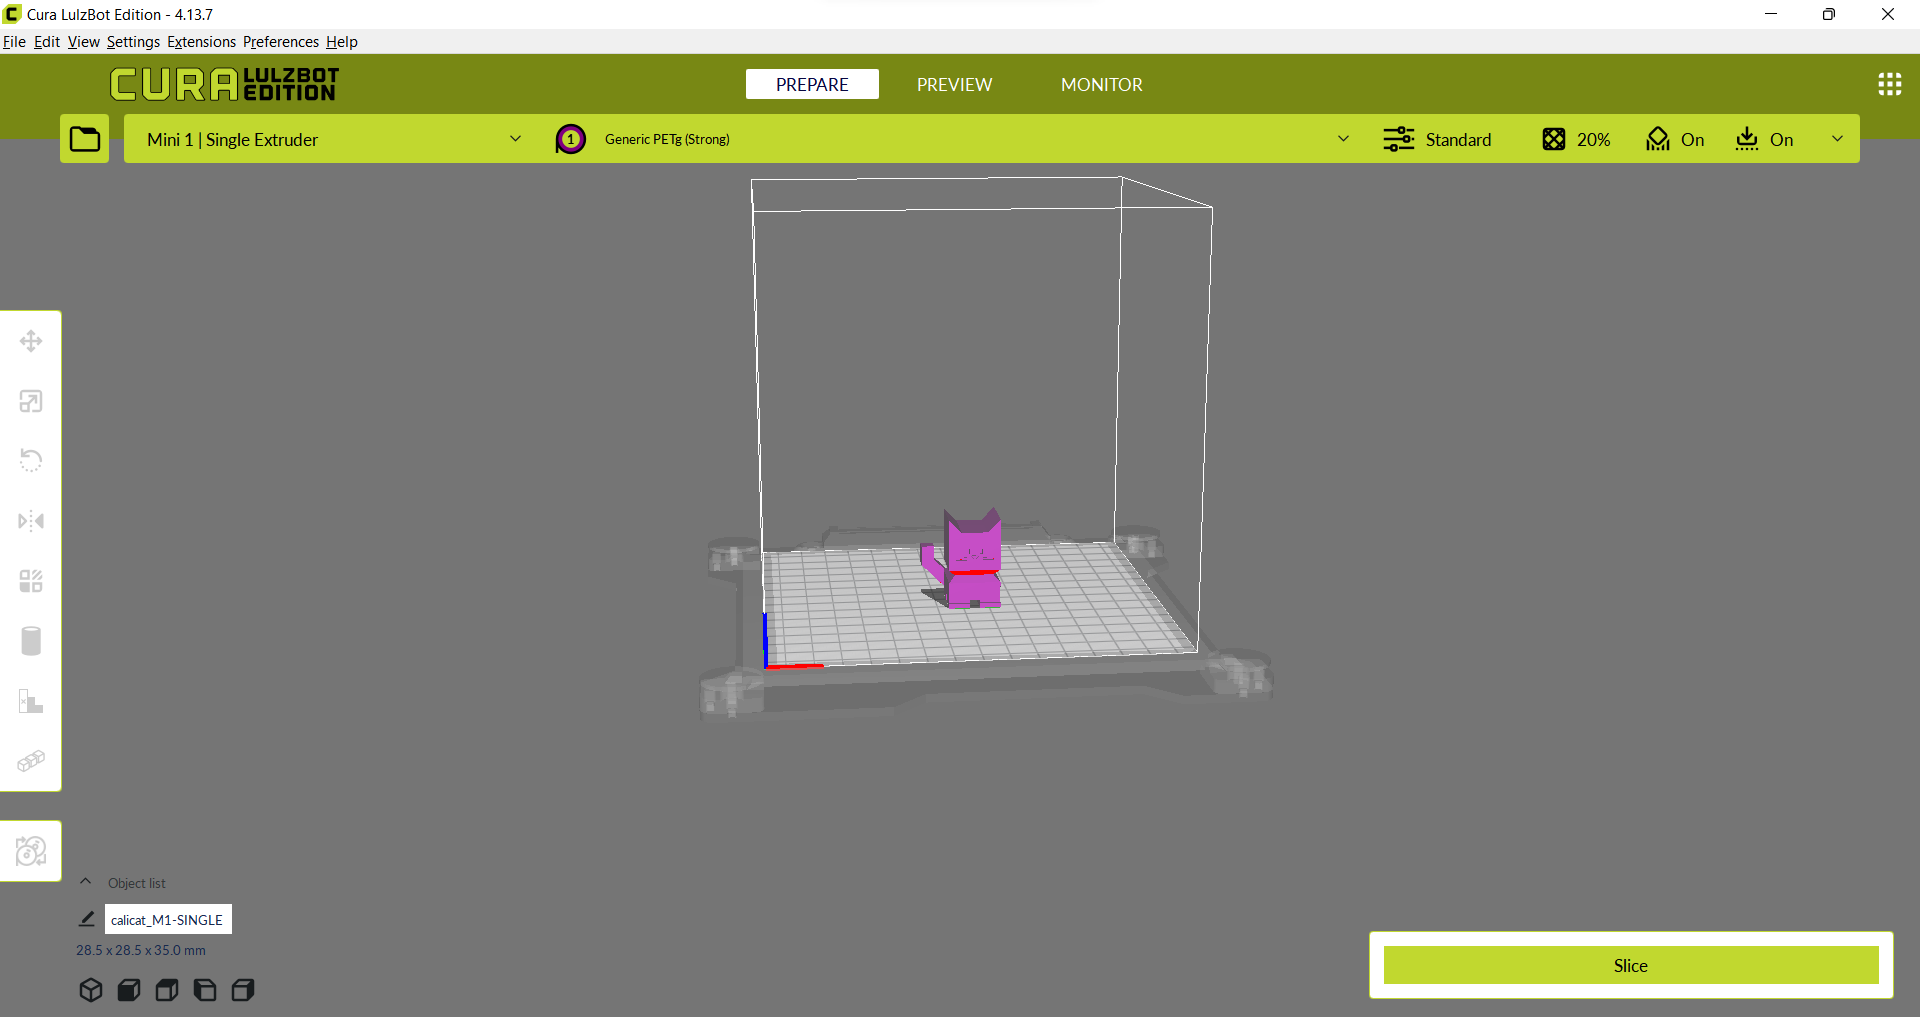
To upload files to the Ultimaker first get the stl, obj, or other 3D file type and open it with Cura LulzBot Edition either through opening through File Explorer or dragging the file into the Cura LulzBot Edition application.

Once the file loads in, you can move it around the buildplate and change it to your likings, or upload more files by dragging them into the application window.
Moving
To move the print around the print bed, first click the item you wish to move, then click the ( ) icon and you will see three arrows pop up around your shape.
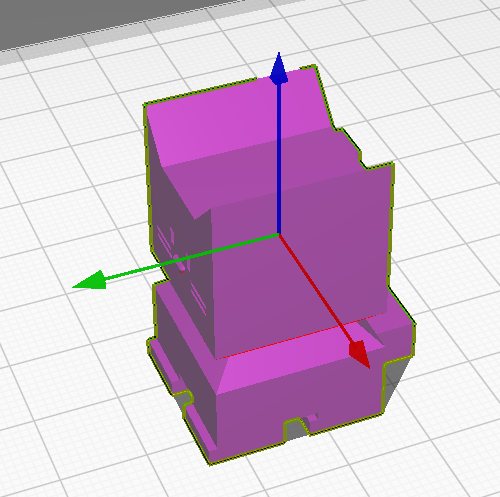
Once that happens you can either move it on the main axis by dragging those arrows, or just grab and drag the object to wherever you want it.
You can also set it’s exact position with the menu that appears next to the (
) icon.
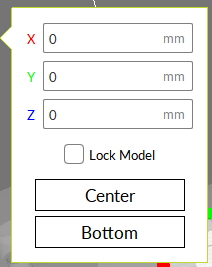
there you will also see two checkboxes, Lock Model and two buttons Center and Bottom.
Lock Model makes it so the model cannot move other than by changing the numbers in the menu, dragging the model or arrows will no longer move it.
Center will move the object to the center of the buildplate.
Bottom moves it’s lowest point to be touching the print bed.
It is recommended to keep the Lock Model unselected and hit Bottom before slicing.
Scaling
To scale your object, select the object, then select the ( ) icon, and three lines with boxes will appear.
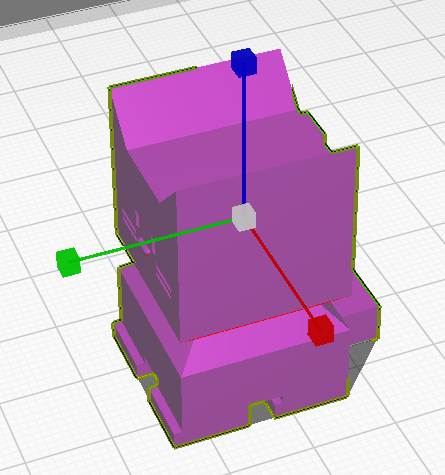
You can grab any of the three to stretch the object in the direction of that line, or instead grab the central box to stretch in all directions equally.
Again a menu will pop up with certain options. The text boxes allow you to set the length, width, or height of the object by measured size or percentage of the original model.
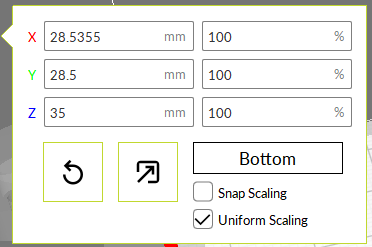
there you will also see two checkboxes, Snap Scaling and Uniform Scaling as well as a rewind icon, a ( ) icon, and a button that says Bottom.
Snap Scaling makes it so the object will snap between set sizes.
Uniform Scaling makes it so all the axis will scale uniformly, meaning any change to one axis will be matched in the other two to keep the proportions of the object the same.
The rewind icon will set the object to it’s original dimensions, and the (
) icon will set it to the max size the printer can print.
Bottom moves it’s lowest point to be touching the print bed.
It is recommended to keep the Snap Scaling unselected and Uniform Scaling selected unless you intentionally want a off proportion model.
Rotation
To rotate your object, select the object, then select the ( ) icon, and three rings will appear.
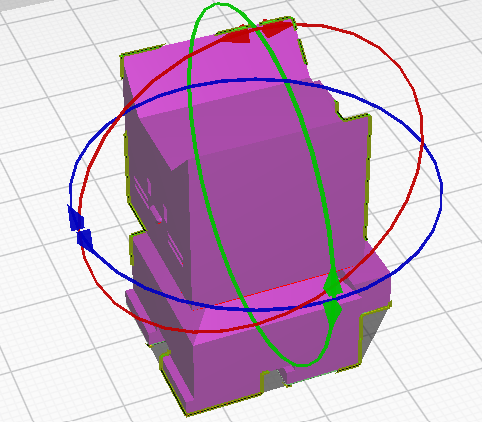
You can grab these rings and rotate them to rotate the object how you would like it to print. Keep in mind where the back of the bed is, signified by the lip where it is written Ultimaker S5.
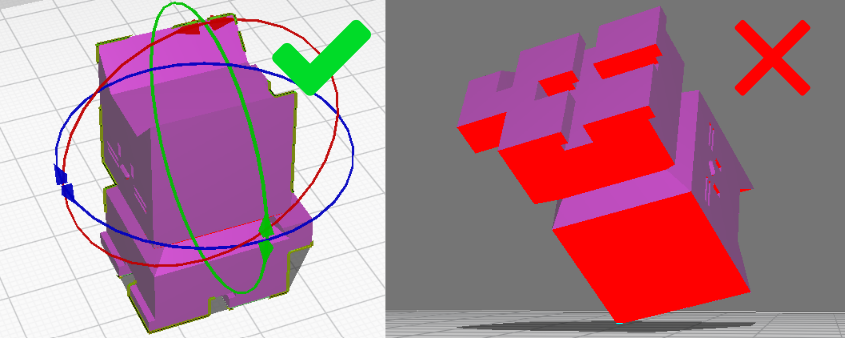
It is recommended to rotate the object so that the least amount of overhang is achieved:
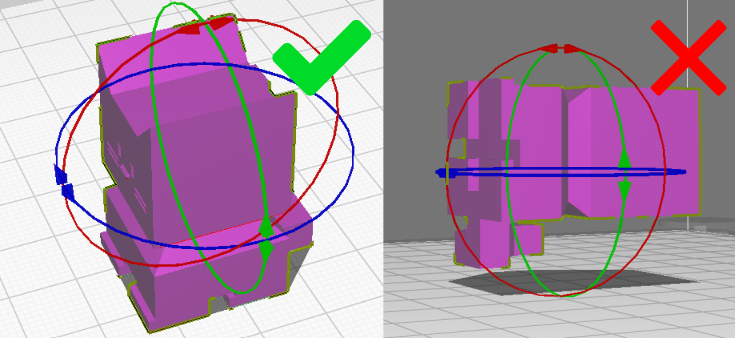
And the maximum amount of the print is touching the build plate, shown by the light blue highlight:
Again a menu with certain options will also appear next to the (
) icon.
The rewind icon will return the object to it’s original orientation.
the ( ) icon will rotate the model as little as possible to ensure a flat surface is laying against the print bed.
the ( ) icon will allow you to click on a face of the print and the program will lay it flat against the print bed. This feature is somewhat inconsistent so it may take a few tries to correctly align it.
Snap Rotation makes it so the print will only rotate in multiples of 15 degrees.
It is recommended to keep Snap Rotation selected unless a particular angle is needed.
Mirroring
When you select the (
) icon, 6 arrows will appear.
Clicking any of these arrows will mirror the object as if there was a mirror that the arrow was pointed directly into.
Mesh Type
Clicking the ( ) icon will allow you to change how the object prints.
The first icon is the default, and will follow the print settings that you set.
The second prints as if is is support for a different model, which will follow the support settings that you set.
The third will deal with overlapping objects, which is much more complicated, and a full description of the options can be found here: https://support.makerbot.com/s/article/1667417981430.
The last will remove all supports in the volume of the object, but will not print the object itself.
Custom Supports
To create custom supports, select your object then hit the ( ) icon.
There you will see some options for how you want the support to generate.
Once you have set your desired shape, click where on the object you want to support and it will automatically support that spot.
Support blocking
The ( ) icon will block support in a cubic area, similar to the last option of the last tool.
To use this, click the model you want to remove supports from, click the (
) icon, and then click where you want the blocker. You can then edit the blocker as if it was any other object, using the tools above. The print will not generate any supports in the area of this block.
Duplication
To duplicate your object, select the object and then hit the ( ) icon.
A menu will appear and allow you to set how many copies you want. Hit the Multiply button once you have set the desired number.
Pauses
To add a pause or filament change to your print, select the object and hit the ( ) icon.
There a menu will pop up, with a box to specify what layer you want the filament change at. If instead you just want to pause the print, select the Pause Only box.
Done?
Once you are happy with the object’s placement, move to the Print Settings section.